Imagine stepping into your backyard and harvesting crisp lettuce, plump tomatoes, and fragrant herbs—all grown in neat, tidy garden beds just steps from your kitchen. Raised garden beds make this possible, even if your soil is poor or you have limited space. How to use a garden bed effectively starts with smart design, quality soil, and efficient planting techniques. Unlike traditional in-ground gardening, raised beds give you full control over the growing environment, leading to healthier plants, fewer weeds, and bigger harvests.
This guide walks you through every step—from building and filling your bed to planting, watering, and maintaining it year after year. Whether you’re a beginner or looking to optimize your current setup, you’ll learn how to maximize yields, avoid common mistakes, and enjoy gardening with less strain on your back. Let’s dig in.
Choose the Right Height for Your Garden Bed

12-18 Inches: Ideal for Beginners
For most gardeners, a bed height of 12 to 18 inches strikes the perfect balance. It provides enough depth for root development, improves drainage, and reduces bending during maintenance. This range suits shallow and medium-rooted crops like lettuce, peppers, and cucumbers while remaining affordable and easy to fill.
Taller beds (18+ inches) are best for deep-rooted vegetables such as carrots, potatoes, and parsnips. They also benefit gardeners with mobility issues, allowing work from a standing or seated position. However, they require more soil and materials, increasing cost.
Shorter beds (6–12 inches) work well when native soil is healthy, letting roots access nutrients below. They’re budget-friendly but offer less protection from pests and weeds.
Taller Beds: Pros and Cons
Advantages:
• Less bending, better for back and joint health
• Fewer weeds from underlying soil
• Deters rabbits and ground-dwelling pests
• Accessible for wheelchair users when built at 24–30 inches
Drawbacks:
• Expensive to fill with quality soil
• Harder to reach tall plants like tomatoes at harvest
• May look bulky in small yards
Shorter Beds: When to Use Them
If your yard has well-draining, uncontaminated soil, a shorter bed can save money and labor. These are ideal for shallow-rooted greens and herbs. Just expect more weed pressure and less insulation from poor native soil.
Set the Correct Width for Easy Access
Max 4 Feet for Easy Access
The golden rule: you must reach the center without stepping in. Stepping compacts soil, harming root growth and reducing yields. Most adults can comfortably reach 2–2.5 feet, so a 4-foot-wide bed is the maximum. For beds against a wall or fence (accessible from one side), keep width to 2–3 feet.
Wider beds look impressive but create maintenance headaches. You’ll stretch, damage plants, or end up compacting the soil—defeating the purpose of a raised bed.
Why Width Matters More Than Length
Length is flexible—build beds as long as your space allows. But width directly impacts usability. A 4×8-foot bed is a popular size because it maximizes growing area while staying accessible.
Too wide? You’ll waste time crawling or walking around. Stick to the 4-foot limit and enjoy effortless planting, weeding, and harvesting.
Plan Pathways Early for Functional Access

24–36 Inches for Functional Walkways
Pathways are often an afterthought—but they shouldn’t be. Narrow paths block wheelbarrows and make maintenance frustrating. Aim for:
• 24 inches minimum: Enough to walk and kneel
• 36 inches ideal: Fits a wheelbarrow
• 48+ inches for main aisles: Connects multiple beds comfortably
Leave room for plant overhang. Tomato vines and squash leaves will spill into paths, so give them space.
Avoid Common Pathway Mistakes
• Beds too close together: No room for tools or movement
• Ignoring drainage: Paths should slope slightly to shed water
• Dead-end paths: Require backtracking—annoying during harvest
• Wrong materials: Grass needs mowing; gravel stays clean but can shift
Use mulch, gravel, landscape fabric, or stepping stones to keep paths weed-free and functional.
Start Small: Build 2–3 Garden Beds First
Build Gradually, Learn as You Go
Beginners often overbuild, then get overwhelmed. Start with 2–3 beds. This lets you:
• Test soil mixes
• Learn what crops thrive
• Master watering and pest control
• Expand based on success
Add one or two beds per year. This spreads costs and prevents burnout.
Combine Raised and In-Ground Beds
Use in-ground plots alongside raised beds to experiment. They’re great for testing new crops or growing large vining plants like pumpkins. This hybrid approach saves money and increases flexibility.
Pick Safe, Durable Materials for Longevity

Best Options for Longevity
Choose materials that last and won’t leach toxins:
Cedar or Redwood
• Naturally rot-resistant
• No chemicals needed
• Expensive but lasts 10–15 years
Composite Lumber
• Made from recycled wood and plastic
• Resists rot and pests
• Higher upfront cost, minimal upkeep
Concrete Blocks or Bricks
• Inexpensive and long-lasting
• Ensure they’re not treated with fly ash
• Can be stacked creatively
Galvanized Steel
• Modern, sleek look
• Extremely durable
• Heats up in sun—beneficial in cool climates
Avoid Unsafe Materials
• Old pressure-treated wood (pre-2003): Contains arsenic
• Railroad ties: Leach creosote—highly toxic
• Tires: May release heavy metals
• Recycled plastics (unverified): Some aren’t food-safe
Modern Pressure-Treated Wood: Is It Safe?
Post-2003 pressure-treated wood uses copper-based preservatives, not arsenic. It’s considered safe for gardens unless you’re growing certified organic food. For home use, it’s a cost-effective option—especially for multiple beds.
Still, line the inside with landscape fabric if concerned. This adds a barrier while preserving structural integrity.
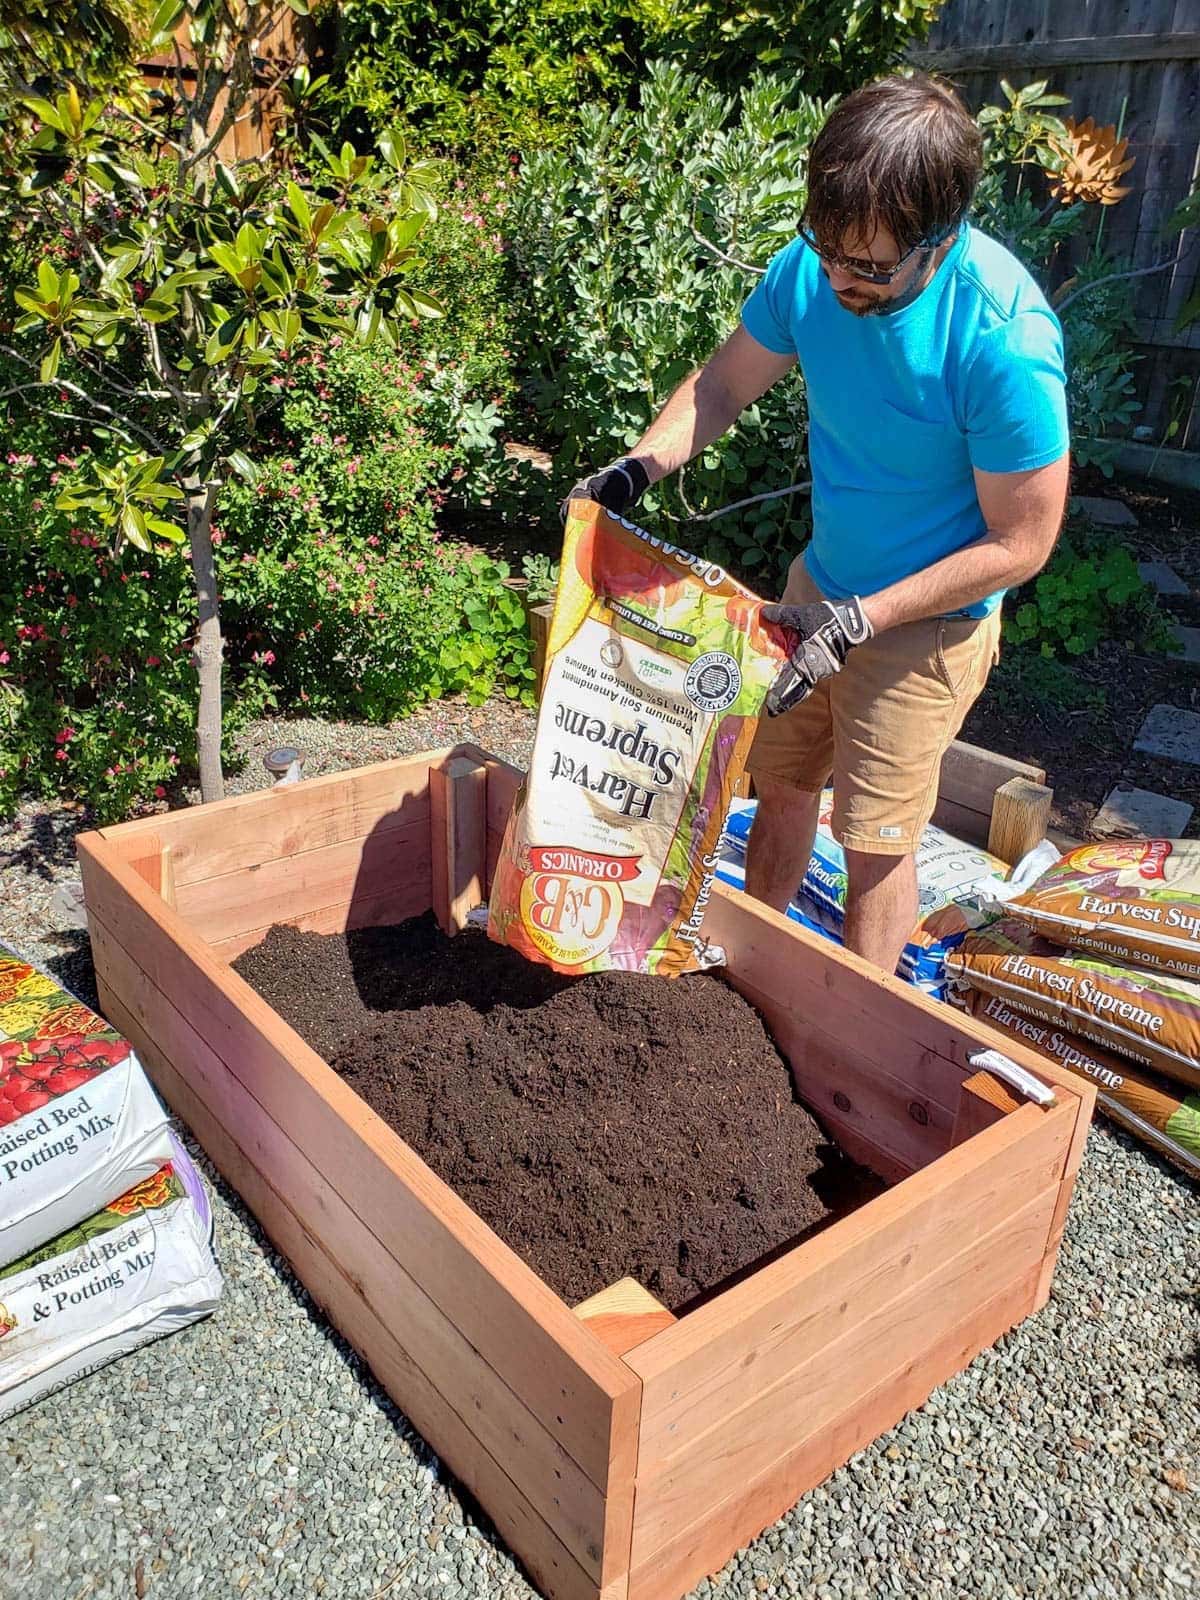
Fill with Quality Soil Mix for Healthy Plants
Use the 1/3 Rule for Best Results
Never fill raised beds with native soil alone. Instead, use a blend:
• 1/3 topsoil: Provides structure
• 1/3 compost: Feeds plants and microbes
• 1/3 aeration material: Perlite, vermiculite, or coarse sand
This mix drains well, retains moisture, and supports strong root growth.
Boost Fertility with Compost
Aim for 30% compost by volume. It enriches soil, improves texture, and encourages beneficial microbes. Use aged compost—fresh manure or green waste can burn plants.
Top-dress with 1–2 inches of compost each spring or fall to replenish nutrients lost through harvesting.
Save Money When Filling
Soil is expensive. Cut costs with these tricks:
• Fill the bottom with branches, straw, or leaves: Decompose slowly and improve drainage
• Use native soil as base layer (if clean and well-draining)
• Make your own compost
• Buy soil in bulk, not bags
Expect soil to settle 2–4 inches in the first week. Fill beds to the top initially and top off annually.
Plant Smart: Ignore Seed Packet Spacing

Use Square-Foot Gardening
Seed packets assume row gardening with walkways. In raised beds, you don’t need those paths. Instead:
• Use only in-row spacing
• Plant in blocks or squares
• Adopt square-foot gardening
Divide your bed into 1-foot squares. Plant per square:
• 1 plant: Tomatoes, peppers, broccoli
• 4 plants: Lettuce, chard, marigolds
• 9 plants: Spinach, beets, carrots
• 16 plants: Radishes, onions
This method increases yield, reduces weeds, and creates a living mulch that retains moisture.
Maximize Space with Intensive Planting
Dense planting shades the soil, suppressing weeds and conserving water. Just ensure good air flow to prevent disease. Avoid overcrowding—follow mature plant size, not seedling size.
Use drip grids as spacing guides. They double as irrigation systems and keep layouts neat.
Install Drip Irrigation Before Planting
Water Efficiently, Save Time
Install irrigation before planting. Snaking hoses through grown crops damages stems and roots. A 10-minute setup now saves hours later.
Best options:
• Drip lines: For individual plants
• Drip tape: For rows
• Soaker hoses: Simple and effective
• Drip grids: Perfect for square-foot layouts
• Ollas: Buried clay pots for slow watering
Water Deeply, Not Daily
Raised beds drain fast. Check moisture by sticking your finger 1–2 inches down. Water only when dry.
• Water in the morning to reduce evaporation and disease
• Water deeply to encourage deep roots
• Avoid wetting leaves to prevent fungal issues
Group plants with similar needs. Tomatoes and peppers like consistent moisture; carrots prefer drier soil.
Maintain for Long-Term Success
Add Compost Every Year
Soil depletes over time. Replenish with 1–2 inches of compost annually. Gently mix into the top layer—no tilling needed.
Tilling destroys soil structure and harms beneficial fungi. Use a broadfork or garden fork to loosen soil without flipping it.
Mulch to Protect Soil
Apply 2–3 inches of straw, wood chips, or leaves after planting. Benefits:
• Reduces evaporation
• Suppresses weeds
• Prevents soil splash on leaves
• Feeds soil as it breaks down
Replenish as mulch decomposes.
Rotate Crops to Prevent Problems
Grow the same family in the same spot year after year? That invites pests and nutrient loss.
Rotate these groups every 3–4 years:
• Nightshades (tomatoes, peppers)
• Brassicas (cabbage, kale)
• Legumes (beans, peas)
• Root crops (carrots, onions)
• Leafy greens (lettuce, spinach)
This simple practice keeps soil healthy and pests at bay.
Avoid These Common Mistakes
Don’t Use Poor-Quality Soil
Skimping on soil leads to weak plants and low yields. Invest in a good mix from the start. Avoid heavy clay or unknown soil sources.
Don’t Overwater
Raised beds drain well—overwatering leaches nutrients and causes root rot. Let soil dry slightly between waterings.
Don’t Build Too Wide
A 5-foot-wide bed looks impressive but forces you to step in. Stick to 4 feet max.
Don’t Skip Pathway Planning
Too many gardeners regret narrow paths. You can’t harvest zucchini with a wheelbarrow stuck behind a tomato plant.
Don’t Plant Perennial Herbs in Beds
Rosemary, thyme, oregano, and sage spread and take over. They block space needed for annual vegetables.
Instead:
• Grow perennials in containers
• Place pots near the garden
• Use them as borders
Annual herbs like basil, cilantro, and dill are fine to interplant.
Protect from Pests and Diseases
Use Height to Your Advantage
Beds 15+ inches tall deter rabbits and deer. Add fencing for full protection.
For slugs and snails:
• Copper tape around edges
• Beer traps buried at soil level
• Diatomaceous earth (reapply after rain)
Try Natural Pest Control
• Row covers: Shield from insects and frost
• Netting: Stop birds from eating berries
• Beneficial insects: Attract ladybugs and lacewings
• Hand-pick pests: Effective for tomato hornworms and cabbage worms
Avoid chemical pesticides. They harm pollinators and disrupt soil life.
Extend Your Growing Season
Plant Earlier, Harvest Later
Raised beds warm faster in spring. Sow cool-season crops like spinach and radishes weeks before in-ground gardens.
Use these season extenders:
• Cold frames: Mini greenhouses for frost protection
• Row covers: Lightweight fabric that traps heat
• Hoophouses: Low tunnels for extended harvests
• Black plastic mulch: Warms soil early
In fall, plant garlic, kale, and cover crops like rye or clover to enrich soil over winter.
Frequently Asked Questions About Garden Beds
Can I use regular garden soil in a raised bed?
No. Native soil is often too dense and may contain weeds, pests, or contaminants. Use a blend of 1/3 topsoil, 1/3 compost, and 1/3 aeration material for best results.
How deep should a garden bed be for vegetables?
Most vegetables need 8–12 inches. Deep-rooted crops like carrots and potatoes require 18+ inches. For beginners, 12–18 inches is ideal.
Do I need to replace the soil every year?
No. Replenish with 1–2 inches of compost annually and top off settled soil. With proper care, your soil mix can last for years.
Can I grow tomatoes in a 12-inch bed?
Yes. Tomatoes grow well in 12-inch beds, especially determinate varieties. For indeterminate types, 18 inches is better to support deeper roots.
Should I line my raised bed?
Only if using questionable materials like modern pressure-treated wood. Use landscape fabric to prevent leaching while allowing drainage.
Can I place a raised bed on concrete or asphalt?
Yes. Ensure drainage by adding a gravel base and drilling holes. Use drip irrigation and monitor moisture closely.
Key Takeaways for Using Your Garden Bed Successfully
To get the most from your garden bed, focus on smart design, quality soil, and consistent care. Start with a 4×8-foot bed at 12–18 inches tall, use a 1/3 soil blend, and install drip irrigation before planting. Plant using square-foot spacing, rotate crops yearly, and top-dress with compost each season.
Avoid common pitfalls like poor soil, overwatering, or overcrowding. Keep pathways wide, grow perennials in containers, and protect plants with natural pest controls. With the right approach, your raised bed will deliver high yields, fewer weeds, and years of gardening joy—all within arm’s reach.