Your raised garden bed has served you well, but now it’s sagging, rotting, or just doesn’t match your updated garden design. Replacing it doesn’t mean starting over—it means upgrading. With smart planning and the right techniques, you can rebuild around existing plants, preserve trellises, reuse soil, and create a stronger, longer-lasting structure that blends seamlessly with your landscape.
This guide walks you through how to replace a raised garden bed step by step, using durable materials like cedar, working around trees and slopes, and avoiding common mistakes. You’ll learn how to dismantle safely, manage soil efficiently, reinforce corners, and customize for accessibility and aesthetics—all while protecting your garden’s health and saving time and money.
Plan Before You Dig
Assess Whether Full Replacement Is Needed
Start by inspecting your current bed. Is the wood soft, cracked, or pulling apart at the corners? Boards in direct soil contact often rot after 10+ years. If only one side is damaged, spot repair may suffice. But if multiple sides show decay, a full rebuild ensures stability and prevents future failures.
Check fasteners too. Stripped or rusted screws mean the structure is compromised. Use this chance to decide on upgrades—like adding a trellis or improving drainage—before you begin.
Protect Tree Roots and Soil Levels
Never raise or lower soil around established trees. Covering the root flare suffocates roots and leads to trunk rot. Instead, build a two-tiered bed: keep the lower section flush with the tree’s original soil line and raise the upper part for vegetables or herbs.
Avoid trenching near trunks. On slopes, dig shallow trenches only where necessary and use shorter boards to follow the natural grade without disturbing roots.
Match Height and Width of Adjacent Beds
For a clean, professional look, match the dimensions of neighboring beds. Measure carefully—especially if pathways run alongside. You might shorten one side slightly to allow extra walking space.
Use a level and tape measure to verify alignment. Consistent height and style create visual harmony across your garden.
Clear and Dismantle Safely
Remove Plants and Weeds First
Transplant herbs, perennials, or small veggies to containers before demolition. Pull weeds completely to prevent regrowth under the new frame. This gives you a clean workspace and protects your plants.
Take a photo or sketch the layout. It helps when replanting and restoring soil.
Demolish the Old Frame Carefully
Older beds often come apart easily—rotted wood may peel off by hand. Use a drill to remove screws. Save usable hardware if not rusted.
Work slowly. Sudden collapses can damage nearby plants or injure you. If a trellis is attached, don’t remove it—support it temporarily.
Save the Trellis With Temporary Supports
Build temporary supports from scrap wood: drive two stakes into the ground on either side of the trellis, then screw a horizontal brace across the top. This holds it upright while you rebuild the bed beneath.
Once the new frame is secure, remove the supports and reattach the trellis directly to the fresh lumber.
Manage Soil Smartly
Work With Existing Soil Instead of Removing It
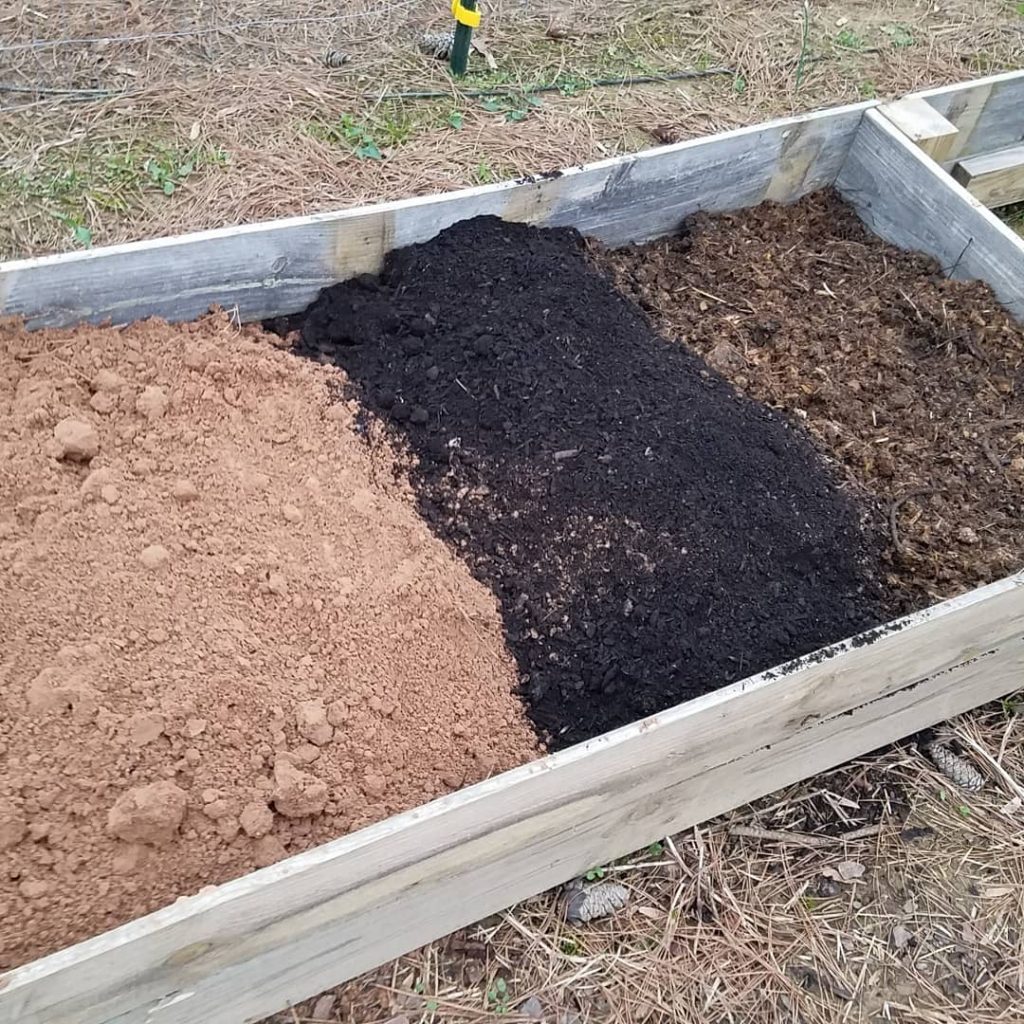
Removing all soil is disruptive and unnecessary. Instead, dig out 3–4 inches from the front and sides to create space for the new frame. This prevents collapse and allows precise placement.
Check alignment often. Push the frame into place gradually, adjusting as needed. Once set, backfill gaps between soil and wood to eliminate air pockets.
Use Mineral Soil With Compost, Not Expensive Mixes
Skip commercial “raised bed mix.” A blend of local topsoil (with sand, gravel, clay) and compost works better and costs less. It retains moisture, supports microbes, and resists compaction.
Avoid peat moss—it’s unsustainable and dries out fast. Coco coir adds cost without major benefits. Stick with mineral soil and bulk compost for a healthy, eco-friendly base.
Choose Durable Materials
Build With Cedar Lumber for Longevity
Cedar is the top choice for raised beds. Its natural oils resist rot and insects, lasting 10–15 years or more in ground contact. It’s easy to cut and screw, and weathers to a silvery gray that blends into gardens.
Use 2×6 or 2×8 boards for sides and 4×4 posts for corners. For the top rail, a 2×4 works well—it’s lighter and easier to level on sloped ground.
Avoid Treated Wood for Edible Gardens
Never use pressure-treated lumber for vegetable or herb beds. Older types contain arsenic; newer versions may leach copper. Stick with untreated cedar, redwood, or naturally rot-resistant alternatives.
Recycled plastic lumber is maintenance-free but less rigid—best for low-height beds. Stone, brick, or metal are durable but harder to modify later.
Assemble the Frame Step by Step
Install Long Sides First for Stability
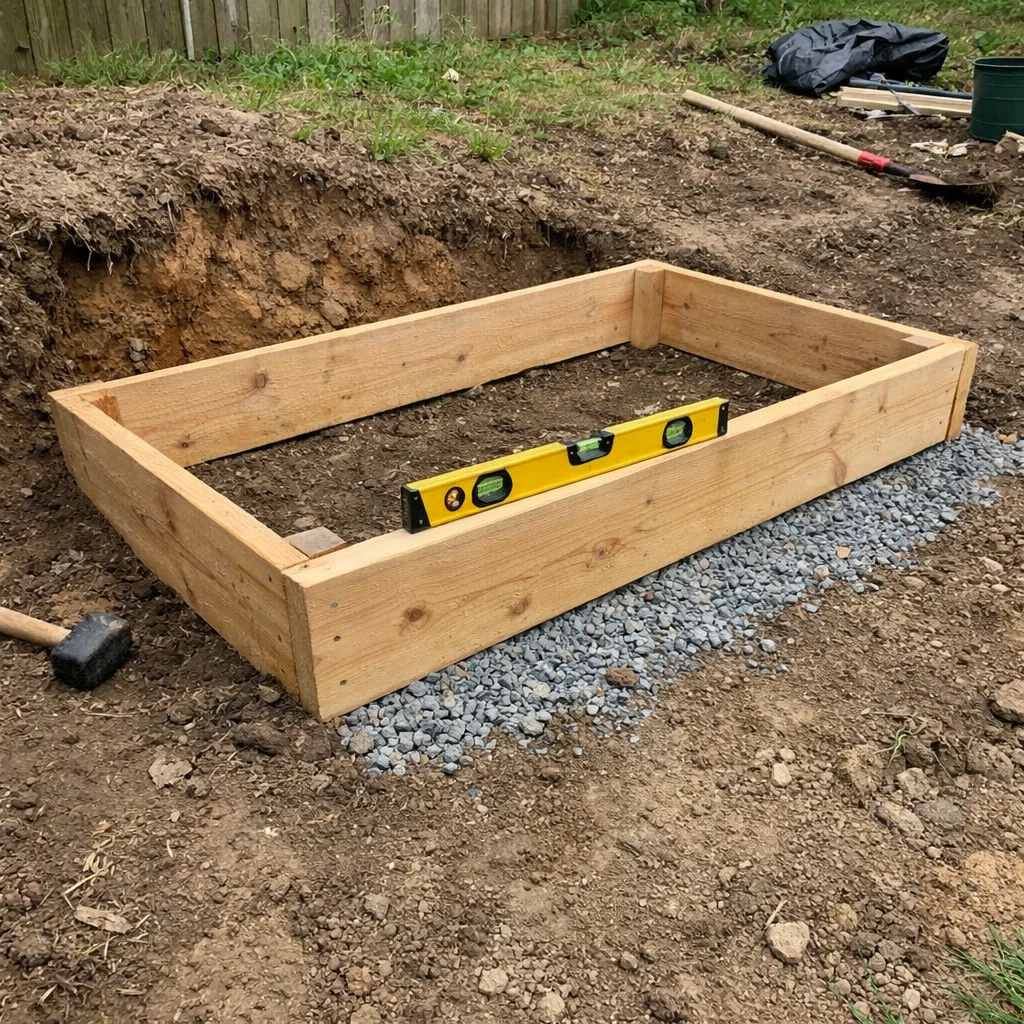
Begin with the longest boards. Position them in the excavated space, ensuring they sit level. Use a 4-foot level to check both lengthwise and across the width.
On slopes, dig a shallow trench at the high end to create a level base. Use a 2×4 instead of a 2×6 here to minimize digging.
Attach End Pieces and Check for Square
Secure the end boards to complete the rectangle. Measure diagonally from corner to corner—both should be equal. If not, adjust until the frame is square.
Double-check alignment with adjacent beds. Even a small misalignment stands out visually.
Reinforce Corners With 4×4 Posts
Cut 4×4 posts to fit inside each corner. For a single-layer bed, posts should match the board height exactly. A common mistake: cutting posts for double-layer beds when only one layer is needed.
If too long, unscrew and re-cut. Use a Workmate bench or sawhorses for safe, accurate cuts. Reinstall with exterior-grade screws—never nails.
Add a Center Cross Brace for Long Beds
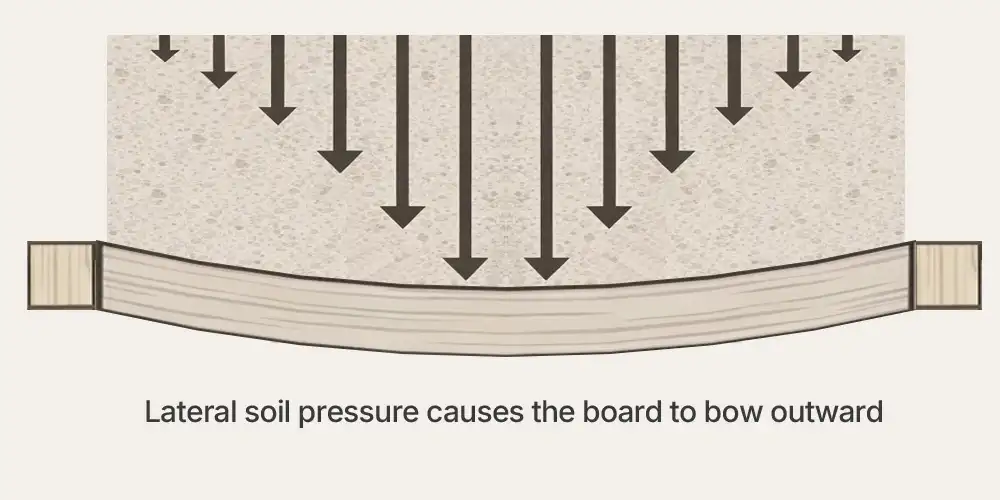
For beds longer than 8 feet, install a 2×4 cross brace in the middle. This prevents bowing from soil pressure.
Position it at the center point. Pre-drill holes to avoid splitting the wood.
Handle Slopes and Grades
Dig Shallow Trenches for Level Installation
On uneven ground, dig a trench just deep enough to seat the bottom board level. Don’t dig deeper than necessary—especially near tree roots.
Backfill with gravel if needed for drainage, then set the board in place. Use a level to confirm before securing.
Use 2×4 for Top Rails on Sloped Ground
Instead of a thick 2×6, use a 2×4 for the top rail when dealing with grade changes. It’s easier to level and reduces excavation. Plus, it provides a comfortable edge for sitting or leaning while gardening.
Customize for Function and Style
Match Height and Design for Visual Harmony
Keep the new bed the same height as others in your garden. This creates a unified look and makes mulching, weeding, and harvesting more ergonomic.
Use the same wood type and finish for consistency. If adding caps or trim, choose food-safe finishes like linseed oil.
Reattach Trellises and Optimize Pathway Space
Reattach saved trellises once the frame is secure. Anchor them well—use lag bolts for heavy-duty support.
Leave at least 24 inches between beds for access. Wider paths (36+ inches) accommodate wheelbarrows or mobility devices.
Add Drainage and Accessibility Features
Ensure the bed drains well—don’t block natural water flow. If the site stays wet, elevate slightly or add gravel beneath.
For elderly or disabled gardeners, build taller beds (30–36 inches) to reduce bending. Use reinforced frames and solid joints to support weight.
Prevent Common Mistakes
Avoid Cutting Corner Posts Too Long
Always measure the actual installation height before cutting. A post cut for a double-layer bed won’t fit a single-layer rebuild. Measure twice, cut once.
Keep a scrap piece on hand to test-fit during assembly.
Don’t Skip Reinforcement for Long Spans
Long beds without cross braces bow outward under soil pressure. Even with strong wood, add a center support for spans over 8 feet. For 12-foot beds, consider two braces.
Use exterior-grade screws (stainless steel or coated) for all connections. They hold better than nails and allow disassembly for future repairs.
Never Raise Soil Around Tree Trunks
Raising soil over a tree’s root system cuts off oxygen and leads to decline. Keep the root flare visible—where the trunk widens at the base. If the bed wraps around a tree, build a U-shape with a gap at the trunk.
Preserve existing soil depth. Build upward only where safe.
Maintain for Longevity
Inspect Annually for Early Signs of Rot
Check bottom boards and corner joints each spring. Soft spots or crumbling wood indicate rot. Replace individual boards if caught early—no need to rebuild the whole bed.
Keep soil level below the top edge to reduce moisture exposure.
Extend Life With Proper Drainage
Ensure water flows away from the bed. Avoid blocking downspouts or natural runoff paths. If the site is low, add a French drain or elevate the bed slightly.
Gravel at the base improves drainage but isn’t mandatory if soil is well-draining.
Reuse and Recycle Old Materials Sustainably
Compost untreated rotted wood—it breaks down safely. Recycle metal hardware. Save usable lumber for compost bins or edging.
Choose sustainable materials: locally sourced cedar, reclaimed stone, or recycled plastic.
Frequently Asked Questions About Replacing a Raised Garden Bed
Can I reuse the soil from my old raised bed?
Yes, in most cases. If the soil is healthy and free of disease, you can reuse it. Remove weeds and refresh with compost to restore nutrients. Only replace soil if it’s contaminated or severely compacted.
Should I remove the old wood completely?
Yes, especially if it’s rotted or unstable. Rotted wood can harbor pests and fungi. Remove all debris to create a clean base for the new frame. Save usable hardware or lumber for other projects.
How do I keep my raised bed from leaning or bowing?
Install a center cross brace for beds over 8 feet long. Use 4×4 corner posts and exterior-grade screws for strong joints. Avoid using nails, which loosen over time.
Can I build a new raised bed over tree roots?
Yes, but never cover the root flare. Build a two-tiered or U-shaped bed that preserves the original soil level around the trunk. Avoid deep digging that could damage major roots.
What’s the best wood for a long-lasting raised bed?
Cedar is the best choice. It resists rot and insects naturally, lasts 10–15+ years, and weathers attractively. Avoid pressure-treated wood for edible gardens.
How long does it take to replace a raised garden bed?
Most DIYers complete the job in 1–2 days. Allow one day for demolition and prep, and another for assembly and finishing. Complex sites with slopes or trellises may take longer.
Key Takeaways for Replacing Your Raised Garden Bed
Replacing a raised garden bed is an opportunity to improve function, durability, and design. Plan carefully by assessing the old structure, protecting trees, and matching adjacent beds. Dismantle safely, save reusable parts like trellises, and work with existing soil to save time and money.
Build with rot-resistant cedar, reinforce corners and long spans, and avoid common mistakes like altering soil around trees. Customize for accessibility and aesthetics, then maintain with annual inspections and proper drainage.
Your next step: Gather tools and materials, measure your space, and start rebuilding a stronger, longer-lasting garden bed that enhances your outdoor space for years to come.