You’ve seen them—serene, rugged landscapes where stones and plants blend effortlessly, thriving with little upkeep. If you’re wondering how to create a rock garden that looks natural and lasts for years, the secret lies in smart design, not just stacking rocks. Whether your yard is flat, sloped, or full of leftover stumps and boulders, you can transform it into a low-maintenance, drought-resistant feature. The key is working with what you already have, shaping the land for depth, and placing every rock and plant with purpose.
This guide walks you through the entire process of how to create a rock garden using proven techniques from real landscape transformations. You’ll learn how to reuse stumps and boulders, build berms for elevation, choose the right mix of rocks, and plant drought-tolerant species that thrive in rocky soil. We’ll cover a 7-phase build process, common mistakes to avoid, and how to maintain your garden for long-term beauty. By the end, you’ll know exactly how to create a rock garden that’s sustainable, visually striking, and uniquely yours.
Repurpose Stumps and Boulders Instead of Removing Them
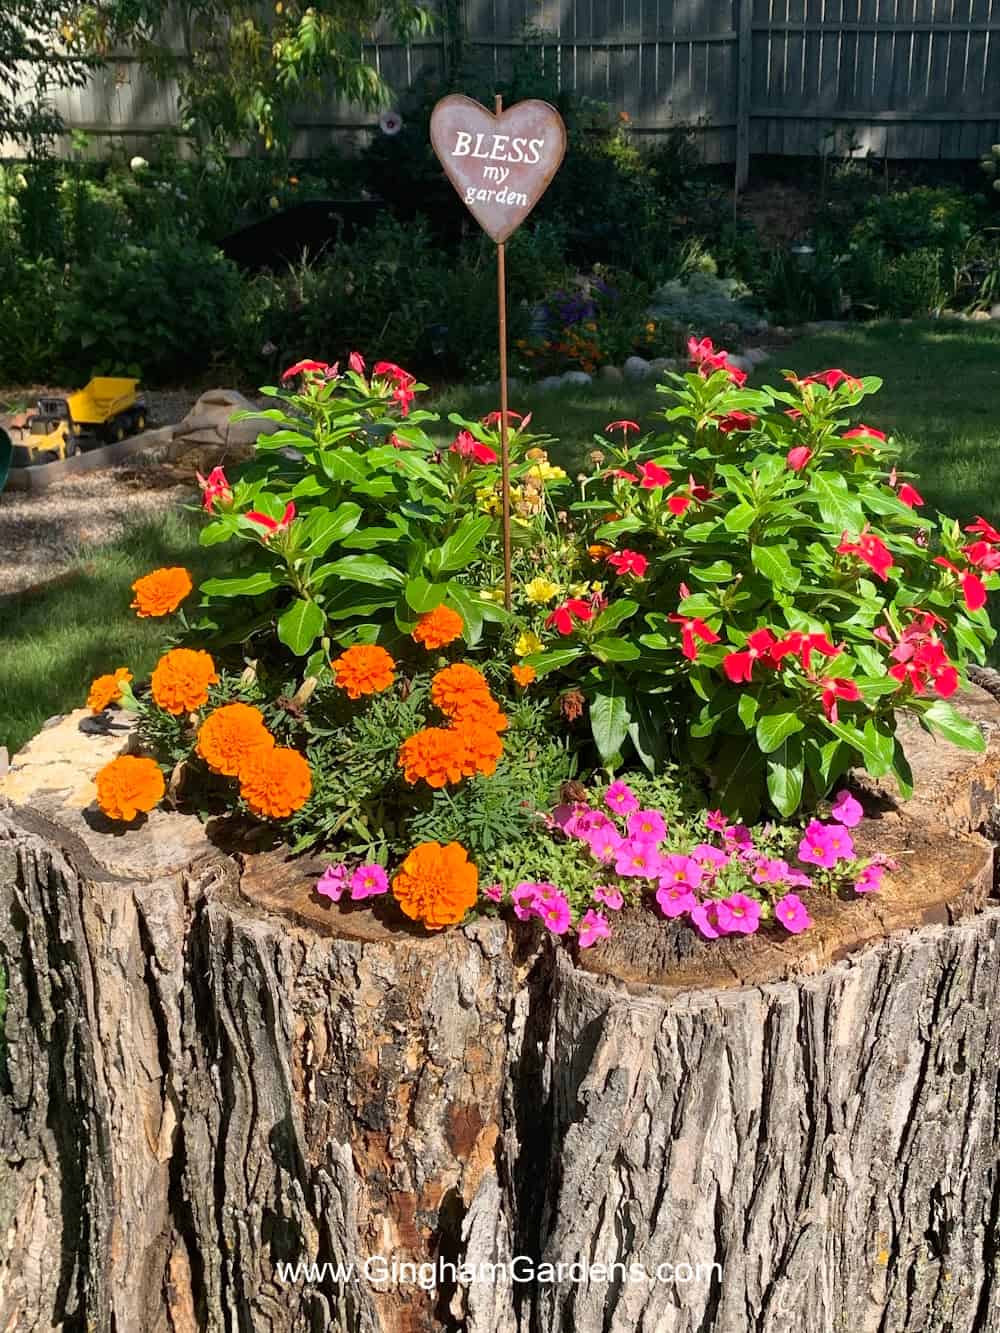
One of the most cost-effective and eco-friendly strategies in rock garden design is reusing what’s already on your property. Instead of spending money to remove stumps or haul away boulders, use them as structural anchors and focal points.
Turn Old Stumps Into Raised Planting Zones
Tree stumps don’t need to be ground out—they can become the foundation for your garden. Cover them with soil to create natural berms, then plant directly on top. In one successful transformation, Japanese yew stumps were buried under pulverized soil mixed with original pine needles, creating rich, elevated planting beds. This method adds height, saves on fill dirt, and gives your garden a sense of age and permanence.
Blend organic debris like pine needles into the soil layer. This boosts moisture retention and provides nutrients, especially important during the first few weeks after planting.
Design Around Existing Boulders as Centerpieces
If your yard has a large boulder, don’t see it as a problem—see it as a design asset. Build the entire garden to flow toward it. Use berms to rise gently toward the boulder, and frame it with rocks and plants to create visual rhythm. This draws the eye naturally through the space and makes the boulder feel like the heart of the garden.
Pro Tip: Position the tallest berm near the boulder to create a crescendo effect, enhancing its prominence and making the design feel intentional.
Build Berms for Visual Depth and Drainage
Flat yards often look dull and lifeless. Even a 12–18 inch berm can add dimension, improve drainage, and create new planting zones.
Shape Natural-Looking Berms Over Stumps or Low Spots
Start by piling soil over stumps or sunken areas. Use a shovel to shape soft, rolling contours—avoid sharp edges. Feather the sides so they blend smoothly into the surrounding lawn. On larger properties, higher berms add drama; in small yards, keep them modest to avoid overwhelming the space.
Aim for a height that complements your yard size. Too tall, and it looks artificial; too short, and it won’t make an impact.
Plan Drainage Before Adding Soil
Before building berms, check how water flows from your roof and driveway. Never block natural runoff. Instead, use the berm’s slope to guide water away from your foundation and toward garden beds or permeable areas.
If your yard tends to pool water, add a shallow swale—a gentle trench—along the berm’s base to redirect flow. This prevents erosion and protects plant roots.
Critical Reminder: Always locate buried irrigation lines, electrical cables, or utility pipes before digging. Move hoses to corners before adding soil or rock.
Choose the Right Mix of Rocks for Texture and Structure
The type and placement of rocks define your garden’s character. A blend of sizes and textures mimics natural landscapes and prevents a staged look.
Anchor the Design With Fieldstone
Start with fieldstone—large, irregular rocks that provide structure. Use them to:
– Stabilize berm edges
– Frame boulders or planting zones
– Create natural terraces
Bury about one-third of each rock so it looks like it’s emerged from the ground over time. Position them at slight angles for a more organic appearance.
Add Contrast With Granite Rip Rap
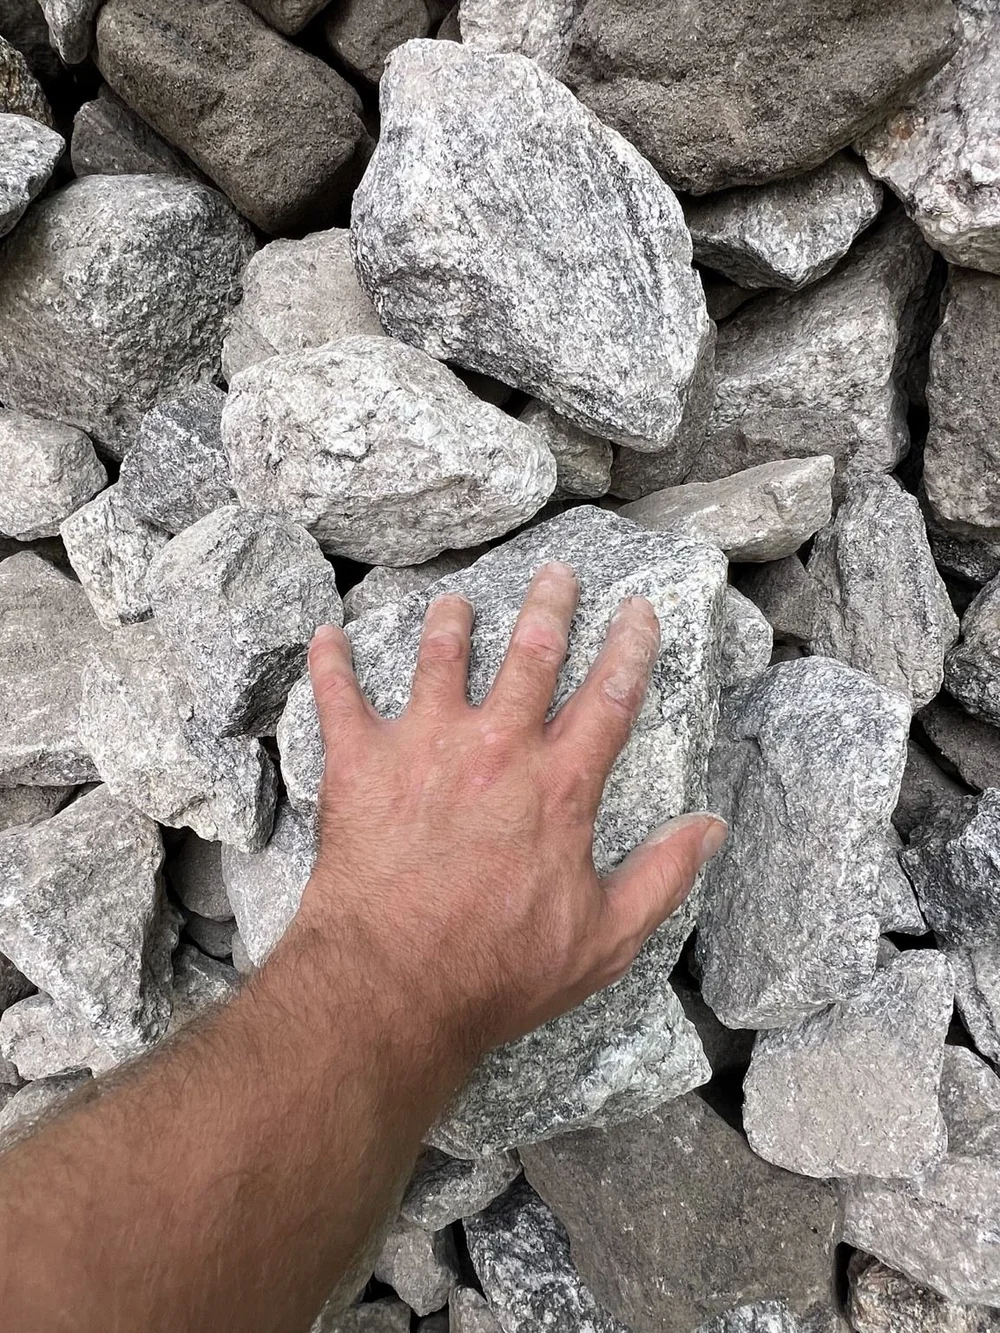
Granite rip rap—jagged, broken rock—adds rugged texture and visual interest. It’s the “star” of the rock garden aesthetic. Dump it in clusters, then refine placement by hand. Avoid dense packing; leave gaps so smaller rock can “vein” through.
This contrast between smooth fieldstone and rough rip rap creates depth and complexity.
Finish With Three-Quarter Inch Crushed Granite
The final layer is crushed granite. It fills gaps, softens transitions, and unifies the look. Apply it by hand—never dump from a wheelbarrow, as this destroys texture.
Use foot pressure to settle the rock. Walk gently to lock pieces in place without over-compacting. This keeps the surface porous and natural-looking.
Expert Note: Wash the rocks with a hose after placement. This removes dust, reveals true colors, and helps everything settle.
Plant Drought-Tolerant Species Before Adding Final Rock

Plants should go in before the last rock layer. This protects roots and gives them room to establish.
Best Plants for Rock Gardens
Choose species that thrive in shallow, well-drained soil. Top picks include:
- Russian Sage: Airy purple blooms and silver foliage add height and movement
- Karl Foerster Feather Reed Grass: Tall plumes sway in the breeze, adding vertical interest
- Bobo Hydrangea: Compact size and summer blooms bring seasonal color
- Gold Nugget Barberry: Golden leaves provide year-round contrast
- Sedum: Spreads over rocks and stumps, thrives in poor soil
Smart Planting Tips
- Cut roots slightly before planting to encourage new growth
- Place taller plants toward the back or center of berms
- Mix heights and textures for visual rhythm
- Allow space for spreading—don’t overcrowd
Pro Tip: Plant sedum directly on stumps. It will cascade over the edges, softening the transition between rock and plant.
Follow the 7-Phase Rock Garden Build Process
Use this sequence for a professional-quality result.
Phase 1: Assess and Prepare the Site
- Survey stumps, boulders, and drainage patterns
- Decide what to keep and what to remove
- Mark buried lines (irrigation, utilities)
- Move hoses to out-of-the-way spots
Phase 2: Build Berms
- Pile soil over stumps or low areas
- Shape with a shovel for gentle slopes
- Feather edges into the lawn
- Mix in pine needles or compost for organic matter
Phase 3: Place Fieldstone
- Position large rocks to anchor berm edges
- Frame focal points like boulders
- Bury one-third of each rock for stability
- Adjust for a natural, un-staged look
Phase 4: Install Plants
- Plant before final rock layers
- Trim roots slightly to stimulate growth
- Arrange for height variation and seasonal interest
- Water thoroughly after planting
Phase 5: Apply Rip Rap
- Dump granite rip rap in clusters
- Place by hand—no dumping
- Leave gaps between large rocks
- Create contrast with crushed granite
Phase 6: Add Crushed Granite
- Feather in three-quarter inch rock to fill gaps
- Use feet to settle—no heavy compaction
- Avoid wheelbarrow use at this stage
- Keep edges clean and defined
Phase 7: Wash and Polish
- Spray entire area with water
- Remove loose rock from plants and boulders
- Check for low spots or uneven areas
- Water plants again to help settle soil and rock
Avoid These Common Rock Garden Mistakes
Even small errors can ruin the look and function of your garden.
Never Install Rock Over Buried Lines
Always relocate irrigation or electrical lines before adding soil or rock. If you cover them, future repairs will mean tearing up your entire garden.
Don’t Over-Compact the Rock
Foot pressure is enough. Mechanical compactors destroy texture. The goal is a settled but porous surface that allows water to drain.
Don’t Overfill Gaps Between Rocks
Leave space. Filling every void makes the garden look artificial. Gaps let smaller rock “vein” through, creating depth.
Don’t Skip Drainage Planning
Poor drainage leads to pooling, erosion, and plant rot. Always verify water flows away from structures.
Maintain Your Rock Garden for Longevity
Rock gardens are low-maintenance, but not no-maintenance.
Watering Schedule
- First 4–6 weeks: Water plants 2–3 times per week
- After establishment: Most plants need little to no supplemental water
- Use water during construction to help settle rocks
Seasonal Care
- Spring: Plant new additions, divide grasses if needed
- Summer: Check for weeds, water new plants in heat
- Fall: Top off crushed granite if eroded
- Winter: Inspect for rock displacement after freeze-thaw cycles
Weed and Debris Control
- Pull weeds early
- Use a leaf blower or hand brush to remove debris
- Refresh crushed granite every 2–3 years
Frequently Asked Questions About How to Create a Rock Garden
Can I build a rock garden over tree stumps?
Yes. Cover stumps with soil to build berms, then plant on top. This saves removal costs and creates natural elevation. Stumps act as hidden anchors for your design.
What is the best rock combination for a rock garden?
Use a mix: large fieldstone for structure, jagged rip rap for texture, and three-quarter inch crushed granite to fill gaps. This creates depth and a natural look.
Do rock gardens need drainage?
Absolutely. Poor drainage causes pooling and plant rot. Shape berms to guide water away from foundations, and never block natural runoff paths.
What plants thrive in a rock garden?
Drought-tolerant, low-maintenance plants like Russian sage, Karl Foerster grass, Bobo hydrangea, Gold Nugget barberry, and sedum are ideal. They grow well in shallow, rocky soil.
How do I stop weeds in my rock garden?
Use deep rock layers to suppress weeds. Pull them early, and refresh crushed granite every few years. Avoid landscape fabric—it can trap moisture and degrade.
Can I build a rock garden myself?
Yes. With proper planning and tools, DIY rock gardens are achievable. For very large rocks, consider professional help due to weight and placement challenges.
Key Takeaways for Creating a Low-Maintenance Rock Garden
Creating a rock garden isn’t about covering dirt with stones—it’s about designing a living landscape that feels both planned and natural. By reusing stumps, boulders, and soil, you save money and reduce waste. Shaping berms adds depth and improves drainage, while strategic rock placement creates texture and permanence. Planting drought-tolerant species ensures long-term success with minimal watering.
Follow the 7-phase build process, avoid common mistakes like ignoring drainage or over-compacting rock, and maintain your garden with seasonal care. Start small, work with your land, and let each element serve a purpose. With the right approach, you’ll create a rock garden that’s beautiful, sustainable, and built to last.