There’s nothing quite like harvesting fresh, earthy potatoes from your own backyard. Learning how to plant garden potatoes is easy and rewarding, whether you’re a beginner or an experienced gardener. With just a few essential steps—starting with choosing the right seed potatoes and ending with a bountiful harvest—you can grow a steady supply of homegrown spuds in about 100 days. This guide walks you through every stage, from soil prep to hilling and harvesting, so you get the best yield possible.
You’ll learn how to pick the perfect spot, prepare nutrient-rich soil, plant at the right depth, and care for your crop all the way to harvest. Whether you’re using a raised bed, garden row, or container, these proven techniques will help you avoid common mistakes and enjoy fresh potatoes from summer through winter.
Pick a Sunny Spot for Potatoes
Maximize Sunlight Exposure
Potatoes need full sun to grow strong foliage and develop healthy tubers. Aim for 6 to 8 hours of direct sunlight daily. The more sunlight they receive, the better your harvest will be. Choose a location that isn’t shaded by trees, fences, or buildings during peak daylight hours. Raised beds are especially effective because they warm up faster in spring and offer excellent drainage.
Avoid Waterlogged or Shaded Areas
Never plant potatoes in low-lying areas where water pools after rain—wet soil promotes rot and fungal diseases. Also, avoid spots shaded by tall plants or structures. If you’re growing in containers, place them on a sunny patio or deck where they’ll get consistent light throughout the day.
Prepare Loose, Well-Draining Soil
Loosen Soil to 18 Inches Deep
Use a digging fork or shovel to break up the soil to a depth of 12–18 inches. Deep, loose soil allows roots and tubers to expand without resistance. Work the ground when it’s slightly moist—not wet—to prevent compaction. Avoid walking on the prepared area, as this can undo your efforts and recompact the soil.
Improve Heavy or Clay Soil
If your soil is heavy clay or dense, mix in compost, aged manure, or coconut coir to improve texture and drainage. For best results, grow potatoes in raised beds filled with fluffy, loamy soil. This prevents stunted or misshapen tubers and gives you full control over growing conditions.
Adjust Soil pH and Add Starter Fertilizer
Aim for Slightly Acidic Soil (pH 5.0–6.0)
Potatoes thrive in slightly acidic soil with a pH between 5.0 and 6.0. Test your soil with a pH meter or kit. If it’s too alkaline (above 6.5), apply elemental sulfur several weeks before planting to gradually lower the pH.
Feed the Soil with Organic Fertilizer
Before planting, work a balanced starter fertilizer into the soil. A product like Espoma Organic Bio-tone supports strong root development and early growth. Avoid high-nitrogen fertilizers—they encourage leafy tops but reduce tuber production.
Select and Prepare Seed Potatoes

Use Certified Disease-Free Seed Potatoes
Never plant grocery store potatoes—they may carry viruses or sprout inhibitors. Instead, buy certified seed potatoes from a trusted supplier. Popular varieties include Yukon Gold, Red Norland, and Kennebec, each suited to different harvest times and uses.
Cut Larger Potatoes Into Pieces
• Small potatoes (under 2 oz): Plant whole
• Larger ones: Cut into 1–2 inch chunks, each with at least one or two healthy eyes
• Let cut pieces dry 24–48 hours before planting to form a protective callus
Store cut pieces in a cool, dry place during curing. Keep them out of direct sun and moisture.
Plant Potatoes in Rows or Beds

Dig Trenches 4–6 Inches Deep
Use a hoe or trowel to dig straight trenches 4–6 inches deep. This depth prevents tubers from greening while allowing sprouts to emerge easily. Space trenches 2–3 feet apart if planting multiple rows.
Space Seed Pieces 8–12 Inches Apart
Place each seed piece eyes facing up and space them:
• 8 inches apart in raised beds (for higher density)
• 12 inches apart in traditional rows (for larger tubers)
Cover with soil and gently firm the surface. Mark the ends of rows so you remember where they’re planted—especially helpful before sprouts appear.
Example: Planting in a 3×6 Raised Bed
In a standard 3-foot-wide bed, plant three parallel trenches spaced 12 inches apart. With 8-inch spacing between seeds, you can fit 21 potatoes—enough for a generous harvest in about 100 days.
Hill Potatoes to Boost Yield
Start Hilling at 8–10 Inches Tall
When stems reach 8–10 inches high, mound soil around the base, leaving only the top few inches of foliage exposed. Repeat every 2–3 weeks as plants grow taller.
Why Hilling Works
• Prevents greening: Exposure to light causes tubers to turn green and produce solanine, a toxic compound
• Encourages more tubers: Especially in indeterminate varieties, hilling creates space for new potatoes along the buried stem
• Keeps roots cool and moist: Soil mounds act as insulation during hot weather
Use loose compost or straw if garden soil is limited. Keep the mounded material light and airy—don’t pack it down.
Alternatives: Straw Mulch or Container Growing
Some gardeners use straw mulch—laying 12 inches of straw around plants as they grow. Others grow potatoes in grow bags or buckets. These methods work but often yield less than traditional in-ground planting.
Water Smartly for Healthy Tubers
Keep Moisture Consistent
Potatoes need steady water, especially during flowering—this is when tubers rapidly expand. Inconsistent watering leads to cracking, hollow hearts, or misshapen spuds.
• Water deeply once or twice a week in hot weather
• Let the top 1–2 inches of soil dry out between sessions
• In cooler spring months, watering every 10–14 days may be enough
Avoid Overhead Watering
Use drip irrigation or soaker hoses to deliver water directly to the roots. This keeps foliage dry and reduces fungal diseases like blight. If using a sprinkler, water in the morning so leaves dry by evening.
Pro Tip: Install a Drip System
A simple drip irrigation line connected to a garden faucet saves time and ensures even moisture. It’s especially useful during dry spells or if you’re away from home often.
Watch for Signs of Maturity
Foliage Begins to Yellow and Die Back
The clearest signal that potatoes are ready: the plants start to yellow, wilt, and collapse. This natural die-back means the tubers have stopped growing and are beginning to cure underground.
Check the Days to Maturity
Refer to your variety’s expected timeline:
• Early varieties (70–90 days): Red Norland, Fingerling
• Mid-season (90–110 days): Yukon Gold
• Late-season (110+ days): Russet Burbank
Mark your calendar when you plant—this helps predict harvest time accurately.
Harvest Test: Dig One Early
Curious if they’re ready? Carefully dig around one plant to check tuber size. If they’re firm and full-sized, it’s time to harvest the rest.
Harvest and Store Potatoes Properly
Dig Gently With a Fork
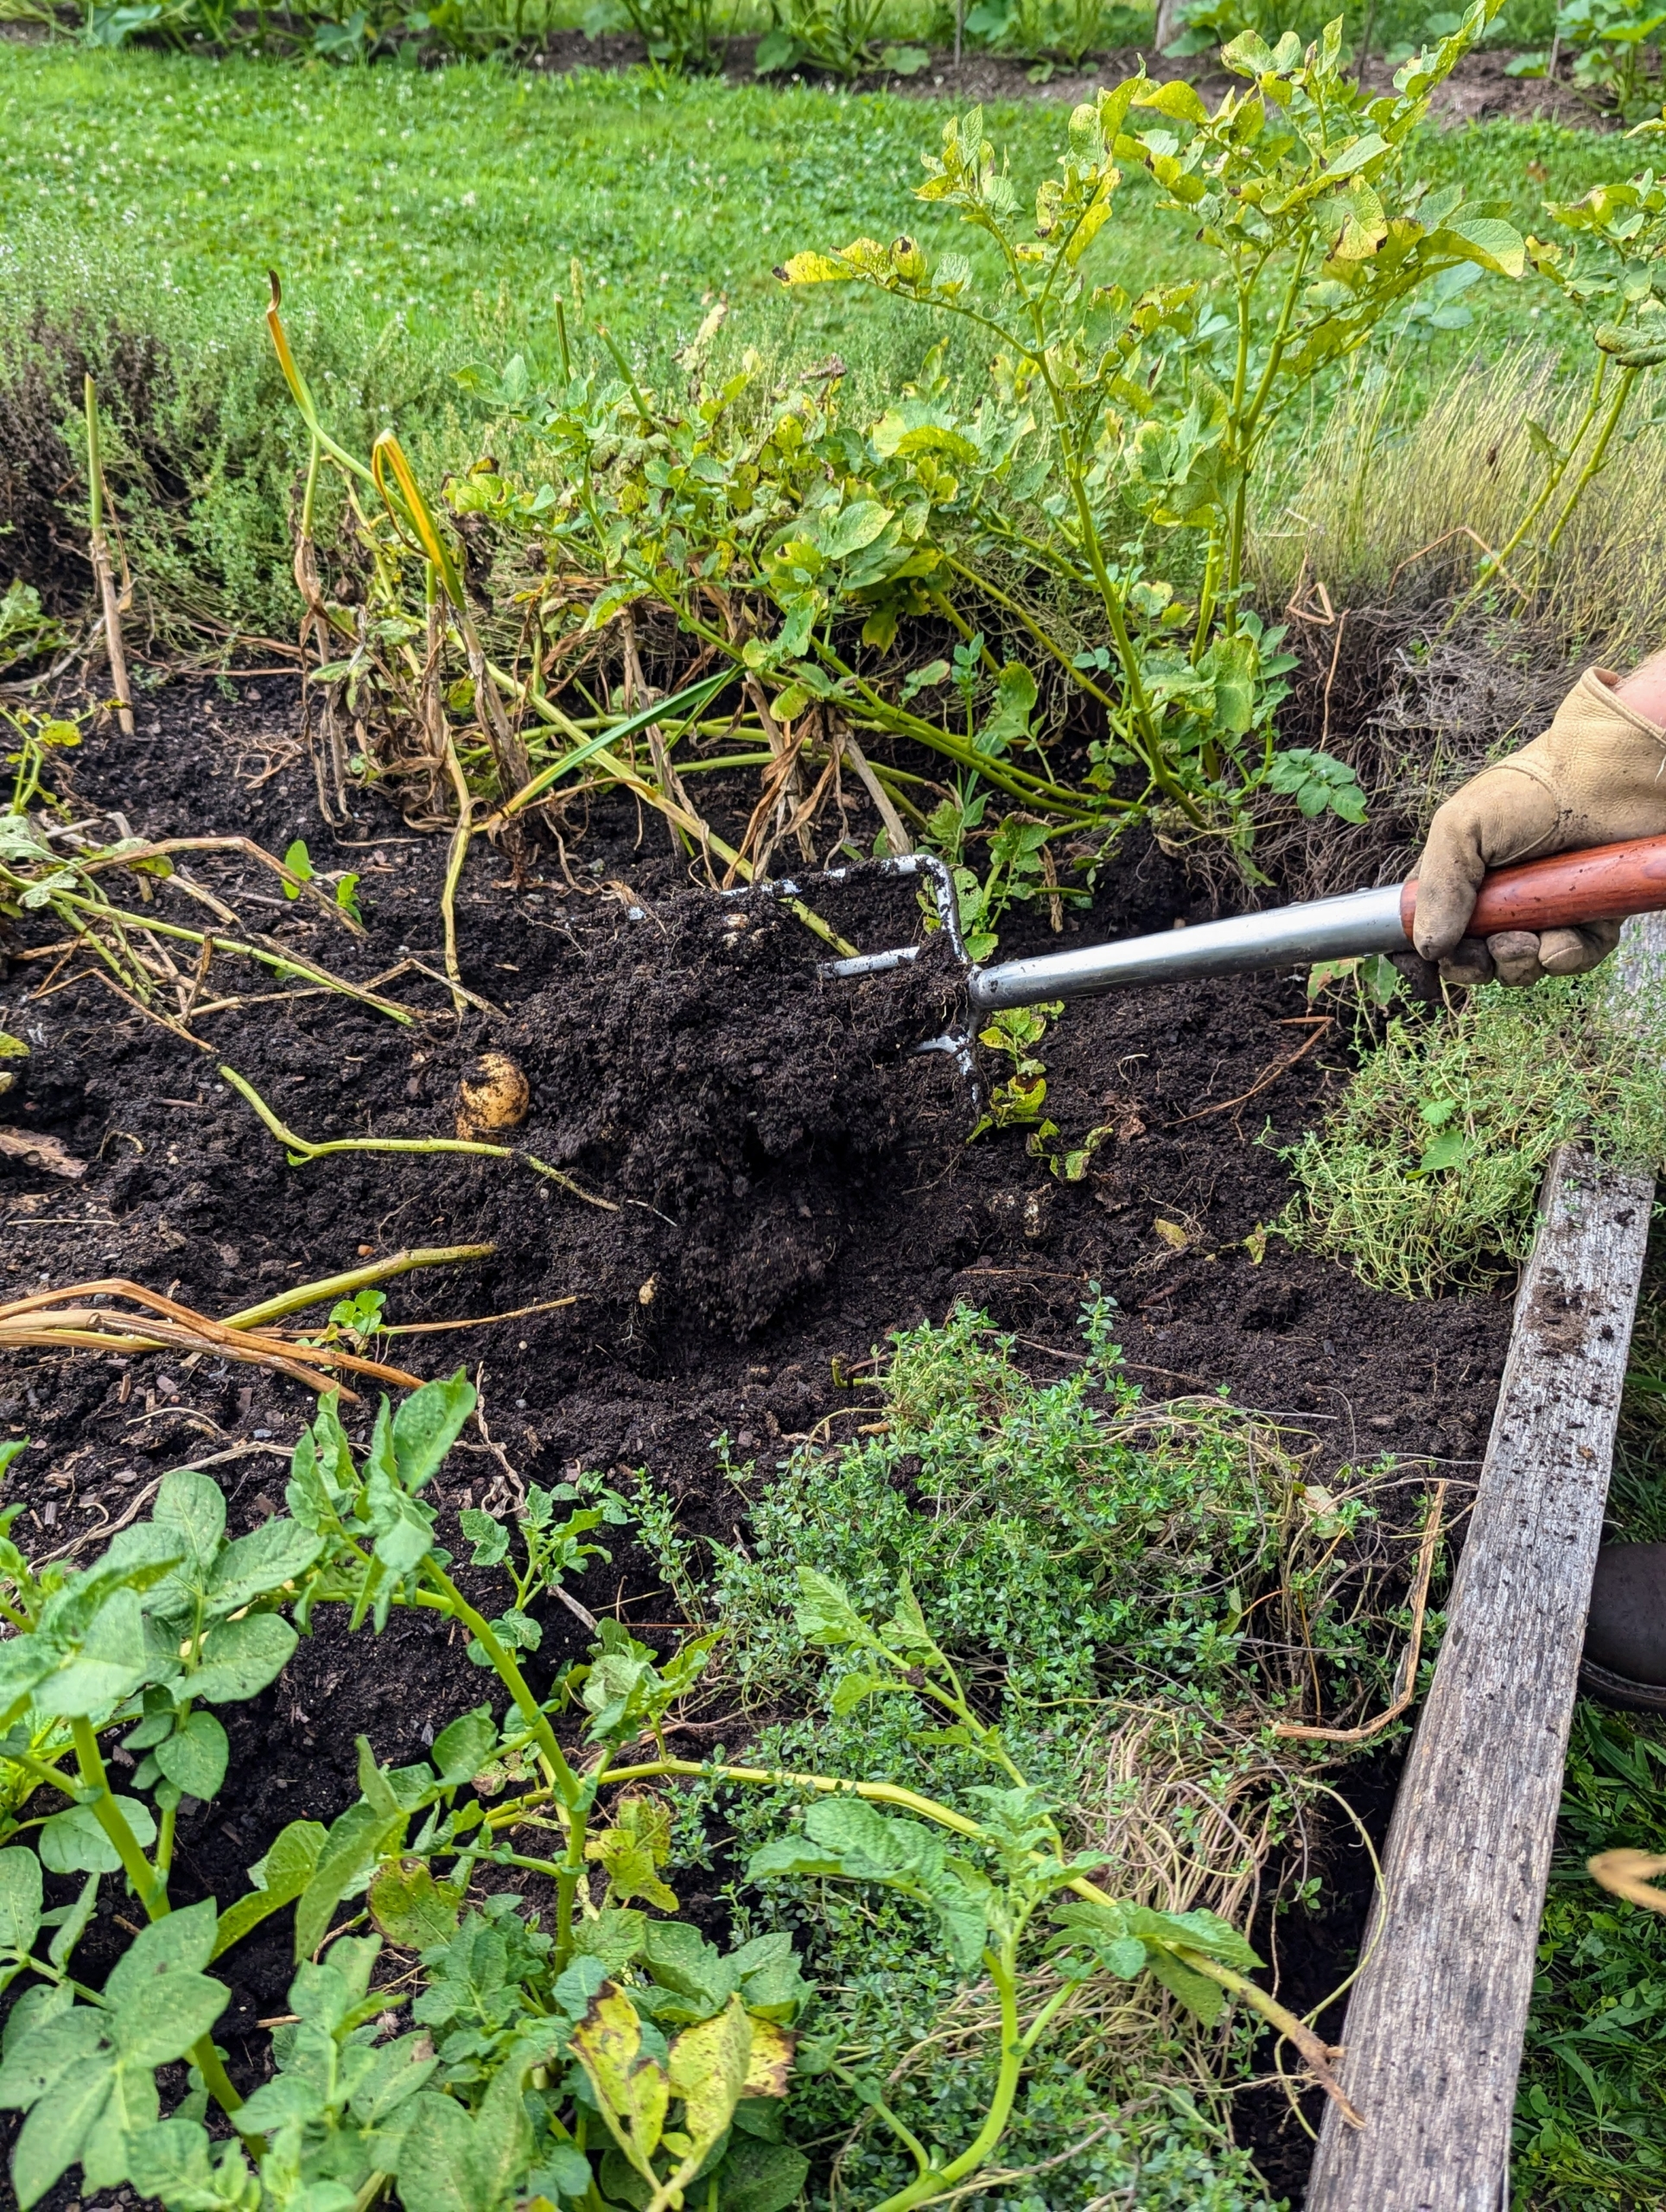
Use a garden fork to lift tubers from the soil. Insert the fork a few inches away from the stem base and lift carefully to avoid piercing potatoes. Shake off loose dirt—don’t wash them yet.
Cure Potatoes Before Long-Term Storage
After harvest, cure them in a cool, dark, humid place (50–60°F, 85–90% humidity) for 10–14 days. This thickens the skin and extends shelf life.
Store in a Cool, Dark Place
Once cured, store potatoes in:
• Ventilated bins or paper bags
• Temperature: 45–50°F
• No light exposure (to prevent greening)
Never store near onions—they release gases that speed up sprouting.
Common Mistakes to Avoid
Planting Too Early in Cold Soil
Even though potatoes are cool-season crops, planting in cold, wet soil (below 45°F) leads to rot. Wait until the soil warms to at least 50°F. Use a soil thermometer to check.
Skipping the Hilling Step
Failing to hill exposes tubers to sunlight, causing greening and bitterness. It also limits yield. Make hilling a regular part of your care routine.
Over-Fertilizing With Nitrogen
Too much nitrogen creates lush green tops but small or few tubers. Stick to balanced or low-nitrogen fertilizers at planting, and side-dress only if needed.
Harvesting Too Late After Die-Back
Leaving potatoes in soggy soil too long after vine death increases rot risk. Harvest within 1–2 weeks of full die-back, especially if rain is expected.
Extend Your Harvest With Succession Planting
Plant Early, Mid, and Late Varieties
Stagger your harvest by growing different types:
• Early-season: Harvest in summer
• Mid-season: Late summer
• Late-season: Fall storage
This gives you fresh potatoes from summer through winter.
Consider a Second Planting in Cooler Climates
In zones 5 and warmer, you can sometimes plant a second crop in late July or August for a fall harvest—provided your season is long enough.
Frequently Asked Questions About How to Plant Garden Potatoes
When is the best time to plant garden potatoes?
Plant potatoes 2–4 weeks before the last expected frost, once soil temperatures reach at least 50°F. In most regions, this falls between late March and early May.
Can I grow potatoes from store-bought potatoes?
No. Grocery store potatoes are often treated with sprout inhibitors and may carry diseases. Always use certified disease-free seed potatoes for reliable results.
How deep should I plant seed potatoes?
Plant seed potatoes in trenches 4–6 inches deep. This depth protects developing tubers from sunlight while allowing sprouts to emerge easily.
Why are my potato plants turning yellow?
Yellowing foliage at the end of the season is normal and signals maturity. However, early yellowing could indicate overwatering, nutrient deficiency, or disease.
Do potatoes need full sun to grow?
Yes. Potatoes require 6 to 8 hours of full sun daily for strong foliage and healthy tuber development. Less sun results in weak plants and lower yields.
How many potatoes will one plant produce?
On average, one potato plant yields 3 to 6 medium-sized tubers. High-yielding varieties and optimal conditions can increase this to 8 or more.
Key Takeaways for How to Plant Garden Potatoes
Growing your own potatoes is simple, satisfying, and highly productive. Start with certified seed potatoes, plant them in loose, slightly acidic soil, and ensure they get full sun. Time your planting after the soil warms to at least 50°F, space seed pieces properly, and commit to regular hilling to prevent greening and boost yield.
Water consistently—especially during flowering—and harvest when the foliage dies back. Cure and store your potatoes correctly to enjoy them for months. By avoiding common mistakes like over-fertilizing or planting too early, you’ll maximize your success. Ready to get started? Grab your seed potatoes and prepare your bed—your first homegrown harvest is just a few months away.