
Transforming a sloped yard into a functional terrace garden is one of the smartest ways to reclaim unusable space, prevent soil erosion, and create a lush, productive outdoor area. Whether your yard has a gentle incline or a steep drop, building a terrace garden allows you to grow vegetables, herbs, and flowers while adding seating zones and visual appeal. With proper planning, solid drainage, and the right materials, your terrace garden can thrive for years—even on a tight budget.
This step-by-step guide walks you through every phase of building a terrace garden, from assessing your slope and choosing materials to constructing stable levels, planting wisely, and maintaining your garden year-round. You’ll learn how to avoid common mistakes, reinforce walls, manage water effectively, and maximize space—so you can turn a challenging slope into a beautiful, sustainable retreat.
Measure Your Slope and Plan Terrace Layout
Determine the Gradient and Available Space
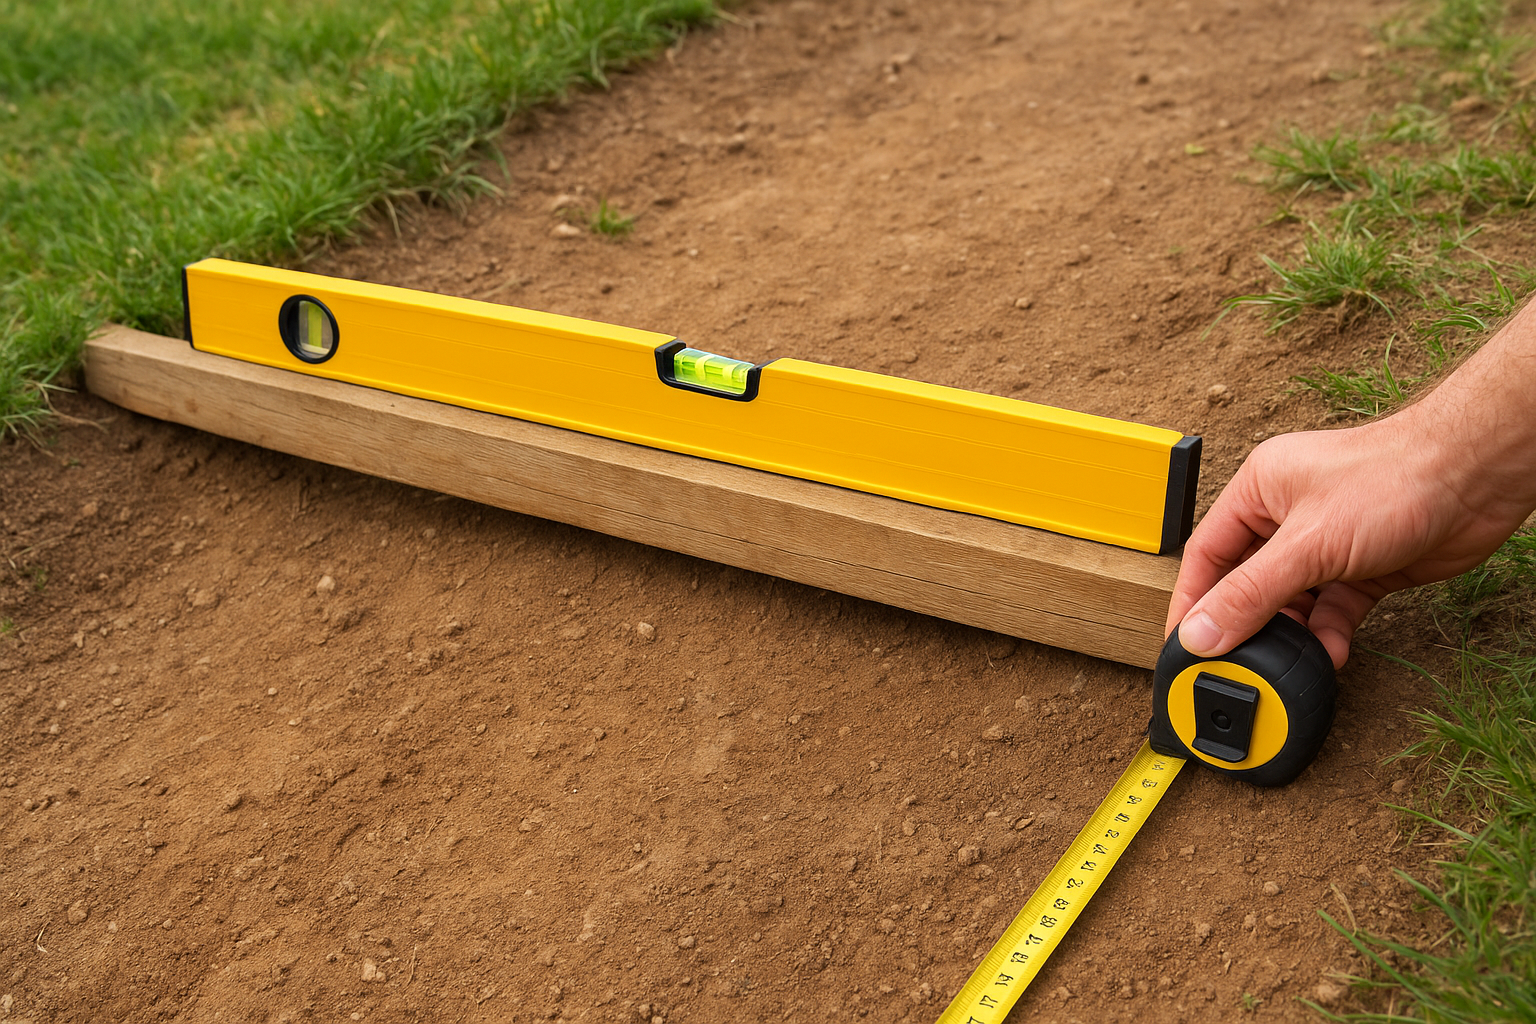
Start by measuring the length and vertical drop of your slope. For example, if your yard drops 1.5 meters over 6 meters, that’s a 25% gradient—ideal for terracing. Use a tape measure and spirit level to mark the slope’s dimensions. Divide the area into equal sections—like three 6-foot terraces on an 18-foot incline—to create balanced, level planting beds.
Map Sunlight Exposure for Plant Success
Observe how sunlight moves across your slope throughout the day. Identify zones with full sun (6+ hours), partial shade (3–6 hours), and full shade. This directly affects what you can grow—sun-loving lavender needs bright upper levels, while shade-tolerant hydrangeas thrive on lower, shaded terraces.
Identify Drainage Paths and Foundation Risks
Watch how water flows during rain. Avoid directing runoff toward your home’s foundation or siding. If your terrace borders a structure, plan to install flashing or waterproof paint to protect against moisture damage and long-term rot.
Design Functional and Safe Terrace Zones
Assign a Purpose to Each Terrace Level
Don’t just plant rows—design each level with a function. Use the lowest terrace for seating or dining, the middle for vegetables and herbs, and the top for pollinator-friendly flowers or a rainwater barrel. This creates a dynamic, usable space that blends beauty and productivity.
Install Safe, Slip-Resistant Steps Between Levels
Build steps using reclaimed timber or stone, ensuring they’re at least 24 inches wide with a 6–7 inch rise per step. Position them where foot traffic naturally flows—like from a back door to a garden path. Use non-slip materials to prevent accidents, especially in wet weather.
Sketch a Scale Layout Before Building
Draw your slope on graph paper, marking each terrace, access points, sun zones, and drainage routes. A simple sketch helps you visualize the final result, avoid costly errors, and plan material needs accurately.
Choose Cost-Effective or Premium Retaining Materials
Compare Retaining Wall Material Options
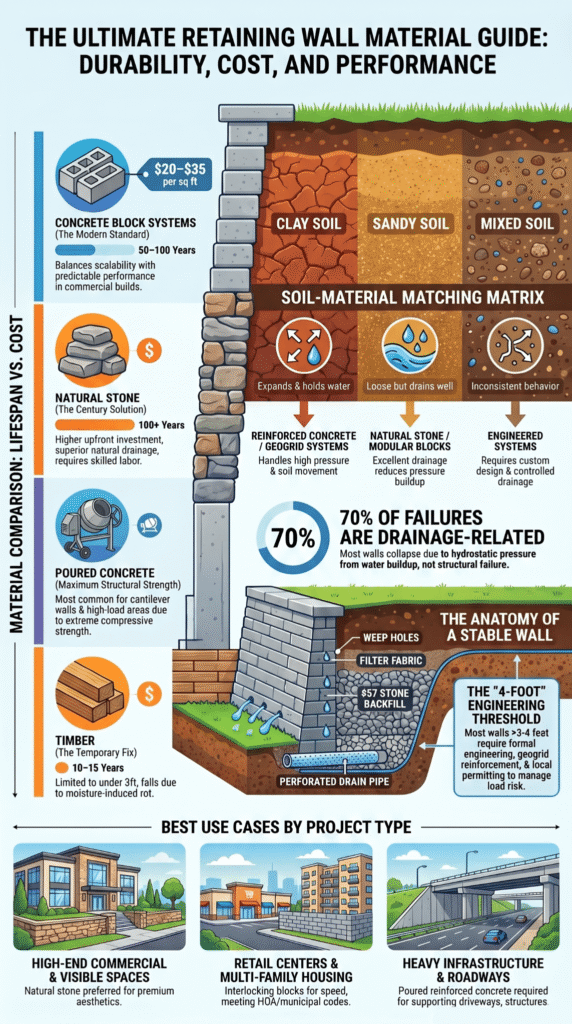
Your choice depends on budget and longevity:
| Material | Best For | Lifespan |
|---|---|---|
| Pressure-treated timber | Long-term stability | 10–15 years |
| Reclaimed wooden pallets | Budget builds | 3–5 years |
| Stone or concrete blocks | Permanent, aesthetic | 20+ years |
| Old bricks or slabs | Low-cost edging | 5–10 years |
Always use heat-treated (HT) pallets—never chemically treated (MB)—to avoid soil contamination.
Gather Essential Base and Drainage Supplies
Every terrace needs:
– Paver base or compacted gravel (10cm minimum) for a stable foundation
– Landscape fabric to block weeds and protect drainage
– 4-inch perforated drainage pipe to redirect water
– Gravel (2–3 inches) to surround the pipe
These prevent sinking, clogging, and water damage.
Repurpose Containers and Create Permeable Paths
Use old bathtubs, crates, or plastic bottles as planters. Lay gravel or recycled concrete between levels for affordable, erosion-resistant pathways that let water seep through.
Build the First Terrace with a Solid Foundation
Clear and Level the Base Area
Begin at the lowest point. Remove weeds, rocks, and debris. Loosen compacted soil with a garden fork. Mark the outline of your first bed and dig a trench for the retaining wall—deep enough to hold the base and first timber layer.
Install a Compacted Gravel Base
Fill the trench with 4–6 inches of paver base or gravel. Level it with a long spirit level and tamp it down firmly. A solid, level base prevents shifting and ensures long-term stability.
Set and Level the First Course of Timbers
Place pressure-treated timbers (or stacked pallets) into the trench. Check for level in all directions. Adjust by packing soil under low spots. Use a sledgehammer to gently tap boards into place.
Anchor the Wall with Rebar
Drill holes through the timber and drive rebar into the ground every 2–3 feet. This prevents the wall from bulging outward due to soil pressure behind it.
Install a Reliable Drainage System Behind the Wall

Lay Perforated Pipe with Proper Slope
Cut a notch in the front board to allow a 4-inch perforated pipe to exit. Lay the pipe behind the wall, sloping it 1/8 inch per foot toward the front. This gravity-fed system carries excess water away from the terrace and prevents waterlogging.
Wrap Pipe in Gravel and Landscape Fabric
Cover the pipe with 2–3 inches of gravel, then wrap the entire layer in landscape fabric. This keeps soil from clogging the system while allowing water to flow freely.
Protect Adjacent Walls and Foundations
If the terrace touches your home, install metal flashing or apply waterproof paint to the siding. This blocks moisture infiltration that could lead to rot, mold, or structural damage.
Reinforce Tall Walls to Prevent Collapse

Never Build Over Two Courses Without Bracing
Walls taller than 24 inches are at risk of bowing. Without reinforcement, soil pressure will eventually push the wall forward and cause failure.
Add “Dead Man” Anchors for Extra Support
For walls over two layers, install horizontal beams (like 2×6 lumber) extending back into the hillside. Attach them to the wall and anchor with rebar. These “dead men” act as tiebacks, holding the structure in place.
Use Diagonal Bracing for Pallet Walls
On budget builds, screw diagonal supports from the front of the pallet to stakes driven into the ground behind. This counters forward pressure and stabilizes the wall.
Backfill and Prepare Fertile Soil for Planting
Reuse Excavated Soil for Backfill
Fill the back of the terrace with soil you dug out during construction. It’s free and helps reduce waste. However, don’t rely on it alone for planting—mix in quality topsoil.
Mix in Topsoil and Compost for Healthy Growth
Top off each bed with 6–12 inches of nutrient-rich garden soil blended with compost. Most plants need at least 6 inches of fertile soil to thrive. Root crops and perennials benefit from deeper layers.
Pack Soil to Prevent Future Settling
As you backfill, tamp down the soil every few inches. This minimizes sinking and keeps the terrace level over time.
Build Additional Terraces Up the Slope
Repeat the Process for Each Level
Work upward from the first terrace. Build the next wall, install drainage, backfill, and level—just like the first. Ensure each new level drains independently to avoid overloading lower tiers.
Stagger Joints for Stronger Walls
When stacking timbers, offset the seams between rows (like brickwork). This distributes weight and increases structural strength.
Connect Levels with Reclaimed Wood Steps
Use old timber or stone to build simple, slip-resistant steps. Position them where they’re most convenient for access and gardening tasks.
Maximize Space with Vertical Gardening Techniques

Install Trellises for Climbing Plants
Attach trellises to walls and grow vining plants like clematis or climbing beans. This adds greenery without using ground space.
Hang Baskets and Stack Planters
Use wall-mounted baskets for herbs like thyme or trailing flowers. Stack planters vertically to grow strawberries, lettuce, or succulents in small footprints.
Grow Up, Not Just Out
Vertical gardening is essential on terraces. It increases yield, improves air circulation, and creates visual depth.
Choose the Right Plants for Sun and Soil Conditions
Match Plants to Sunlight Zones
- Full sun terraces: Lavender, rosemary, sedum, marigolds
- Partial shade: Boxwood, hydrangea, catmint, thyme
- Full shade: Ferns, hostas (if drainage allows)
Stabilize Edges with Erosion-Fighting Ground Covers
Plant low-growing, spreading species along edges:
– Creeping thyme – fragrant, drought-tolerant
– Sedum – succulent, needs little water
– Thyme – stabilizes soil, edible
These reduce runoff and soften hard edges.
Use the Grow Together Planting System
Group plants with similar needs:
– Tomatoes + basil + marigolds = pest-resistant, high-yield combo
– Lavender + catmint = drought-tolerant, pollinator-friendly duo
Manage Water Smartly to Conserve Resources
Collect Rainwater at the Top Level
Place a rain barrel at the highest terrace. Use gravity to feed drip lines or water lower beds. This reduces reliance on municipal water and prevents runoff.
Design Gravity-Fed Irrigation
Let excess water from upper levels naturally irrigate lower ones. Ensure each terrace drains properly to avoid pooling.
Mulch to Retain Moisture and Suppress Weeds
Cover soil with wood chips or straw. Mulch reduces evaporation, suppresses weeds, and protects roots from temperature swings.
Maintain Your Terrace Garden Through the Seasons
Spring: Refresh and Prepare
- Add compost to enrich soil
- Prune perennials and remove winter debris
- Plant cool-season crops like kale and daffodils
Summer: Monitor and Harvest
- Check soil moisture daily in containers
- Deadhead flowers to encourage blooming
- Control weeds before they seed
Autumn: Protect and Plan Ahead
- Plant bulbs for spring color
- Cover bare soil with mulch or cover crops
- Inspect walls for shifting after heavy rains
Winter: Assess and Improve
- Repair damaged timbers or bricks
- Tighten loose screws and rebar
- Sketch ideas for next season’s expansion
Troubleshoot Common Terrace Garden Problems
Fix Bowing or Shifting Walls Immediately
If a wall starts to bulge:
– Add dead man anchors
– Reduce soil pressure by removing some backfill
– Reinforce with additional rebar
Clear Clogged Drainage Pipes After Heavy Rain
If water pools behind walls:
– Uncover the pipe and flush with a hose
– Re-wrap with fresh landscape fabric
– Ensure proper slope is maintained
Stop Edge Erosion with Ground Covers and Mulch
If soil washes over the front:
– Plant more ground covers
– Install edging stones or logs
– Add mulch or gravel along the lip
Save Money with Smart Building Strategies
Source Free or Low-Cost Materials Locally
- Ask businesses for used pallets
- Check demolition sites for old bricks or concrete
- Join Facebook gardening groups for material swaps
Start Small and Expand Over Time
Build one terrace this season. Test drainage and plant success. Add more levels next year as budget and confidence grow.
Prioritize Function Over Perfection
Slightly uneven edges or mismatched materials add character. Focus on stability and usability first—cosmetic upgrades can come later.
Ensure Long-Term Safety and Durability
Inspect Structures Twice a Year
Check for:
– Loose screws or rotting wood
– Gaps behind walls
– Signs of water pooling
Catch issues early before they become major repairs.
Keep Paths Wide and Safe
Gravel paths should be wide enough for two people. Avoid slippery surfaces. Trim overgrown plants that block walkways.
Call Before You Dig
Contact your local utility hotline before trenching to avoid hitting gas, water, or electrical lines.
Frequently Asked Questions About Building a Terrace Garden
How do you build a terrace garden on a steep slope?
Start at the lowest point and build upward. Use pressure-treated timber or stone for retaining walls, install perforated drainage pipe behind each wall, and anchor tall walls with rebar or “dead man” anchors. Always ensure proper slope and compaction for stability.
What is the cheapest way to build a terrace garden?
Use reclaimed materials like wooden pallets, old bricks, or recycled concrete. Source free soil from local landscaping projects, and build one level at a time. Start small and expand as your budget allows.
How do you prevent a retaining wall from collapsing?
Anchor the wall with rebar every 2–3 feet. For walls over 24 inches high, install “dead man” anchors—horizontal beams extending into the hillside. Always use a solid gravel base and proper drainage to reduce soil pressure.
Can you grow vegetables in a terrace garden?
Yes—terrace gardens are ideal for growing vegetables. Use deep beds (6–12 inches) filled with compost-rich soil. Grow tomatoes, lettuce, carrots, and herbs on sunny levels, and use vertical planters to maximize space.
How do you stop soil erosion on a terrace?
Plant ground covers like thyme or sedum along edges. Use mulch or gravel to cover bare soil. Install proper drainage and ensure walls are securely anchored to prevent shifting.
How do you water a terrace garden efficiently?
Use a rain barrel at the top to collect runoff. Let gravity feed water to lower levels. Install drip irrigation or soaker hoses, and mulch soil to reduce evaporation.
Key Takeaways for Building a Successful Terrace Garden
- Start at the bottom and build upward to ensure stability
- Install perforated pipe and gravel in every terrace for reliable drainage
- Offset joints and anchor walls with rebar or dead men for long-term strength
- Group plants by sun and water needs to reduce maintenance
- Use reclaimed materials to save money and support sustainability
- Think in layers—vertical, ground cover, and canopy—for maximum impact
- Test and amend soil annually for healthy plant growth
A well-built terrace garden turns a challenging slope into a productive, beautiful asset. With smart planning, proper drainage, and thoughtful planting, you’ll create a resilient outdoor space that grows more rewarding each season. Whether you’re growing food, flowers, or simply creating a peaceful retreat, your terrace garden can thrive for years—with minimal maintenance and maximum impact.



