A clean, crisp border can instantly elevate your garden from messy to magazine-worthy. Metal garden edging provides durable, low-maintenance definition that keeps grass out, holds mulch in, and gives your landscape a professional finish. Whether you’re outlining flower beds or separating lawn from walkways, installing metal edging is a weekend project with long-term rewards.
This step-by-step guide shows you exactly how to install metal garden edging using either the trenching or direct hammering method—based on expert recommendations and real-world best practices. You’ll learn how to plan your layout, remove factory stakes safely, set the edging straight and level, and secure it for lasting performance. With the right tools and technique, you can achieve a polished look in just a few hours.
Plan Your Garden Edging Layout
Measure Total Length Needed
Walk the perimeter of your garden bed and measure the full length where edging will go. Use a garden hose or spray paint to mark curved lines before finalizing. Add 10% extra to your total footage to account for corners, overlaps, or unexpected adjustments. This ensures you buy enough edging strips and corner pieces without running short mid-project.
Choose the Right Strip Width
Metal edging comes in standard widths: 4″, 6″, 8″, and 12″. Wider strips (8″ or 12″) create deeper underground barriers, ideal for blocking aggressive grass like Bermuda or Zoysia. Narrower options (4″ or 6″) work well for light-duty borders or decorative beds. Always dig a trench half the width of your strip—e.g., a 4-inch-deep trench for an 8-inch-wide edging.
Select the Best Installation Method
Two main methods exist: trenching and direct hammering.
– Trenching offers precision and is required for Corten (rusted) steel, which degrades faster when buried or hammered directly.
– Direct hammering works quickly in soft, loamy soil but should never be used on pre-rusted edging.
Choose based on your soil type, edging material, and desired accuracy.
Gather Tools and Safety Gear
Wear Protective Equipment
Always wear cut-resistant gloves and safety glasses during installation. Metal edges are sharp, and stake removal involves leverage that could cause injury if tools slip. Protecting your hands and eyes is essential—never skip this step.
Prepare Essential Tools
For manual installation, gather:
• Hammer
• 2×4 or 4×4 wooden block (to protect edging while hammering)
• Half-moon edger, sharpshooter shovel, or edging spade
For power tool use (alternative method):
• Screw gun
• Self-drilling sheet metal screws
• Wooden garden stakes
Keep a pry bar or heavy-duty screwdriver on hand for removing factory-installed stakes.
Remove Factory Stakes Before Installation
Locate Pre-Installed Stakes
Most metal edging (like Colmet brand) comes with four factory-installed stakes—two on each end. These must be removed before installation. Each piece has six stake pockets, but only four stakes are used due to overlapping joints between sections.
Use Leverage, Not Force to Remove Stakes
Lay the edging flat on the ground or workbench. Hold it steady with your foot. Insert a long-handled pry bar at the wide end of the stake near the pocket. Gently rock the tool back and forth to fatigue the metal tab. Avoid pliers or brute force—this risks damaging the edging or injuring your hands. Repeat for all four stakes.
Dig a Precision Trench (Trenching Method)
Cut a Clean, Consistent Path
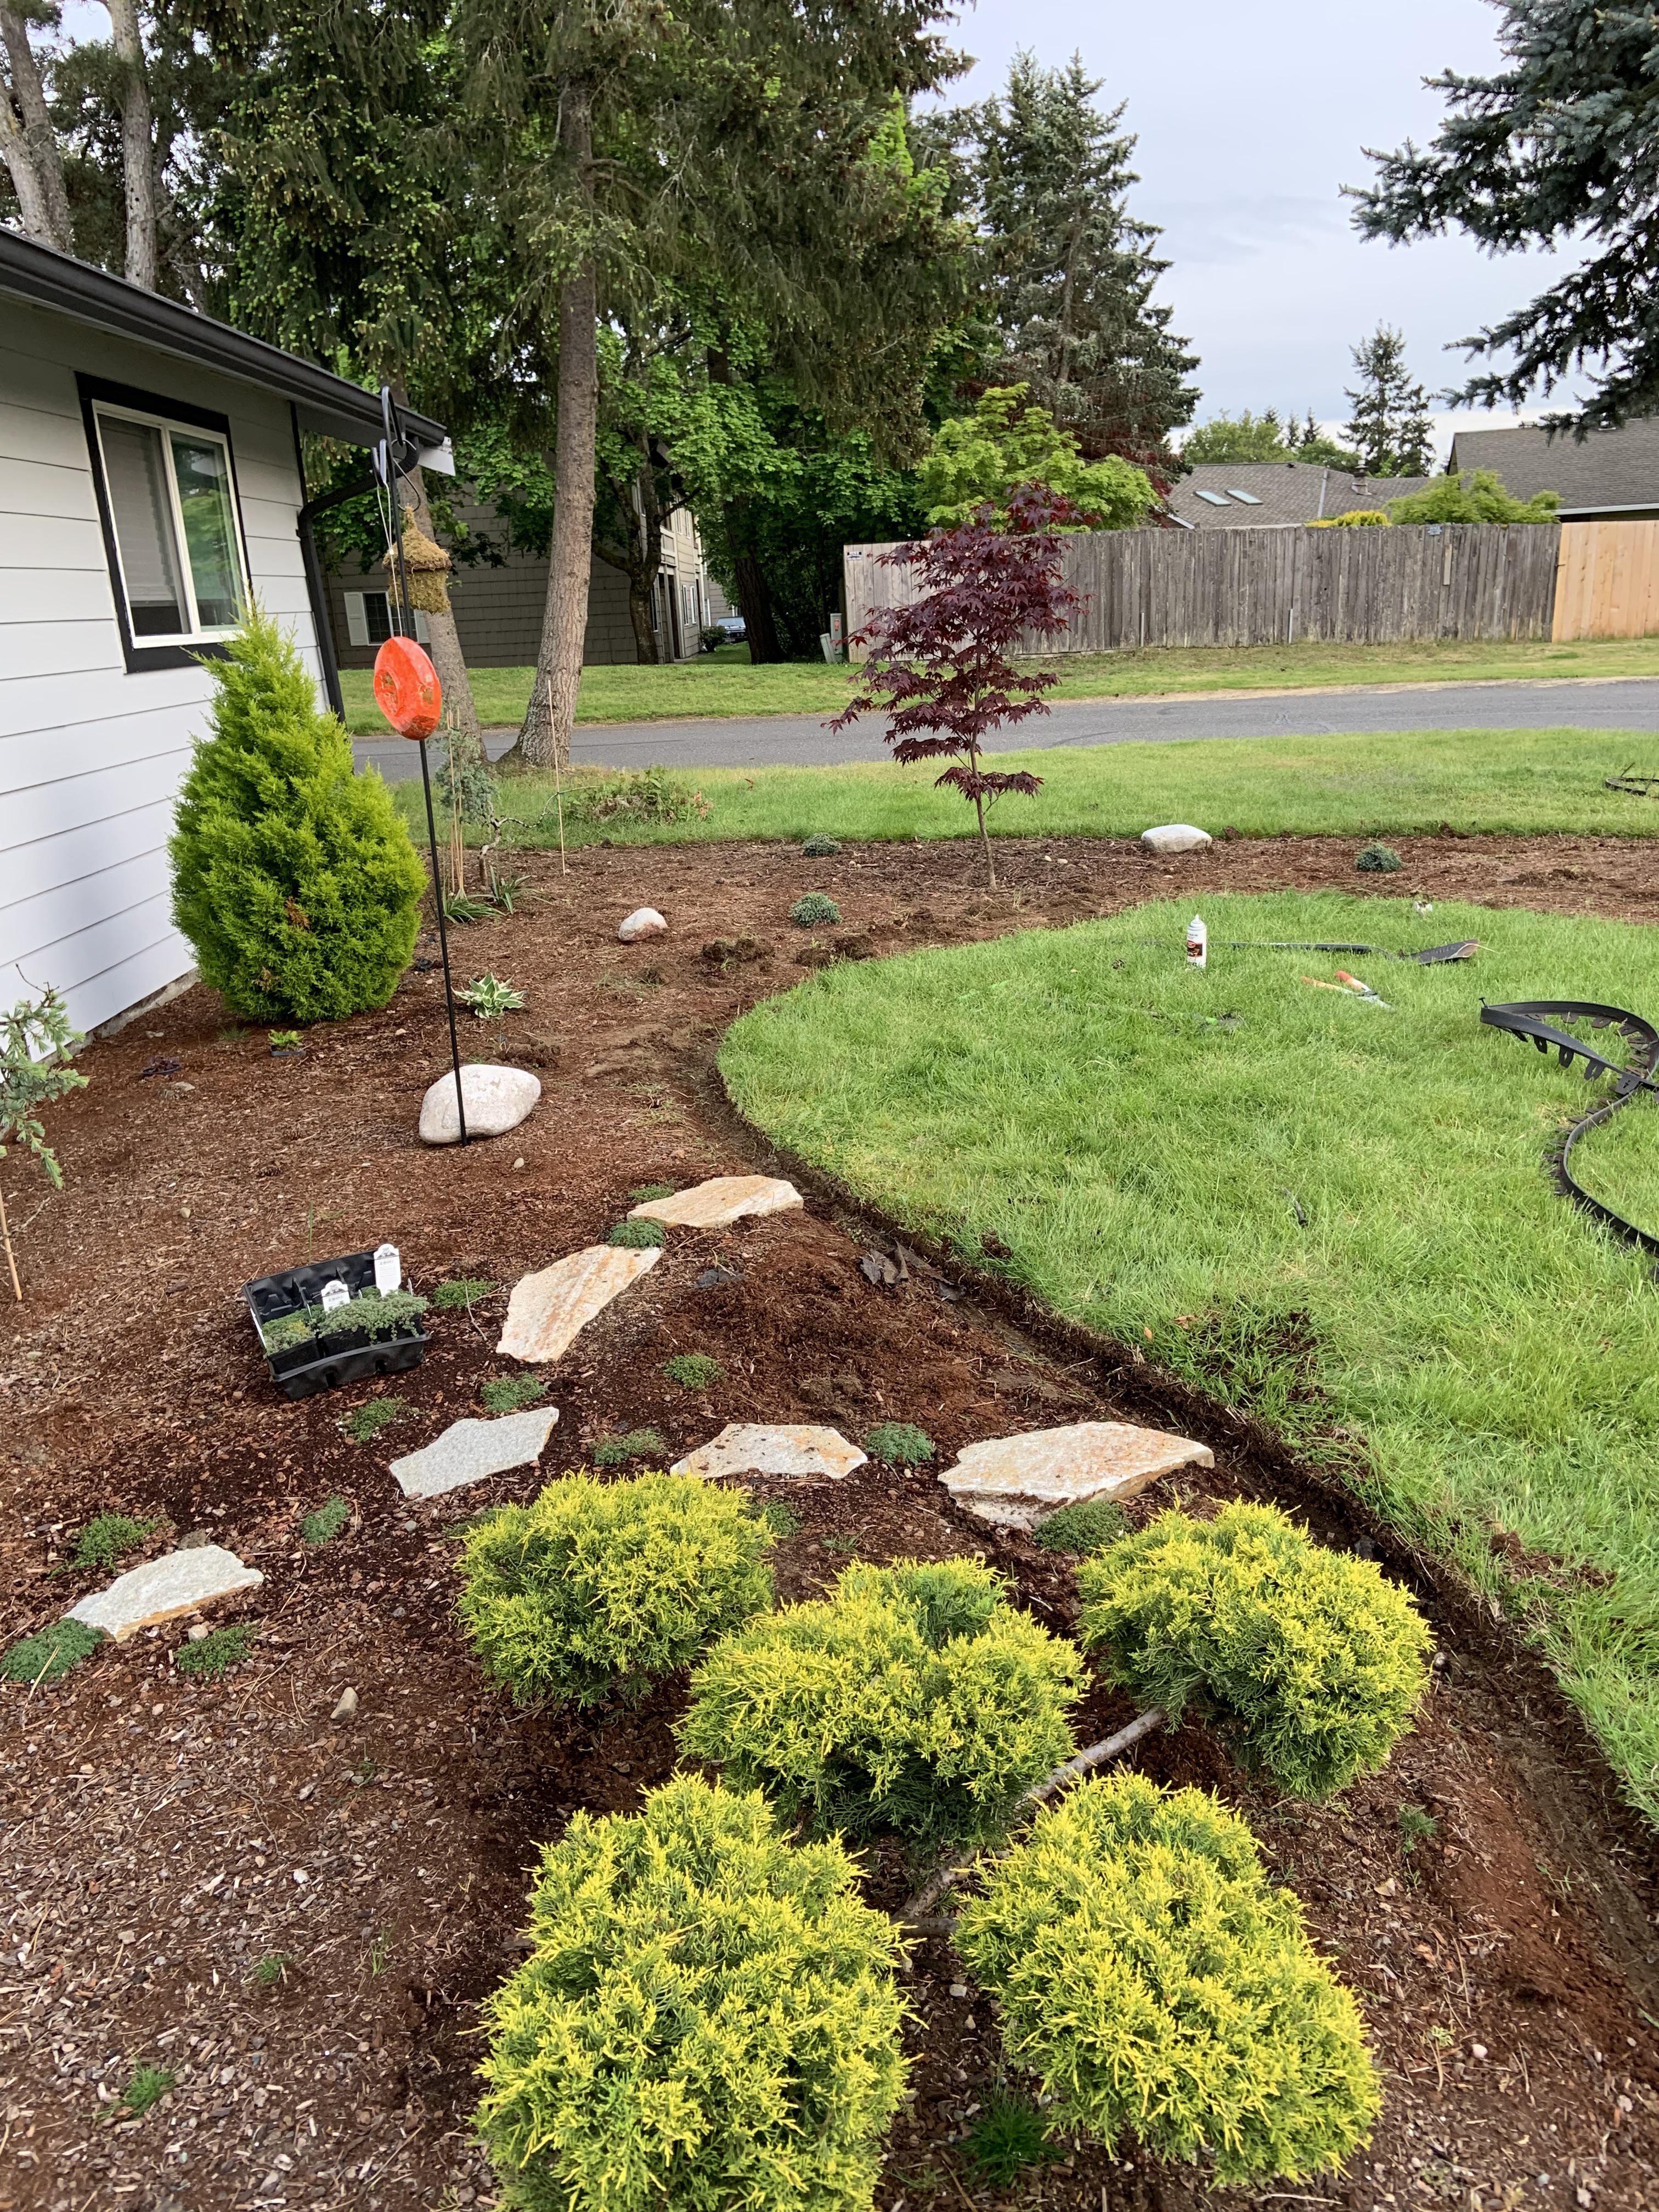
Use a half-moon edger or sharpshooter shovel to slice along your marked line. Remove soil to create a trench that’s:
• Half the width of your edging strip (e.g., 3″ deep for a 6″ strip)
• Slightly wider than the edging to allow easy placement
This method ensures uniform depth and is required for rusted Corten steel, which deteriorates faster when improperly buried.
Maintain Smooth Curves and Straight Lines
For curves, bend the edging gradually as you lay it. For straight runs, stretch a string line between stakes as a guide. A clean, consistent trench means easier installation and better long-term stability.
Set Edging in Place Correctly

Position the First Section Properly
Place the first piece in the trench with stake pockets facing inward (toward the garden). This ensures stakes anchor the edging from behind. Check which end allows the next piece to slide on top, not underneath. Installing in the wrong order forces gaps and misalignment.
Connect All Sections with Proper Overlap
Continue adding pieces, ensuring each new one overlaps the previous. Never force a piece under—always install on top for a tight seam. Use pre-made corner pieces or carefully bent strips for turns. Keep the top edge level and aligned throughout.
Drive Edging Into Soil (Direct Hammering Method)
Start at One End in Soft Soil
Only use direct hammering in soft, workable soil and with non-rusted steel. Begin at one end, pushing the edging into the ground by hand where possible. Use temporary wooden stakes to hold position until permanent stakes are installed.
Hammer Evenly to Prevent Lifting
Do not hammer one end repeatedly—this lifts the opposite side. Instead:
• Use a 4×4 wooden block across the top to distribute force
• Tap in 1–2 inch increments
• Alternate sides and work from multiple points along the length
• Check alignment frequently
This prevents bending and ensures even depth.
Secure With Stakes for Maximum Hold
Space Stakes Every 30 Inches
Drive a metal stake every 30 inches (or every 2–3 feet) along the edging. For strip installations, place a stake at the joint where two pieces meet. This hides seams and reinforces connections.
Angle Stakes for Stronger Anchoring
Insert stakes into the back of the edging, driving them at a slight angle into the soil. This prevents shifting from rain, foot traffic, or frost heave. Position stakes on the outer edge to conceal gaps between sections.
Protect Corners and Edges
Always cover sharp corners with a stake to prevent injury and movement. Ensure stake tops are flush or slightly below the edging surface for a clean, finished look.
Finalize Depth and Alignment
Bury 2 Inches for Optimal Performance
For best weed and grass control, bury the edging 2 inches deep (Colmet recommendation). This depth blocks grass runners while leaving 2 inches above ground to hold mulch or stone securely.
Verify Uniform Height
Walk the entire line and check that the edging sits at a consistent height. Adjust any high or low spots by gently tapping with the wood block and hammer. Use a level or straight board to spot deviations.
Backfill and Inspect for Quality
Fill Gaps at the Base
Use soil or compacted material to backfill any gaps around the trench base. Tamp lightly to stabilize the edging without shifting it. This also prevents water pooling and erosion.
Step Back and Evaluate the Entire Line
From a distance, inspect for:
• Straightness and smooth curves
• Even depth and alignment
• Flush stake tops
• Secure connections
Make minor adjustments now to avoid issues later.
Avoid Common Installation Mistakes

Never Bury Rusted Edging Deep
Corten (rusted) steel develops a protective patina when exposed to air, but burial in soil accelerates corrosion. Avoid direct hammering and deep burial—use the trench method and keep rusted edging partially exposed.
Don’t Force Pieces Under Each Other
Forcing a new section under the previous one creates gaps and weak joints. Always install on top with proper overlap. Test fit before final placement.
Always Protect the Edging Top
Hammering directly on the metal can dent or warp the top edge. Always use a wooden block (2×4 or 4×4) as a buffer during installation.
Frequently Asked Questions About Installing Metal Garden Edging
Can I install metal edging on a slope?
Yes, metal edging works on gentle slopes. Use the trenching method to maintain consistent depth and alignment. Cut the trench slightly deeper on the downhill side if needed to keep the top edge level.
How do I cut metal garden edging to fit?
Use a metal-cutting circular saw blade or angle grinder with a metal-cutting disc. Mark the cut line with a straight edge and wear safety gear. Sand sharp edges after cutting.
Should I paint or seal rusted Corten edging?
No. Corten steel is designed to rust naturally and form a protective layer. Sealing it traps moisture and can cause premature failure. Avoid burying it to extend its life.
Can I install metal edging over tree roots?
Yes, but avoid driving stakes directly into large roots. Hand-bend the edging around obstructions and secure with extra stakes on either side. Use the trench method for better control.
How long does metal garden edging last?
With proper installation, metal edging lasts 15–25 years. Corten steel lasts longer when partially exposed and not buried. Avoid acidic or wet soils to maximize lifespan.
Is metal edging pet-safe?
Yes, when installed correctly. Ensure stake tops are flush or below the surface and cover sharp corners. Rounded-top edging options are available for high-traffic pet areas.
Key Takeaways for Installing Metal Garden Edging
Installing metal garden edging is a high-impact DIY project that defines your landscape with clean, lasting lines. By choosing the right method—trenching for precision or hammering for speed—removing factory stakes safely, and securing with properly angled stakes, you’ll achieve a professional finish in just a few hours.
Remember to bury edging 2 inches deep for weed control, keep 2 inches above ground to hold mulch, and never bury rusted steel. With minimal maintenance, your metal edging will suppress grass, prevent erosion, and enhance your yard’s curb appeal for years.