
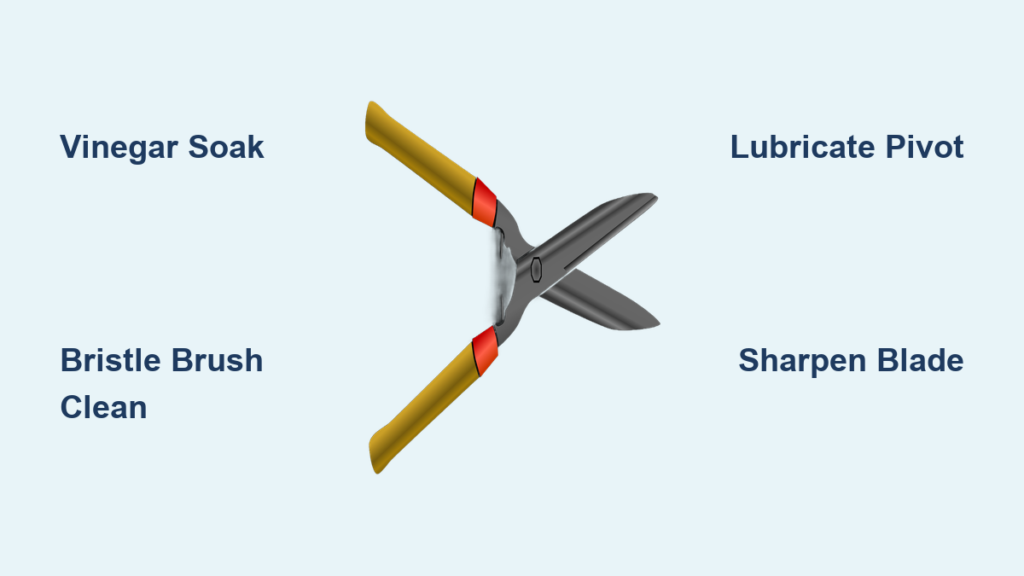
Garden shears that stick, rust, or crush stems instead of cutting cleanly are a sign they need attention. Over time, exposure to sap, soil, and moisture leads to grime buildup, rust, and dull blades—compromising both plant health and tool performance. The good news is that cleaning garden shears doesn’t require special equipment or expensive products. With a simple 24-hour vinegar soak, a bristle brush, and proper lubrication, you can restore your shears to peak condition. This guide shows you how to remove rust, clean every pivot point, sharpen blades safely, and prevent disease transmission—all using affordable household supplies.
You’ll learn a complete maintenance routine backed by proven methods: dissolving corrosion with white vinegar, choosing the right oil, avoiding common sharpening mistakes, and setting a seasonal schedule. Whether you’re prepping for spring pruning or reviving neglected tools, these steps will extend your shears’ life and protect your plants from damage and disease.
Remove Rust and Grime with a Vinegar Soak
White vinegar is one of the most effective, accessible solutions for cleaning garden shears. Its mild acidity breaks down rust, mineral deposits, and dried plant sap without harming the metal. To start, fully submerge your shears in a container of undiluted white vinegar. Let them soak for 24 hours—this gives the vinegar enough time to penetrate and loosen stubborn buildup. After soaking, remove the shears and use a stiff bristle brush dipped in vinegar to scrub all surfaces. Focus on blade edges, hinge areas, and crevices where debris accumulates. Most seasonal grime comes off in under five minutes of scrubbing. For particularly tough spots, repeat the soak or extend the time slightly.
Clean Every Pivot and Crevice Thoroughly
Don’t overlook small parts like the pivot screw or spring mechanism—these areas trap dirt and moisture, leading to stiff operation. After scrubbing, wipe down all surfaces with a microfiber cloth to remove loosened residue and dry the metal quickly, preventing immediate re-rusting. Open and close the blades while wiping to expose hidden areas. If your model allows, slightly loosen the pivot screw to clean inside the joint, then tighten it securely once finished. A thorough clean ensures smooth action and prevents premature wear.
Lubricate Blades and Joints for Smooth Operation

Once your shears are clean and completely dry, lubrication is essential. Oil prevents new rust, reduces friction in moving parts, and keeps the mechanism functioning smoothly. Apply a few drops of lubricating oil—such as sewing machine oil or mineral oil—along each blade and directly into the pivot point. Work the handles back and forth to distribute the oil throughout the mechanism. Then, use a clean microfiber cloth to wipe away any excess. Leaving too much oil can attract dust and debris, which may gum up the blades over time. A light, even coat is all you need for lasting protection.
Choose the Right Oil for Long-Term Protection
Not all oils are suitable for garden tools. Avoid WD-40 and heavy greases—they can dry out or attract dirt. Instead, use lightweight options like mineral oil or sewing machine oil, which penetrate well and resist evaporation. These oils are gentle on metal and won’t damage rubber grips or plastic components. After oiling, store your shears in a dry place to maintain their condition between uses.
Sharpen Blades for Clean, Precise Cuts
Even after cleaning, dull blades will crush plant stems instead of slicing cleanly—damaging plants and increasing the risk of disease. Sharpening restores cutting precision. Use a handheld sharpener or sharpening stone designed for small tools. Before starting, secure the shears firmly—clamp them in a vise or hold them steady with one hand. Only sharpen the beveled edge (typically the outer side of the blade), following the original angle. Use smooth, controlled strokes from the base to the tip. Do 5–10 passes per blade, then test the edge on a small twig.
Avoid Common Sharpening Mistakes
Never saw back and forth or apply excessive pressure—this can roll or chip the blade edge. Most garden shears have a single-bevel design, so avoid sharpening both sides unless specified. After sharpening, check blade alignment: when closed, the blades should meet evenly without gaps. If one side sticks out, adjust the pivot screw. Re-sharpen as needed, especially after heavy pruning sessions.
Prevent Disease Transmission Between Plants
Dirty shears can spread fungi, bacteria, and viruses from one plant to another. Sap, soil, and plant debris harbor pathogens that enter fresh cuts. Cleaning after each use—or at least between different plant types—reduces the risk. While some gardeners use bleach or alcohol for disinfection, these can damage metal over time. Bleach causes corrosion; alcohol may leave mineral residue. Instead, rely on mechanical cleaning with vinegar and scrubbing, which effectively removes biological contaminants without harming your tools.
Skip Harsh Disinfectants for Routine Care
If you must disinfect—such as after trimming diseased plants—use a diluted solution (1 part bleach to 9 parts water) briefly, then rinse thoroughly and dry immediately. Follow with oiling to counteract corrosion. However, for regular maintenance, vinegar cleaning alone is safer and sufficient.
Set a Maintenance Schedule for Long-Lasting Tools
Don’t wait until your shears are stuck or rusted. A simple routine keeps them ready for action. Clean and sharpen before each major pruning session—whether it’s spring cleanup, summer shaping, or fall prep. At minimum, give them a full refresh at the start and end of the growing season. The entire process—soak, scrub, oil, sharpen—takes less than 30 minutes but pays off in performance and longevity.
Make Tool Care Part of Your Gardening Routine
Treat maintenance like watering or weeding: a small task that prevents bigger problems. Keep your cleaning supplies—vinegar, brush, oil, sharpener—in the same shed or drawer as your shears for easy access. Consistent care means cleaner cuts, healthier plants, and tools that last for years.
Restore Spring Tension for Proper Function
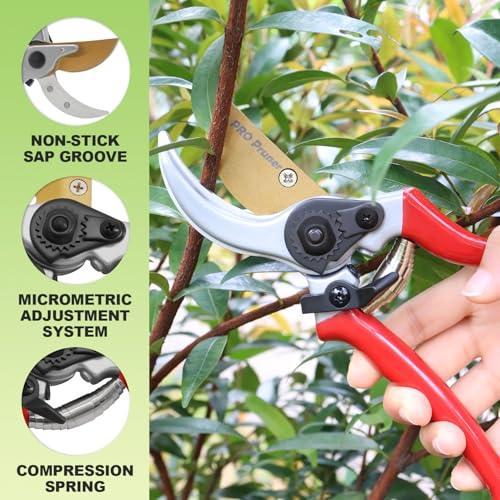
Over time, the spring that opens your shears can weaken or become misaligned. If the blades don’t snap back open smoothly, try this fix: fully open the shears and gently bend the spring slightly outward with your fingers or pliers. Test the action and adjust incrementally. Avoid over-bending, which can break the metal. If the spring is cracked or corroded beyond repair, consider replacing it or upgrading to a new pair.
When to Repair vs. Replace Garden Shears
Some wear is normal, but if blades are deeply pitted, cracked, or no longer align properly, replacement may be more practical than repair. However, most quality shears can be revived with consistent cleaning, oiling, and sharpening—often extending their life by many seasons.
Essential Tools and Supplies You Need
You don’t need a full workshop to maintain garden shears. Here’s what works best:
• White vinegar – Dissolves rust and mineral buildup
• Bristle brush – Scrubs blades and joints effectively
• Microfiber cloth – Dries and polishes without scratching
• Lubricating oil – Use sewing machine or mineral oil
• Handheld sharpener or sharpening stone – Restores blade edge
Keep these supplies labeled and stored near your tools for quick touch-ups.
Frequently Asked Questions About Cleaning Garden Shears
How often should I clean my garden shears?
Clean your shears after heavy use or at least at the beginning and end of each growing season. For best results, wipe them down after each use and do a full vinegar soak and oiling every few months.
Can I use bleach to disinfect garden shears?
Yes, but only occasionally and in a diluted form (1:9 bleach to water). Always rinse and dry thoroughly afterward, then apply oil to prevent corrosion. For routine cleaning, vinegar and scrubbing are safer and just as effective.
Why do my garden shears keep rusting?
Rust forms when moisture is left on metal. Always dry your shears completely after cleaning or use, and apply a light coat of oil to protect the blades and pivot points.
Should I sharpen both sides of the blade?
No—most garden shears have a single-bevel blade. Only sharpen the beveled (angled) side. Sharpening both sides can ruin the cutting edge and alignment.
What’s the best way to remove stubborn sap from blades?
Soak the blades in white vinegar for 24 hours. The acid breaks down sap and grime. After soaking, scrub with a bristle brush for complete removal.
Can I clean garden shears without taking them apart?
Yes, but cleaning around the pivot screw and spring is harder. If possible, slightly loosen the screw to access hidden areas, then tighten it securely after cleaning.
Key Takeaways for Keeping Garden Shears in Top Condition
Cleaning garden shears is a simple, low-cost task that significantly improves performance and plant health. A 24-hour vinegar soak removes rust and grime, while a bristle brush ensures every crevice is clean. Lubricate with mineral or sewing machine oil to prevent future corrosion and ensure smooth operation. Always sharpen the beveled edge only, using steady strokes, and check blade alignment afterward. Avoid harsh disinfectants for routine care—vinegar cleaning is safer and effective.
Make maintenance a habit: clean and sharpen before major pruning sessions and at seasonal transitions. With consistent care, your garden shears will deliver clean cuts, resist rust, and last for years—keeping your garden healthy and thriving.



