Walking across a sloped yard shouldn’t feel like a mountain climb. Uneven terrain can make your garden difficult to navigate, especially when carrying tools, groceries, or gardening supplies. Garden stairs solve this problem by creating safe, stable access between different levels while adding structure and charm to your landscape. Whether you’re connecting a patio to a lower lawn or stepping through a wooded hillside, building garden stairs is a practical DIY project that enhances both usability and curb appeal. In this guide, you’ll learn how to measure your slope, calculate step dimensions, choose durable materials, build a solid foundation, and install long-lasting stairs that blend seamlessly into your outdoor space.
Calculate the Right Step Dimensions for Comfort and Safety
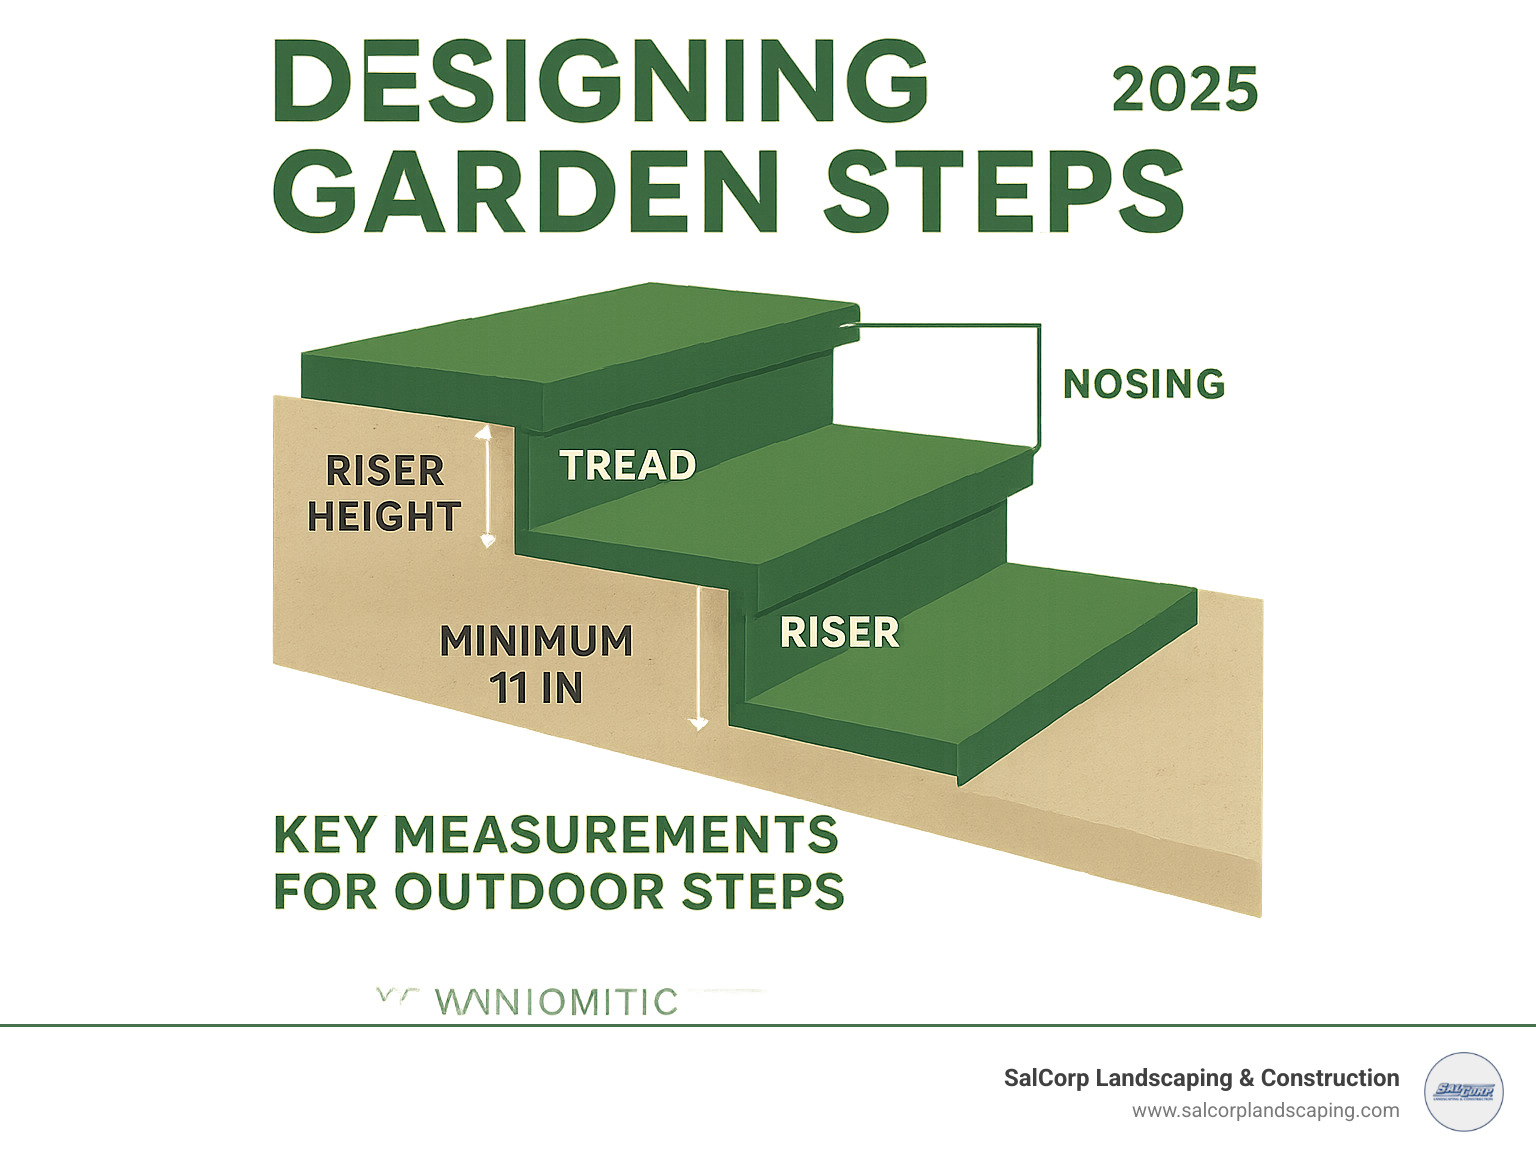
Measure Total Rise and Run Accurately
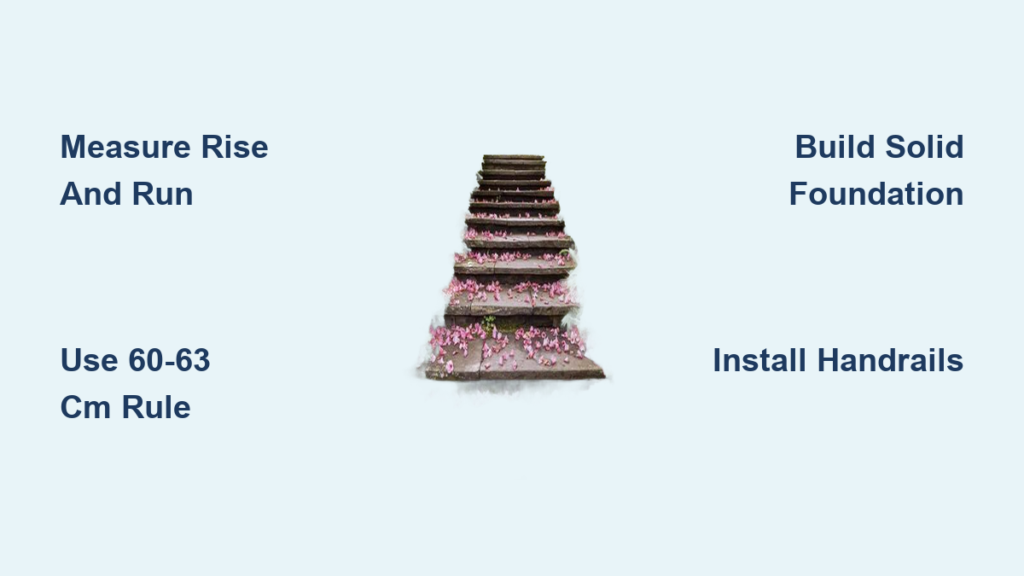
Start by measuring the total rise—the vertical distance from the top landing to the bottom. Use a long level, straight board, and tape measure: place the board horizontally from the upper surface, then measure straight down to the lower level. This number determines how many steps you’ll need. Next, estimate the run, or horizontal length of the staircase. Steeper slopes mean shorter runs, while gentle inclines require longer footprints. Accurate measurements prevent awkward, uneven steps and ensure comfortable walking.
Use the 60–63 cm Rule for Ideal Step Proportions
For comfortable garden stairs, follow the standard formula: twice the riser height plus the tread depth equals 60–63 cm (24–25 in)—matching the average human stride. Most outdoor stairs use a 15 cm (6 in) riser and 30–40 cm (12–16 in) tread. To find the number of steps, divide the total rise by your target riser height. For example, a 90 cm rise ÷ 15 cm = 6 steps. Always round to a whole number and adjust the riser height slightly if needed—but keep every step exactly the same height. Inconsistent risers are a major tripping hazard.
Determine Stair Width and Landing Spacing
Aim for a minimum width of 90 cm (36 in) to allow comfortable passage. For two people or garden equipment, go wider—120 cm (48 in) or more. If your staircase has more than 10–14 steps, include a level landing at least as deep as the stair width. Landings provide rest points, break up long climbs, and allow for direction changes on curved designs. Also, check local building codes—some require permits or specific dimensions for stairs over 30 cm (12 in) high.
Choose the Best Materials for Your Garden Stairs
Natural Stone for Elegant, Long-Lasting Steps
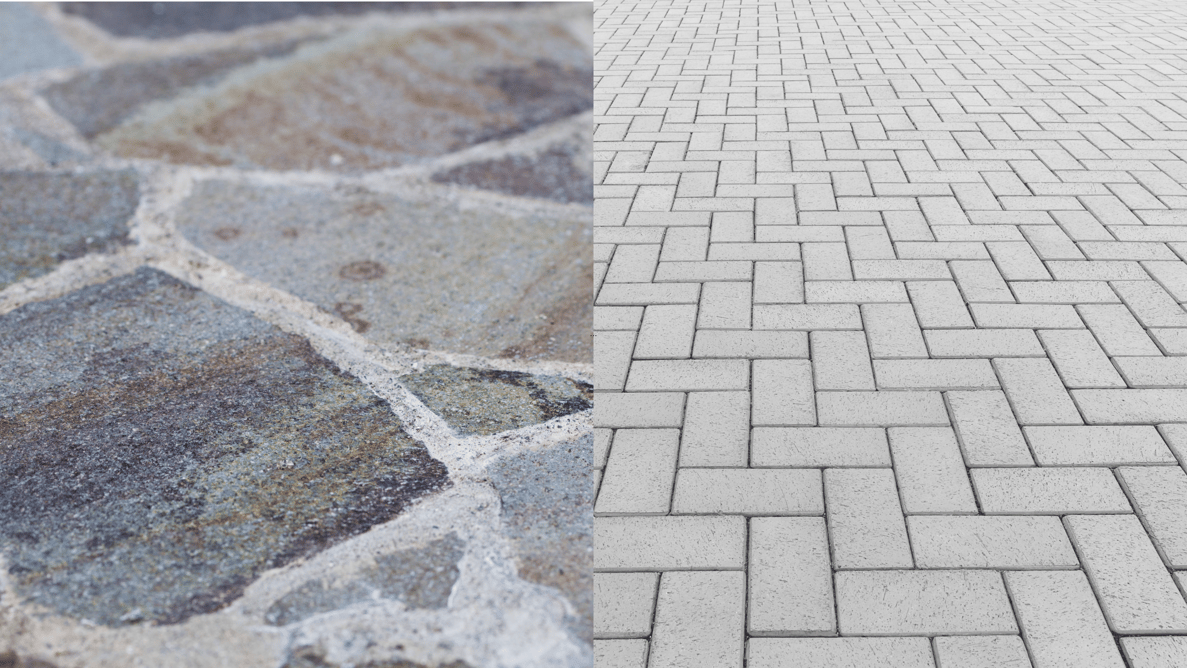
Flagstone, bluestone, or limestone steps blend naturally into gardens and last decades with minimal upkeep. These stones offer excellent slip resistance when textured and develop a beautiful patina over time. However, they’re heavy and often require professional help or mechanical aids for installation. Irregular shapes may need cutting, and porous types should be sealed every 2–3 years to resist freeze-thaw damage and stains. Ideal for high-end landscapes where appearance matters most.
Concrete Pavers for Affordable, DIY-Friendly Durability
Concrete pavers are a top choice for homeowners. They’re budget-friendly, come in realistic stone-like finishes, and have uniform sizes that simplify layout. Install them on a compacted gravel base with sand leveling. If one paver cracks, it can be replaced individually. Choose textured or anti-slip finishes to prevent accidents when wet. Avoid low-density pavers that fade or crack in cold climates—opt for freeze-thaw-rated versions.
Reclaimed Brick for Classic, Timeless Appeal
Brick steps add traditional charm and work well in formal or historic gardens. Laid in herringbone or running bond patterns, they offer good traction and moderate durability. Use Type S mortar for structural strength and ensure proper drainage to prevent erosion. Over time, moss may grow on smooth bricks—regular cleaning or sealing helps. Replace damaged bricks individually and repoint mortar joints every few years to maintain stability.
Wood and Timber for Warm, Rustic Garden Steps
Cedar, redwood, or pressure-treated lumber creates inviting steps that suit woodland or cottage gardens. Build timber frames or stringers, then attach decking boards. Wood is easier to cut and shape than stone, making it ideal for curved or custom designs. But it demands maintenance: reseal every 2–3 years to prevent rot and warping. Avoid smooth wood in shady, damp areas—it becomes slippery. Composite decking is a low-maintenance alternative, though more expensive upfront.
Gravel-Filled Steps for Low-Cost, Permeable Access
For informal paths, use timber or stone edging to form step shapes, then fill with compacted gravel or crushed stone. This permeable option drains well and costs less than solid materials. It’s perfect for temporary access or low-traffic zones. The downside? Gravel shifts over time and needs topping off. Not ideal for steep slopes or high foot traffic. Use angular gravel (not round stones) to reduce movement and improve stability.
Build a Solid Foundation to Prevent Sinking and Shifting
Excavate and Level the Base Properly
Remove topsoil, roots, and organic matter down to firm subsoil. Dig each step location 15–20 cm (6–8 in) deep. The base must slope 1–2% away from structures to shed water. For cut-and-fill stairs, carve horizontal platforms into the slope, using excavated soil to build up lower treads. Compact the soil thoroughly with a hand tamper or plate compactor. Soft, loose soil leads to sinking steps and tripping hazards.
Install Geotextile Fabric and Crushed Stone Base
Lay landscape fabric over the entire excavated area. This stops weeds and prevents fine soil from mixing with the base layer. Add 10–15 cm (4–6 in) of crushed stone, such as Class II road base. Spread in 5 cm (2 in) layers, compacting each with a plate compactor. A solid, well-drained base prevents shifting and frost heave. In cold climates, extend the gravel below the frost line—typically 30–120 cm (1–4 ft) deep depending on your region.
Construct the Steps with Precision and Stability

Set the Bottom Step First as Your Reference Point
Always start with the lowest step—it sets the level for all others. Place your material (stone, paver, or timber) and check for level side-to-side and front-to-back. The tread should slope slightly forward (1/8 in per ft) to drain water. Adjust by adding or removing base sand or gravel. Tap gently with a rubber mallet to settle it. For stone slabs, ensure full contact underneath—no rocking.
Install Upper Steps with Consistent Riser Height
Work upward, using a story pole—a marked board showing each step’s rise—to maintain exact riser height. This avoids cumulative measuring errors. For pavers or stone, stack with mortar or dry-fit on sand. For timber steps, build box frames, anchor them with rebar, then backfill with gravel. Keep each tread aligned with your string lines. Double-check level and spacing before finalizing.
Backfill and Secure Each Step Against Movement
Behind each riser, pack compacted gravel or soil in layers. This supports the step and prevents backward movement. For timber, use galvanized spikes or rebar to pin frames into the slope. On steep terrain, install deadmen anchors—horizontal timbers extending into the hillside—to resist sliding. Ensure drainage holes or weep pipes are clear if using retaining walls.
Add Safety and Aesthetic Enhancements

Install Handrails for Stairs Over 30 cm High
Any staircase with more than three steps or over 30 cm (12 in) in height should have handrails. Mount them 85–95 cm (33–37 in) above the tread nose. Use pressure-treated wood, metal, or composite posts anchored into concrete footings. Attach securely with lag bolts. For wide stairs (over 120 cm), install rails on both sides. Curved rails match arched staircases; simple square posts suit modern designs.
Improve Traction with Non-Slip Surfaces
Outdoor steps get wet, icy, and mossy. Prevent slips with textured materials, anti-slip tape, or grit coatings. Apply non-slip paint to wood or concrete. Embed crushed granite in the top layer of concrete. For pavers, choose cobbled or tumbled finishes. Avoid smooth stone in shady areas. Trim overhanging plants so they don’t obscure step edges.
Light the Stairs for Nighttime Safety
Low-voltage LED lights make stairs safe after dark. Options include:
– Step-nose lights recessed into risers
– Path lights along the edges
– Solar-powered stakes for easy installation
– Motion-sensor floodlights at landings
Bury wiring in conduit or use solar lights to avoid trenching. Aim light downward to reduce glare and light pollution.
Maintain Your Garden Stairs for Long-Term Performance
Clean and Inspect Regularly
Sweep steps weekly to remove leaves and debris. Check monthly for loose pavers, cracks, or shifting. Trim plants that encroach on treads. In spring, inspect for frost damage—look for cracked concrete, lifted stones, or rotting wood. Clear drainage channels and weep holes to prevent water buildup.
Repair Damage Promptly
Fix small issues before they worsen. Repoint crumbling mortar in brick steps. Replace cracked pavers or chipped stone. For wood, cut out rotted sections and install new boards. Use epoxy filler for stone chips. Reapply sealant to porous materials every 2–3 years. In winter, use calcium chloride-based ice melt—avoid rock salt, which damages concrete and kills plants.
Avoid Common Garden Stair Building Mistakes
Never Skip Base Preparation
The #1 cause of failing stairs is poor compaction. Skipping gravel or using un-compacted soil leads to sinking, tilting, and tripping hazards. Spend extra time on the base—it’s the foundation of everything. Rent a plate compactor if needed.
Never Mix Riser Heights
Even a 1 cm difference between steps breaks walking rhythm and increases fall risk. Use a story pole to mark all risers from a single reference point. Measure from the bottom up, not step to step.
Avoid Ignoring Drainage
Water pooling under or behind steps causes erosion and frost heave. Ensure treads slope forward, install French drains behind retaining walls, and use permeable joint sand for pavers. At the base, add a gravel splash pad or drainage swale to redirect runoff.
Frequently Asked Questions About How to Make Garden Stairs
What is the ideal riser height for garden steps?
The ideal riser height is 15 cm (6 in). This matches the natural stride and provides comfortable climbing. Riser heights between 10–18 cm (4–7 in) are acceptable, but all steps must be exactly the same height to prevent tripping.
How do I prevent my garden stairs from sinking?
Prevent sinking by excavating to stable subsoil, installing geotextile fabric, adding 10–15 cm of compacted crushed stone, and ensuring proper drainage. In cold climates, extend the base below the frost line to prevent heaving.
Can I build garden stairs on a steep slope?
Yes, but use retaining wall techniques or deadman anchors to stabilize steps. For very steep slopes, consider terracing or hiring a professional. Always ensure proper backfilling and drainage to prevent sliding.
What is the best material for garden steps in a shady, damp area?
Choose textured stone, concrete pavers with anti-slip finish, or composite decking. Avoid smooth wood or brick, which become slippery when moss grows. Ensure steps slope slightly forward to shed water and reduce pooling.
How wide should garden stairs be?
Aim for at least 90 cm (36 in) for comfortable single-person use. For two people or garden equipment, go 120 cm (48 in) or wider. Wider stairs feel more inviting and are easier to maintain.
Do garden stairs need handrails?
Yes, if the total rise exceeds 30 cm (12 in) or there are more than three steps. Handrails should be 85–95 cm (33–37 in) high and installed on both sides for stairs over 120 cm wide. They improve safety, especially for children and older adults.
Key Takeaways for Building Durable Garden Stairs
Building garden stairs transforms a challenging slope into a functional, beautiful feature. Start with accurate measurements and consistent step dimensions using the 60–63 cm rule. Choose materials that match your budget, climate, and style—natural stone for elegance, pavers for value, or gravel for budget access. Never skip the foundation: compacted gravel and geotextile fabric prevent sinking. Install steps from the bottom up, maintain exact riser heights, and add handrails and lighting for safety. With proper planning and maintenance, your garden stairs will provide safe, attractive access for years. Begin with a small section, follow the steps, and enjoy a more usable, inviting outdoor space.