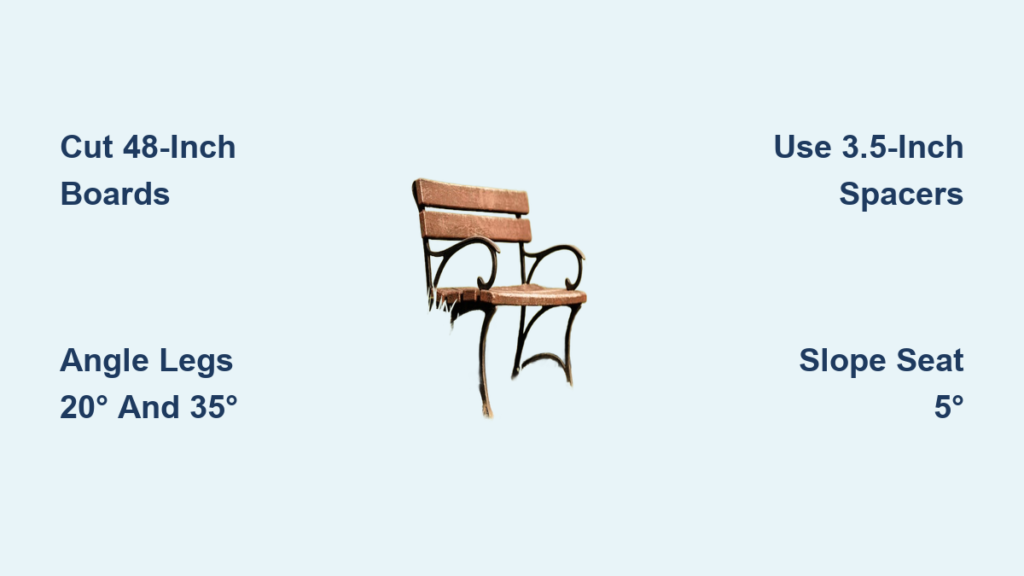
Building a garden bench doesn’t have to take days or cost hundreds. With just four 2×6 boards, a circular saw, speed square, and drill, you can build a durable, attractive outdoor bench in about half an hour. Inspired by the Leopold bench but simplified for beginners, this design uses smart angles and basic screws—no complex joinery or expensive tools. Whether you’re adding seating to a patio, fire pit, or garden nook, this guide shows you exactly how to make a garden bench that’s strong, comfortable, and weather-ready.
You’ll learn how to cut precise angles with a speed square, assemble the frame without wobbling, and create a slightly sloped seat and angled backrest for both comfort and drainage. Every piece fits together cleanly using scrap wood spacers and exterior screws. By the end, you’ll have a handmade bench that looks like it came from a catalog—but costs less than dinner for two.
Let’s get building.
Gather Materials and Tools for Fast Assembly

Before making any cuts, collect all supplies. This project is designed for affordability and speed using common hardware store materials.
What You’ll Need
• Four 8-foot 2×6 pressure-treated or cedar boards (for weather resistance)
• 12 exterior-grade 3-inch wood screws (stainless or coated)
• Circular saw (set to ~2.5 inches depth for clean 2×6 cuts)
• Speed square (critical for accurate 20°, 35°, 40°, and 45° angle marking)
• Tape measure (for consistent 48-inch, 38.5-inch, and 19.375-inch measurements)
• Straight edge or scrap board (to guide straight cuts)
• Pencil (for marking lines)
• Drill/driver (for pre-drilling and driving screws)
• Clamps (optional but helpful for alignment)
Pro Tip: A miter saw speeds up angled cuts, but it’s not required. The speed square makes angle layout fast and foolproof with a circular saw.
All parts are cut from standard 8-foot boards with minimal waste. Total material cost: under $30 at most home centers.
Cut Four 48-Inch Boards for Seat and Backrest
Start by cutting the long panels that form the seat and backrest.
Measure and Mark Long Panels
- From two of the 8-foot boards, cut two 48-inch seat boards.
- From the other two, cut two 48-inch backrest boards.
Use your tape measure and speed square to mark each 48-inch line across the board. Align the square to ensure a perfect 90° cut.
Clamp a straight edge along the line as a guide for your circular saw. Set the blade depth so it cuts about 1 inch deeper than the 1.5-inch thickness of the 2×6—this prevents damage to your work surface.
Make clean, straight cuts. Set aside the four 48-inch boards. Save the leftover ends—they’ll be used for leg spacers.
Visual Cue: After cutting, you should have four identical boards ready for assembly. Label them if needed: “Seat Front,” “Seat Back,” “Backrest Top,” “Backrest Bottom.”
Cut Long Legs with 20° and 35° Angles

The long legs support the backrest and seat at the proper height and angle.
Mark and Cut Compound Angles on Side Supports
Each long leg has two angled cuts:
– Top: 20° angle (for backrest alignment)
– Bottom: 35° angle (for stability and joint fit)
Steps per leg:
- On one end of an 8-foot 2×6, use the speed square to mark a 20° angle across the board.
- Measure 38.5 inches from the tip of the 20° point along the outer edge.
- At that mark, set the speed square to 35° and draw a line across the board.
- Cut along both lines with the circular saw.
Repeat to create a second identical long leg.
Visual Cue: The finished leg looks like a parallelogram—angled at both ends, with a total outer length of 38.5 inches.
These legs will connect to the short front legs and support the seat and backrest at a comfortable height.
Cut Short Legs with 40° and 45° Angles

The short legs support the front of the seat and create a gentle downward slope.
Create Front Support with Comfort Slope
Each short leg has:
– Top: 40° angle
– Bottom: 45° angle
Steps:
- On a fresh 2×6, mark a 40° angle at one end using the speed square.
- Measure 19.375 inches (19⅜”) from the tip of the angled end along the long edge.
- At that point, mark a 45° angle across the board.
- Cut both lines.
Repeat for the second short leg.
Why These Angles? The 40° and 45° cuts create a 5° downward slope from front to back—improving comfort and helping rainwater run off the seat.
These legs are about half the height of the long legs and will be joined using a spacer block for strength.
Make Support Spacers from 45° Offcuts

Use scrap wood to build strong, aligned joints between legs.
Repurpose the 45° Cut for Structural Reinforcement
After cutting the short leg, you’ll have a triangular offcut with a 45° edge.
- Take that piece and measure 3.5 inches along the 45° edge from the corner.
- Use the speed square to mark a 90° cut across the piece at that point.
- Cut it off with the circular saw.
This small block—about 3.5 inches long—fits between the long and short legs at the seat joint.
Function: The spacer aligns the legs correctly, prevents wobbling, and increases screw holding power by adding more wood at the joint.
Keep two of these spacers—one for each side of the bench.
Taper Long Legs for Level Backrest Alignment
To make the backrest sit flat and look clean, cut a taper on the back edge of the long legs.
Create a Flat Surface for Backrest Mounting
- On the back side of the long leg (opposite the 20° top cut), measure 1.5 inches down from the top edge.
- From that point, measure 12.75 inches (12¾”) straight down the board.
- Use a straight edge to connect the two points with a pencil line.
- Cut along the line with the circular saw.
This creates a flat, angled surface where the backrest boards will attach.
Result: The taper ensures the backrest leans back slightly (~100° from horizontal), giving ergonomic support while keeping the top edge level.
Repeat on the second long leg.
Assemble One Side Frame at a Time
Build each side separately to ensure symmetry and stability.
Join Long Leg, Short Leg, and Spacer Block
- Lay the short leg flat on the ground (or on a scrap board to simulate ground contact).
- Position the long leg so its back edge aligns with the front edge of the short leg.
- Place the 3.5-inch spacer block between them at the joint.
- Clamp or hold in place.
- Pre-drill two holes through the long leg into the spacer and short leg.
- Drive two 3-inch screws to secure.
Why Pre-Drill? Prevents splitting the end grain of the short leg and spacer.
Now attach the first 48-inch seat board:
– Align the back edge of the seat board with the front edge of the long leg.
– Pre-drill four holes through the long leg into the seat board.
– Drive four 3-inch screws to lock it in place.
Repeat to build the second side frame.
Check Alignment: Place both frames on a flat surface. Compare leg angles and seat height—they should be mirror images.
Attach Both Seat Boards with Drainage Gap
With both side frames complete, install the seat surface.
Secure Top Seat Panels
- Place the two 48-inch seat boards on top of the frame.
- Align the front edge of the seat with the front edge of the short legs.
- Position the second board directly behind the first, leaving a ½-inch gap between them.
- From the outside, drive two 3-inch screws per board through the long legs into the seat boards.
Tip: Angle the front screws slightly downward to avoid hitting the thin front edge of the short leg.
Use clamps to hold boards in place before screwing. Keep the gap consistent with a scrap block.
Result: A strong, slightly sloped seat that sheds rain and feels comfortable.
Install Backrest Boards at a Comfortable Angle
Now add the backrest for full upper-body support.
Mount Tapered Back Support Panels
- Flip the bench onto its side.
- Position the two 48-inch backrest boards against the tapered edge of the long legs.
- Align the bottom edge of the backrest with the top of the taper cut.
- Leave a ½-inch gap between the two backrest boards.
- Drive two 3-inch screws per board through the long leg into the backrest.
Check Level: Use a small level or eyeball it—top edges should be even.
The 20° top angle and 1.5-inch taper ensure the backrest sits flat and looks polished.
Repeat on the other side.
Pro Tip: Pre-drill screw holes to prevent splitting the backrest ends.
Frequently Asked Questions About Garden Benches
How long does it take to build this garden bench?
Most builders complete the bench in 20–30 minutes after cutting all pieces. With prep and finishing, total time is under one hour.
Can I use a miter saw instead of a circular saw?
Yes. A miter saw makes angled cuts faster and more precise, but it’s not required. The speed square works perfectly with a circular saw for accurate layout.
What wood should I use for outdoor durability?
Use pressure-treated pine or cedar. Both resist rot and insects. Cedar has a nicer natural look and lasts longer but costs more.
Why does the seat slope slightly?
The 5° front-to-back slope improves comfort by supporting natural posture and helps rainwater drain off the seat quickly.
Do I need to seal the wood?
Yes. Even pressure-treated wood benefits from a water-repellent sealant or outdoor stain. Apply annually to extend the bench’s life.
Can I paint or stain the bench?
Absolutely. Paint gives a clean, modern look. Stain enhances the wood grain. Let the finish dry 24 hours before use.
Key Takeaways for Building Your Garden Bench
You now know how to make a garden bench that’s affordable, durable, and quick to build. Using just four 2x6s and three basic tools, you’ve created a functional outdoor seat that withstands weather and supports comfort. The smart use of angles eliminates complex joints, while the spacer block ensures rock-solid stability.
The 5° seat slope and ½-inch gaps between boards improve drainage and comfort. The tapered backrest gives ergonomic support and a clean finish. With minimal investment, you’ve added lasting value to your outdoor space.
Next Step: Build a matching side table or planter box to complete your garden seating area.