
Your garden sprayer builds no pressure, leaks from the handle, or sprays weakly despite pumping hard. Before you replace it, know this: over 90% of sprayer issues stem from worn seals, dried lubrication, or clogs—all fixable with a simple disassembly. Taking apart a garden sprayer is a straightforward DIY task that takes under 20 minutes with basic tools. This guide shows you exactly how to dismantle, clean, inspect, and reassemble your sprayer—whether it’s a Chapin, Solo, or Smith model—so you can restore full pressure and spray performance.
You’ll learn how to remove the pump cylinder, inspect the check valve, clear clogged tips, and lubricate seals properly. By the end, you’ll be able to diagnose common failures and fix them confidently—saving money and extending your sprayer’s life.
Diagnose the Problem Before Disassembly
Identify the issue first to avoid unnecessary teardown. Specific symptoms point to precise internal failures:
- No pressure when pumping? Likely a dislodged or dried-out rubber seal at the pump base.
- Leaks at the tank cap or wand? Damaged or missing O-rings.
- Pressure builds but no spray? Clogged shut-off valve, pickup tube, or spray tip.
- Pump feels stiff or binds? Lack of lubrication or internal debris.
- Loses pressure quickly? Failed check valve or plunger seal.
For example, if the plunger drops instead of building resistance, the base seal has likely popped out. If water sprays weakly, focus on the wand and tip. Accurate diagnosis saves time and ensures you fix the real problem.
Why Pressure Won’t Build?
Most no-pressure issues trace back to the pump cylinder seal. This rubber gasket sits at the base of the plunger tube and creates a vacuum during the upstroke. If it’s dry, cracked, or dislodged, air leaks in and prevents pressure buildup.
Pro Tip: Before disassembling, pump the sprayer with the cap slightly loose. If it builds pressure when loose but not when tight, the issue is likely the top O-ring or tank cap seal.
What Causes Leaks at Connections?
Leaks from the wand, hose, or tank neck usually mean damaged or missing O-rings. These small rubber rings seal threaded or snap-fit joints. Even a tiny nick or twist can cause leaks. Inspect all O-rings during disassembly—especially the one at the wand base and pressure relief valve stem.
Gather the Right Tools and Supplies
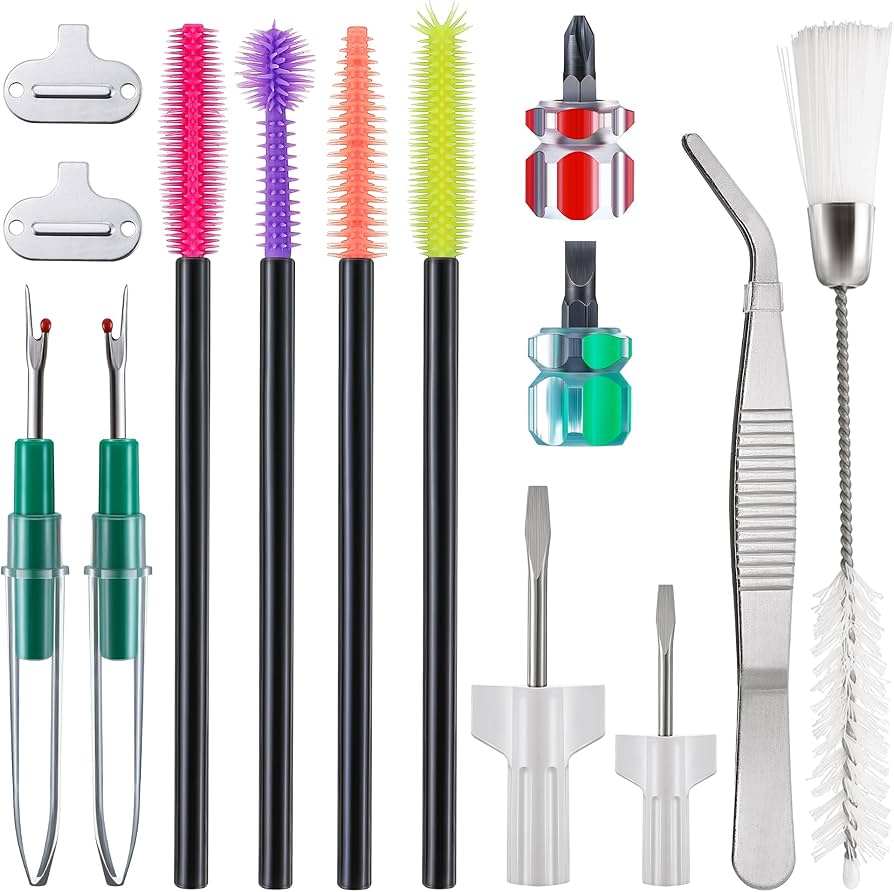
Essential Tools for Sprayer Disassembly
You don’t need specialized equipment. Most repairs use common household or hardware store items:
• Flathead screwdriver – For prying side tabs on pump cylinders
• Small pick or dental tool – Removes stubborn O-rings from tight spaces
• Bent wire hook – Retrieves lost seals from deep inside the plunger tube
• Bottle brush – Cleans the tank interior and cylinder walls
• Toothbrush – Scrubs clogged valves and filters
• Q-tips and clean rags – Apply lubricant and wipe residue
• Compressed air with air chuck – Clears clogs in narrow passages
• Paperclip or carb cleaner nozzle – Unclogs spray tip holes
• Rubbing alcohol – Cleans gummy residue from O-rings and seals
Keep these ready—you’ll use them in every repair.
Choose the Correct Lubricant
Using the wrong grease destroys seals. Always use:
• Silicone grease – Safe for rubber and plastic; ideal for O-rings, plunger seals, and check valves
• Solo Superior Grease (part #9850) – Recommended for Solo models; non-water soluble
• 3-in-1 oil or bike chain oil – Only for metal piston bores (2–3 drops)
• White lithium grease – Acceptable alternative for plastic components
Warning: Never use Vaseline, automotive grease, or petroleum-based products—they degrade rubber and cause leaks.
Remove the Pump Cylinder Assembly
Release Side Tabs on Smith and Similar Models
Many sprayers, including Smith models, secure the pump with two side tabs:
- Insert a flathead screwdriver into the gap on one side.
- Gently pry outward to release the tab.
- Flip the sprayer and repeat on the opposite side.
- Lift the entire pump assembly straight out.
If your model lacks tabs, look for a twist-lock mechanism—rotate the cylinder counter-clockwise to unlock.
Extract the Plunger and Inspect Key Components
Once the pump is free:
- Pry off the top cap if present.
- Pull the plunger straight out of the cylinder.
- Inspect these parts:
• Large top O-ring – Seals the cylinder to the tank cap
• Plunger seal – Creates pressure during pumping
• Check valve – Located at the base, prevents backflow
If the plunger sticks, work it gently. Forcing it can crack plastic parts.
Access and Inspect the Check Valve

Remove the Base Check Valve by Brand
The check valve is critical for pressure retention. Its location varies:
• Chapin models: Pop the valve out from the bottom of the barrel.
• Solo models: Pull out the umbrella valve from the cylinder base.
• Smith models: Remove the silicone check valve from the plunger tube base.
Inspect for cracks, warping, or stiffness. It should flex slightly and seal tightly. Clean the seat with a dry rag before reinserting.
Pro Tip: If the valve won’t stay seated, apply a tiny dab of silicone grease to help it lock in place.
Disassemble the Wand and Spray Tip

Disconnect the Wand and Check the O-Ring
- Unscrew or unclip the wand from the hose.
- At the wand base, locate the O-ring—usually black or brown.
- Remove and inspect for cracks, pinching, or deformation.
This O-ring is a common failure point. Replace it if worn—even slight damage causes leaks.
Remove and Clean the Spray Tip O-Ring
- Unscrew the spray tip completely.
- Inside the housing, find a second O-ring.
- Use a pick to remove it carefully.
Clean both O-rings with rubbing alcohol, dry thoroughly, and lubricate lightly before reassembly.
Clear Clogged Shut-Off and Relief Valves
Take Apart the Shut-Off Valve
If pressure builds but no liquid sprays:
- Remove the shut-off valve from the wand.
- Unscrew the spring cap and remove the green lever.
- Extract the valve cup and internal O-ring.
Check for residue buildup—one repair guide calls it schmutz—that blocks flow. Use a toothbrush and warm water to clean all parts.
Flush the System with Compressed Air
For stubborn clogs:
- Attach an air chuck to the pump inlet or hose end.
- Blow air through the system to expel debris.
- Repeat until no residue comes out.
This often reveals dried fertilizer or herbicide—especially if the sprayer wasn’t flushed after use.
Remove and Service the Pressure Relief Valve
Unscrew and Inspect the Valve Stem
- Turn the pressure relief valve counter-clockwise to remove.
- Pull off the lower housing to access the O-ring on the stem.
- Check for pinching, wear, or cracks.
When reinstalling:
• Seat the O-ring in the recess on the stem.
• Lubricate with silicone grease.
• Hand-tighten only—over-tightening cracks plastic housings.
Clean All Internal Components Thoroughly
Scrub the Tank and Cylinder
Use a bottle brush with warm, soapy water to clean:
• Inside of the tank
• Pump cylinder walls
• Pickup tube
Rinse thoroughly. Leftover residue re-clogs the system.
Clean O-Rings and Seals
For sticky or gummy O-rings:
• Soak in rubbing alcohol for a few minutes.
• Wipe clean with a rag.
• Dry completely before re-lubing.
Never use petroleum-based cleaners—they degrade rubber.
Unclog the Spray Tip
- Use a paperclip or carb cleaner nozzle to poke each spray hole.
- Flush with water to confirm flow.
- Clean threads with alcohol and dry.
A single blocked hole disrupts the entire spray pattern.
Lubricate All Moving Parts Properly

Apply Silicone Grease to Critical Seals
Never use Vaseline or automotive grease—they destroy rubber. Instead:
• Apply silicone grease to:
• All O-rings
• Plunger seal
• Check valve edges
• Threaded connections
• Use 3-in-1 oil (2–3 drops) only on metal piston bores.
• For Solo models, use Solo Superior Grease (part #9850) on gaskets.
Warning: A dry seal will pop out under pressure. Lubrication prevents failure.
Reassemble the Sprayer Correctly
Reinstall the Pump Cylinder
- Align the cylinder with the flat spots on the tank neck—it only fits one way.
- Push down firmly until seated.
- Reattach the handle and lock into place.
If your model has cylinder supports (Solo), snap them back into the tank cap before inserting the piston.
Reinsert the Plunger and Seal
- Insert the plunger seal into the cylinder top.
- Slide the plunger in smoothly.
- Ensure the large top O-ring is seated and not twisted.
A misaligned gasket causes leaks—double-check its position.
Reattach the Wand and Tip
- Reinstall the O-ring in the wand base.
- Snap or screw the wand back onto the hose.
- Reinstall the tip O-ring and screw on the nozzle.
Make sure all connections are snug but not over-tightened.
Test the Repaired Sprayer
Perform a Pressure Test
- Fill the tank 3 inches below the rim with water.
- Pump 4 times—pressure should build instantly.
- Hold for 30 seconds—no drop means the system holds.
If pressure leaks, check the check valve and plunger seal.
Conduct a Spray Test
- Pull the trigger—flow should be strong and consistent.
- Look for an even spray pattern.
- If weak, repeat air flush or inspect O-rings again.
Pro Tip: Always test with water first before adding chemicals.
Prevent Future Failures
Flush the Sprayer After Every Use
• Never leave chemicals like vinegar or copper sulfate in the tank overnight.
• Flush with clean water immediately after use.
• Drain the wand and hose completely.
Residue dries and clogs—this is the #1 cause of failure.
Store the Sprayer Properly
• Release pressure via the relief valve.
• Store empty and dry—moisture degrades rubber.
• Keep spare O-rings on hand; replace them proactively.
A well-maintained sprayer lasts years—even on a $45 Chapin Pro model.
Know When to Replace Parts
Use a Repair Kit for Full Restoration
Brands like Chapin offer complete kits with:
• Plunger seal
• Check valve
• Wand and relief valve O-rings
• Silicone grease
Replace all seals every 1–2 years, even if they look fine. Preventive maintenance beats emergency repairs.
Key Takeaways for Fixing Your Garden Sprayer
Taking apart a garden sprayer isn’t just about fixing one broken part—it’s about restoring the entire system. With basic tools, silicone grease, and 20 minutes, you can solve most issues. Whether it’s a lost seal, clogged tip, or dried O-ring, disassembly gives you full access to clean, inspect, and re-lube every component.
Remember: Fix it. Don’t throw it away. A properly maintained sprayer performs like new and saves money in the long run. Keep this guide handy, and you’ll never waste another afternoon struggling with a weak or leaking sprayer again.
Frequently Asked Questions About Garden Sprayer Repair
Why won’t my sprayer build pressure?
The most common cause is a dislodged or dried-out rubber seal at the base of the pump cylinder. Disassemble the pump, retrieve the seal with a bent wire hook, clean it, lubricate with silicone grease, and reinstall.
Can I use Vaseline on sprayer O-rings?
No. Petroleum-based products like Vaseline degrade rubber over time. Always use silicone grease, which is safe for both rubber and plastic components.
How do I unclog a spray tip?
Use a paperclip or carb cleaner nozzle to poke each hole. Flush with water to confirm flow. Clean the tip’s threads with rubbing alcohol and dry before reassembly.
Do all sprayers disassemble the same way?
Most follow the same design: a check valve at the base, plunger with seal, top O-ring, and wand O-rings. Repair procedures are largely transferable between brands like Chapin, Solo, and Smith.
How often should I replace sprayer seals?
Replace all seals every 1–2 years, even if they look fine. Proactive replacement prevents sudden failures and extends sprayer life.
What’s the best lubricant for garden sprayers?
Silicone grease is the best choice. It’s safe for plastic and rubber, doesn’t degrade seals, and lasts longer than petroleum-based alternatives. For Solo models, use Solo Superior Grease (part #9850).



