
If your garden soil dries out too fast, seedlings struggle to sprout, or containers need constant watering, peat moss could be the missing piece. This lightweight, fibrous material holds up to 20 times its weight in water, improves soil structure, and creates a sterile environment perfect for starting seeds. But it’s not a fertilizer—peat moss contains no nutrients and must be paired with compost or fertilizer. When used correctly, it transforms sandy soils, boosts container gardening success, and supports healthy root development. In this guide, you’ll learn exactly how to use peat moss in garden settings—from seed trays to raised beds—while avoiding common mistakes like over-acidification or poor drainage.
You’ll discover how to pre-soak peat moss for best results, mix it with compost and drainage materials, and tailor its use to vegetables, flowers, lawns, and hydroponic systems. We’ll also compare peat moss to coconut coir, address environmental concerns, and share expert tips for long-term soil health. Whether you’re amending garden beds or starting seeds indoors, this step-by-step guide ensures you get the most from peat moss without harming your plants or the planet.
Maximize Water Retention in Soil
Peat moss is one of the best soil amendments for holding moisture, especially in fast-draining soils or containers that dry out quickly. Its sponge-like fibers absorb and slowly release water, reducing how often you need to water.
Improve Moisture in Sandy Soils
Sandy soils let water slip through too fast, leaving plant roots thirsty. Adding peat moss increases water-holding capacity significantly. For a 10′ x 30′ garden bed, spread 1–2 inches of peat moss over the surface and mix it into the top 6–8 inches of soil. Combine it with 2–3 inches of compost to boost both moisture retention and fertility. This creates soil that stays consistently damp, supports deeper root growth, and reduces watering frequency.
Prevent Container Drying
Containers lose moisture rapidly, especially in hot weather. Adding 20–30% peat moss to potting mixes helps retain water and reduces stress on plants. This means fewer trips to the watering can and healthier growth. Always blend peat moss with perlite or coarse sand to prevent compaction and ensure roots get oxygen.
Hydrate Peat Moss Before Use
Dry peat moss is hydrophobic—it repels water and floats on top of soil. Never add it straight from the bale. Instead, pre-soak it thoroughly until it feels like a damp sponge. Fill a large container, add water gradually, and squeeze the moss with your hands to break surface tension. This ensures even integration and immediate water availability.
Boost Seed Starting Success

Starting seeds is one of the best uses for peat moss. Its sterile, lightweight texture supports delicate seedlings and prevents disease.
Create Ideal Germination Mix
Use a simple blend:
• 1 part peat moss
• 1 part perlite
• 1 part vermiculite
This mix retains moisture without staying soggy, allows easy root penetration, and prevents soil crusting—where a hard layer forms and blocks emerging seedlings. Because peat moss is naturally sterile, it reduces the risk of damping-off disease, a common cause of seedling death.
Avoid Common Seed-Starting Mistakes
• Don’t use straight peat moss—it holds too much water and lacks oxygen.
• Always pre-moisten before filling trays.
• Supplement with fertilizer—seedlings need nutrients after their first true leaves appear.
Peat moss alone won’t feed plants, so begin liquid feeding within 2–3 weeks of germination.
Enhance Raised Bed Performance
Raised beds often use soilless mixes, and peat moss is a key ingredient for moisture and structure.
Mix 30–50% Into Bed Soil
For best results, blend 30–50% peat moss with native soil or compost. This improves aeration in dense mixes and helps sandy blends retain water. It also creates a uniform texture that supports strong root development across the entire bed.
Balance pH for Healthy Plants
Peat moss is slightly acidic (pH 4.5–6.0). While this benefits acid-loving plants like blueberries or azaleas, it may lower pH too much for vegetables. After amending, test your soil. If pH drops below 6.0, add garden lime to neutralize acidity. A balanced pH ensures nutrients remain available to plants.
Replenish Annually
Peat moss breaks down slowly but does decompose over time. Reapply 1 inch per year to maintain its benefits. Pair it with compost to continuously build soil fertility and organic matter.
Fix Drainage and Aeration Issues
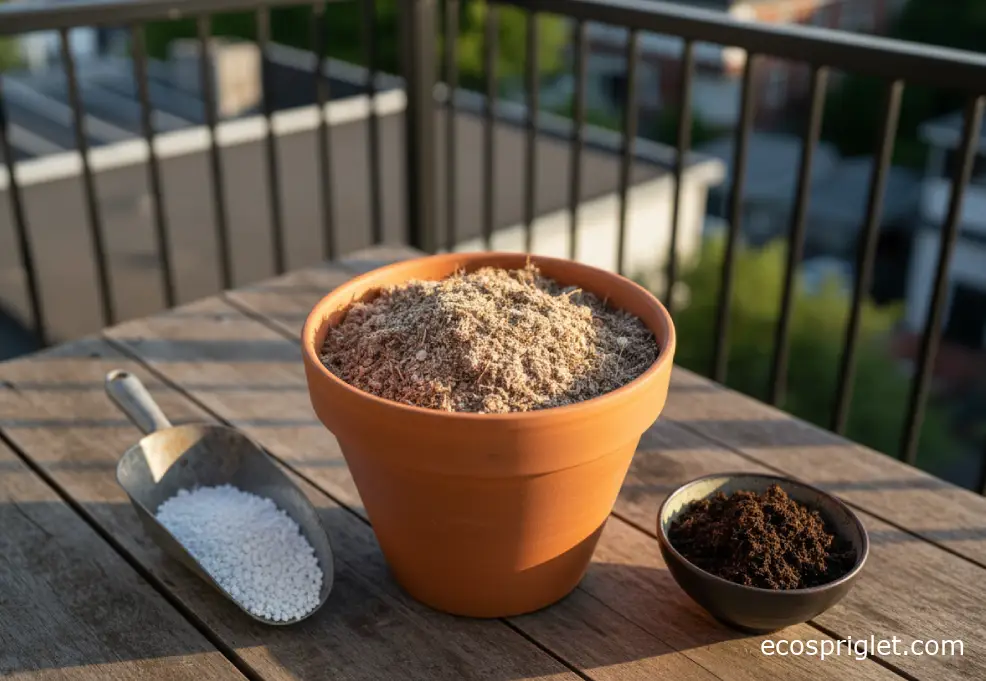
While peat moss holds water, it can cause problems if used alone. Proper blending prevents root rot and oxygen deprivation.
Mix With Perlite or Sand
To avoid waterlogged soil, always combine peat moss with drainage materials:
• Perlite – improves aeration and prevents compaction
• Vermiculite – retains water and nutrients
• Coarse sand – adds weight and improves drainage
A good rule: for every 2 parts peat moss, add 1 part perlite in container mixes.
Recognize Signs of Poor Drainage
If water pools on the surface or plants develop yellow leaves and mushy roots, the mix is too dense. Root rot is a serious risk. Fix it by repotting with a better-balanced mix or top-dressing with perlite.
Use in Clay Soils Cautiously
Clay already holds water. Adding peat moss can make it too soggy. Instead, use compost first to loosen clay, then add small amounts of peat moss only if extra moisture retention is needed.
Prepare Organic Peat Moss Mix
Turn inert peat moss into a living growing medium by enriching it with organic amendments.
Add Nutrients and Microbes
Since peat moss has no nutrients, enrich it before use. For a 3-cubic-foot bale (about 10 gallons dry), mix in:
• 1 cup bone meal – slow-release phosphorus for roots
• 1 cup blood meal – nitrogen for leafy growth
• 1 cup garden lime – balances acidity
• 2 cups Garden-tone (3-4-4) – adds nutrients and beneficial microbes
This creates a fertile, pH-balanced mix perfect for raised beds or containers.
Follow Proper Mixing Steps
- Use a 22-gallon container for full expansion.
- Add dry ingredients first—peat moss, then amendments.
- Wear gloves and a mask—dry mix is dusty.
- Soak slowly, breaking up clumps with your hands.
- Check consistency—squeeze a handful. Only a few drops should come out.
This mix can be used immediately or stored for spring planting.
Time Applications for Best Results
• Fall: Amend beds early. Microbes work all winter.
• Spring: Ready to plant with no extra prep.
• Winter: Store pre-mixed batches in sealed bins.
This method builds long-term soil health, not just short-term fixes.
Compare Peat Moss vs Coconut Coir
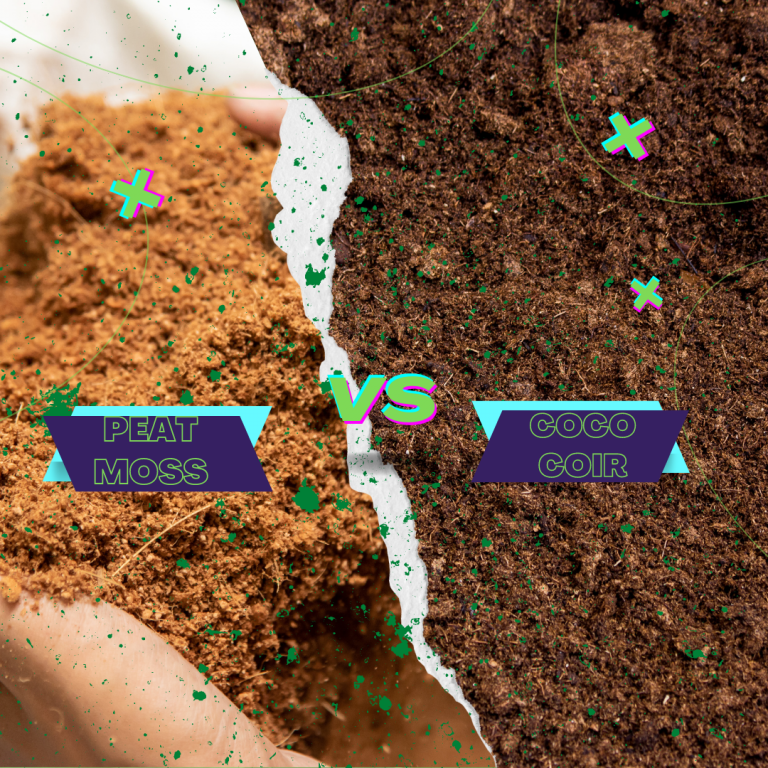
Choosing between peat moss and coir depends on availability, plant needs, and sustainability values.
Evaluate Salt Content and pH
• Peat moss: Low salt, pH 4.5–6.0, consistent quality
• Coconut coir: Often high in salt, pH slightly alkaline
High salt in coir can damage sensitive seedlings. Always rinse coir thoroughly before use. Peat moss is more reliable out of the bag, especially in hydroponic or seed-starting applications.
Consider Environmental Impact
Peat moss forms slowly in bogs, raising sustainability concerns. However, Canadian harvesting is highly regulated:
• Only 41,000 acres harvested annually
• From 281 million acres of peatland
• Reclamation practices restore bogs post-harvest
Look for CSPMA-certified peat moss to ensure responsible sourcing.
Choose Based on Performance Needs
• Use peat moss for: seed starting, containers, consistency, low salt
• Use coir for: sustainability focus, easier rewetting, availability
Both work well when properly prepared. Test your plants’ response and adjust accordingly.
Apply Peat Moss in Specific Gardens
Tailor your use of peat moss to match your garden type and goals.
Vegetable Gardens
Work 1–2 inches of peat moss into the top 6–8 inches of soil. Combine with compost for fertility. Monitor pH—some vegetables (like broccoli or beans) prefer neutral soil. Reapply each season to maintain moisture retention.
Flower Beds and Perennials
Mix peat moss into planting holes at 30–50% volume. It helps new plants establish by reducing transplant shock and maintaining moisture. Especially beneficial for acid-loving flowers like rhododendrons or hydrangeas.
Lawn Establishment
Before seeding, spread 1–2 inches of peat moss over bare soil and till in. It improves seed-to-soil contact, retains moisture during germination, and supports young grass roots in poor soils.
Hydroponic Systems
Peat moss is an excellent soilless growing medium. It holds water and nutrients well and is naturally sterile. Studies show it outperforms coir in hydroponics—especially when salt content in coir is high. Always supplement with nutrient solution.
Avoid Common Peat Moss Mistakes
Even experienced gardeners make errors with peat moss. Knowing these pitfalls ensures better results.
Never Use Dry Peat Moss
Dry peat moss repels water and won’t integrate into soil. Always pre-soak before use. If you’ve already added dry moss, water slowly and repeatedly, or dig it out and rehydrate separately.
Don’t Skip Fertilizer
Peat moss is inert. Plants will starve without added nutrients. Always pair it with compost, fertilizer, or organic amendments.
Don’t Overapply in Acidic Soils
If your soil is already acidic (pH < 6.0), adding peat moss can make it worse. Test pH first. In low-pH soils, use coir or compost instead.
Avoid Straight Peat Moss in Pots
Using 100% peat moss leads to compaction, poor drainage, and root rot. Always blend with perlite or sand for healthy container plants.
Maintain Long-Term Soil Health
Peat moss isn’t a one-time fix—it’s part of a long-term soil improvement strategy.
Replenish Annually
Peat moss decomposes slowly but does break down over 2–5 years. Reapply 1 inch per year in beds or refresh container mixes each season.
Combine With Compost
While peat moss improves structure, compost feeds the soil. Use both:
• Peat moss for water retention and aeration
• Compost for nutrients and microbial life
This combo builds rich, living soil over time.
Monitor Soil Changes
Test soil pH and nutrient levels annually. Adjust lime or fertilizer based on results. Watch for compaction or water pooling—signs it’s time to refresh the mix.
Plan Seasonal Applications
• Fall: Best time to amend—allows integration over winter
• Spring: Ideal for planting-ready beds
• Summer: Only if necessary, with careful watering
• Winter: Store pre-mixed batches
Timing maximizes effectiveness and reduces workload.
Frequently Asked Questions About Using Peat Moss in Garden
Can I use peat moss as a top dressing?
Yes, but only if it’s pre-moistened. Dry peat moss will repel water and may wash away. Lightly mix it into the top inch of soil to help it integrate and retain moisture.
Does peat moss go bad over time?
No, peat moss does not expire. Store it in a sealed container to keep it dry and ready for use. Even after years, it remains effective as long as it’s protected from moisture and contaminants.
Is peat moss safe for organic gardening?
Yes, peat moss is allowed in organic gardening as a soil amendment. However, it provides no nutrients, so you must supplement with approved organic fertilizers like compost or blood meal.
Why is my peat moss not absorbing water?
Dry peat moss is hydrophobic. It resists water until surface tension is broken. Soak it gradually in a bucket, pressing and squeezing it with your hands until fully saturated.
Can I use peat moss for succulents?
Not alone. Succulents need fast-draining soil. If using peat moss, limit it to 10–15% and mix with perlite and coarse sand to prevent root rot.
Is peat moss environmentally friendly?
Canadian-sourced peat moss is harvested sustainably, with only 2% of annual growth extracted. Look for CSPMA-certified products to support responsible practices. For a renewable alternative, consider rinsed coconut coir.
Key Takeaways for Using Peat Moss in Garden
Peat moss is a powerful tool when used correctly. It improves water retention, supports seedlings, and enhances soil structure—but only when pre-soaked, blended with drainage materials, and paired with fertilizer. Whether you’re growing vegetables, flowers, or starting seeds, following these steps ensures healthier plants and less maintenance. For eco-conscious gardeners, choose CSPMA-certified peat moss or consider rinsed coconut coir as an alternative. The key is matching the amendment to your soil, plants, and goals. With smart use, peat moss remains one of the most effective, reliable garden helpers available.



