
You’ve probably tossed cardboard into the recycling bin without a second thought. But what if that same box could transform your vegetable garden—suppressing weeds, improving soil, and reducing waste—all without chemicals? When used correctly, cardboard is a powerful, eco-friendly tool for gardeners. The key is knowing how to use cardboard in vegetable garden beds safely and effectively. Not all cardboard is garden-safe, and improper use can attract pests or even damage nearby structures. This guide breaks down exactly how to leverage cardboard for weed control, composting, pest management, and more—while avoiding common pitfalls like termite risks and poor water absorption. You’ll learn which types to use, how to prepare them, and when to skip cardboard altogether.
In this comprehensive guide, you’ll discover science-backed methods for turning plain cardboard into a gardening powerhouse. From building no-dig lasagna beds to trapping slugs and creating biodegradable seed pots, each technique is designed to boost productivity while protecting your soil and plants. We’ll also cover critical safety rules—like keeping cardboard away from wooden structures—and help you avoid common mistakes that could backfire. Whether you’re expanding your garden or fighting stubborn weeds, this step-by-step resource shows you how to get real results with recycled materials.
Choose the Right Cardboard for Your Garden
Use Only Plain, Uncoated Cardboard
Stick to matte-finish, unprinted cardboard from shipping boxes or food packaging. These materials break down safely and won’t introduce toxins into your soil. Avoid glossy, colored, or wax-coated cardboard—common in retail or beverage packaging—as these resist decomposition and may leach harmful substances. Always check the texture: if it feels slick or shiny, it likely has a plastic or wax coating and should be avoided.
Skip Cardboard with Toxic Inks or Linings
Cardboard containing heavy metal dyes or plastic linings can harm soil microbes and persist in the ground. Brightly printed boxes, especially those with metallic inks, are risky. If you’re unsure about a box’s safety, it’s best to leave it out. Remember, your vegetables absorb what’s in the soil—so only use clean, chemical-free materials.
Smother Weeds Without Herbicides
Block Sunlight to Kill Grass and Weeds
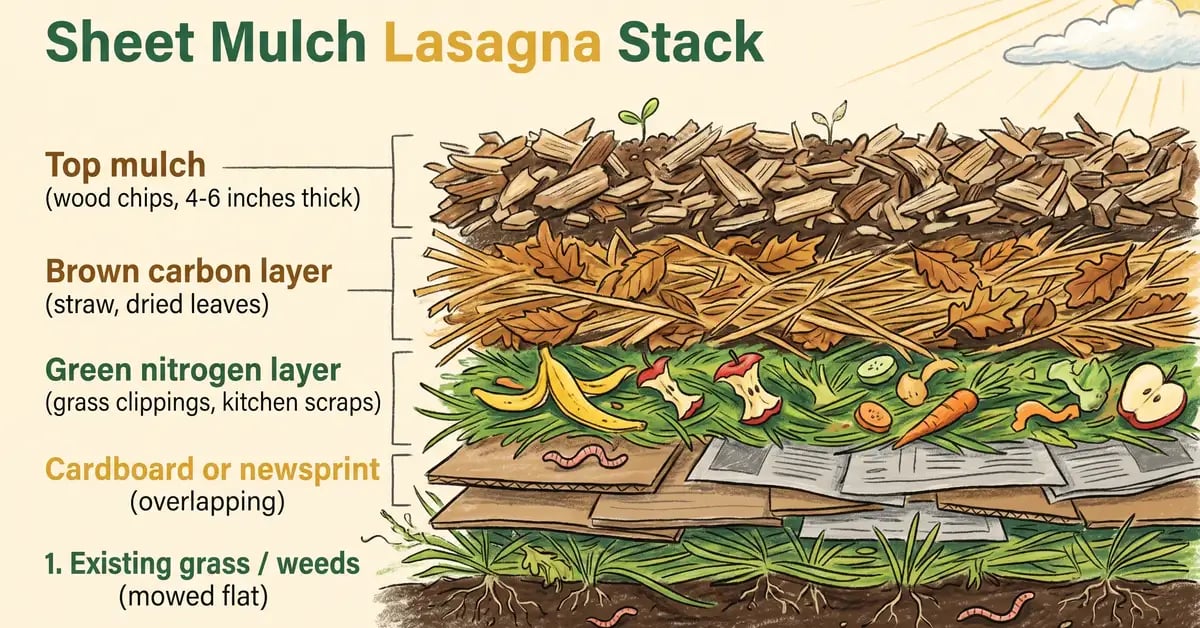
Lay cardboard directly over grass or weeds to cut off sunlight, stopping photosynthesis and seed germination. This method is perfect for converting lawn areas into new garden beds without tilling. After 4–6 weeks, most vegetation underneath will be dead and beginning to decompose, creating a clean planting surface.
Cover with Mulch to Keep Cardboard in Place
After laying the cardboard, top it with 2–3 inches of organic mulch like straw, wood chips, or leaves. This holds the material down, prevents wind lift, and improves the look of your garden. Overlap sheets by at least 6 inches to eliminate gaps where weeds could sneak through.
Build Rich Soil with Lasagna Composting
Start with Cardboard as a Carbon Base Layer
Cardboard acts as a high-carbon foundation in lasagna composting. Lay it down first, then alternate with nitrogen-rich materials like grass clippings, kitchen scraps, or aged manure. Each layer should be 2–3 inches thick. This layered approach creates nutrient-rich soil faster than traditional composting.
Keep Layers Moist to Speed Up Breakdown
For best results, keep the pile moist but not soggy. In warm, wet conditions, this method produces plant-ready soil in 3–6 months. The cardboard breaks down gradually, improving soil structure and water retention over time.
Expand Garden Beds Without Digging
Turn Grass Into Fertile Growing Space
Want to enlarge your garden without chemicals? Lay cardboard over invading grass, especially in shaded spots where mowing is tough. After 2–4 weeks, the grass beneath will die off, leaving you with a clean, fertile area for planting.
Secure Edges to Prevent Wind Lift
Use bricks, stones, or landscape staples to pin down the edges of the cardboard. This ensures consistent coverage and effective weed suppression. Once mulch is in place and decomposition starts, you can remove the anchors.
Ensure Proper Water Flow to Plant Roots
Soak Cardboard Before Laying It Down
Dry cardboard repels water, which can leave plant roots dry even after heavy rain. Always wet the cardboard thoroughly before placing it in your garden. Once saturated, it becomes hydrophilic and helps retain moisture in the soil.
Cut Slits for Direct Root Zone Watering
When planting through cardboard, make X-shaped cuts and fold the flaps down into the soil. This allows water to reach the roots directly. Test your irrigation by checking the soil beneath the cardboard after watering to ensure it’s absorbing properly.
Trap Slugs and Snails Naturally
Use Flat Cardboard as a Nighttime Trap
Lay flat pieces of cardboard on the soil near vulnerable plants like lettuce or spinach. Slugs and snails crawl underneath seeking moisture and shade. Check daily, lift the cardboard, and remove pests by hand or dispose of them.
Watch for Unwanted Insects in Damp Areas
While cardboard traps slugs effectively, it can also attract earwigs or sowbugs in humid gardens. If your garden already has pest issues, avoid using cardboard as ground cover. Instead, reserve it for compost layers or short-term weed suppression.
Start Seeds in Biodegradable Cardboard Pots

Make Easy DIY Seedling Containers
Cut shipping boxes into 3- to 4-inch squares, fold the edges to form small pots, and fill with seed-starting mix. Plant your seeds as usual. The cardboard allows roots to grow through, reducing transplant shock when moved to the garden.
Transplant Before Pots Fall Apart
Seedlings should be ready to move to the garden within 4–6 weeks, before the container fully decomposes. This ensures the pot holds together during early growth while still offering the benefits of a biodegradable system.
Create Clean, Weed-Free Garden Paths
Lay Cardboard Under Mulch to Stop Mud
Lay overlapping cardboard sheets on high-traffic areas, then cover with gravel, wood chips, or straw. This blocks weeds and reduces mud, keeping your tools and shoes clean. It’s an affordable, temporary fix for soggy garden paths.
Reapply Cardboard Every 6–12 Months
Cardboard pathways break down over time. Reapply every 6–12 months depending on foot traffic and weather. For longer-lasting results, combine cardboard with permeable landscape fabric.
Prevent Termite Infestations

Keep Cardboard Away From Wooden Structures
Never place cardboard within 2–3 feet of homes, sheds, or fences. Its cellulose content attracts termites, especially when damp. This creates a hidden bridge from soil to wood, increasing the risk of structural damage.
Avoid Cardboard in High-Risk Areas
If your region has a history of termites, skip cardboard entirely near buildings. Use alternatives like straw or shredded bark that don’t pose the same risk. Always assess your local pest conditions before starting.
Know How Long Cardboard Takes to Break Down
Decomposition Varies by Environment
Cardboard can take anywhere from 2 months to 18 months to fully decompose. Warm, moist soils with active microbes speed up the process. Dry or compacted soils slow it down significantly.
Speed Up Decay With Moisture and Nitrogen
To accelerate breakdown, keep cardboard damp and layer it with nitrogen-rich materials like grass clippings. Turning the pile occasionally introduces oxygen, boosting microbial activity and speeding decomposition.
Frequently Asked Questions About Using Cardboard in Vegetable Gardens
Can I use cardboard from Amazon boxes in my garden?
Yes, most Amazon shipping boxes are plain, uncoated cardboard and safe to use. Avoid any with glossy finishes, heavy ink, or plastic linings. Tear off tape and labels before laying it down.
Will cardboard attract termites to my garden?
Cardboard can attract termites if placed near wooden structures and kept moist. To reduce risk, keep it at least 2–3 feet away from buildings and avoid using it in termite-prone areas.
Do I need to remove cardboard before planting?
No, you don’t need to remove it. Plant directly through wet cardboard by cutting X-shaped slits. The material breaks down over time and enriches the soil.
How long does it take for cardboard to decompose in soil?
It typically takes 2 to 18 months, depending on moisture, temperature, and microbial activity. Warm, wet conditions with added nitrogen-rich layers speed up the process.
Can I compost cardboard in my garden?
Yes, cardboard is excellent for composting. Shred it and mix with green materials like food scraps or grass clippings to maintain a healthy carbon-nitrogen balance.
Is colored cardboard safe for vegetable gardens?
No, avoid brightly colored or glossy cardboard. These often contain heavy metals in the ink or plastic coatings that don’t break down and can contaminate soil.
Key Takeaways for Using Cardboard in Your Vegetable Garden
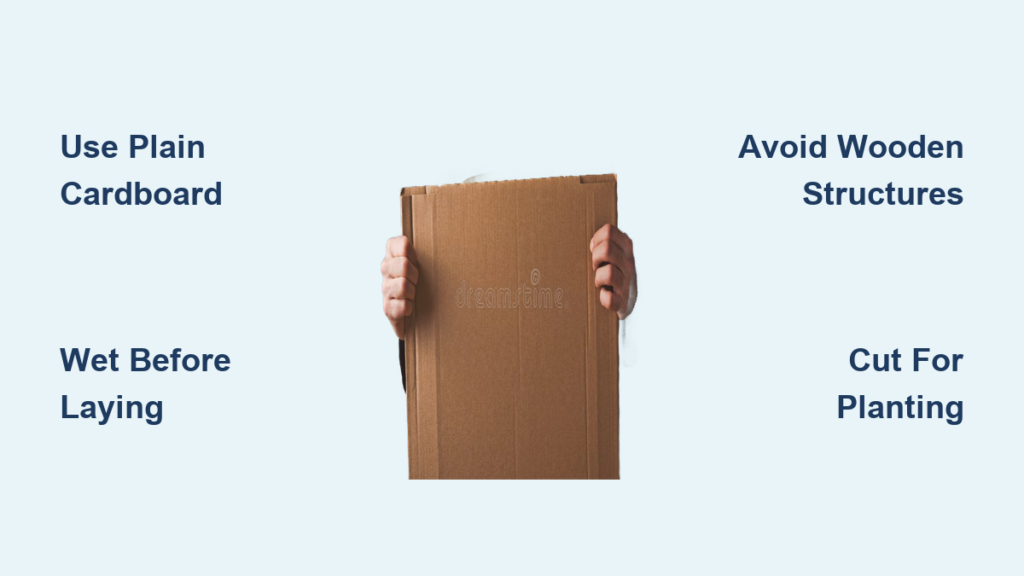
Cardboard is a versatile, sustainable tool when used correctly in vegetable gardens. It suppresses weeds, builds healthy soil through lasagna composting, and reduces waste—all without chemicals. The most important rules are to use only plain, uncoated cardboard, keep it away from wooden structures, and pre-wet it to ensure proper water flow.
To get started, collect clean shipping boxes, remove tape and labels, and lay them over problem areas. Top with mulch and begin planting. Monitor for pests and reapply as needed. By following these science-backed methods, you can turn everyday waste into garden gold—saving money, time, and the planet, one box at a time.



