
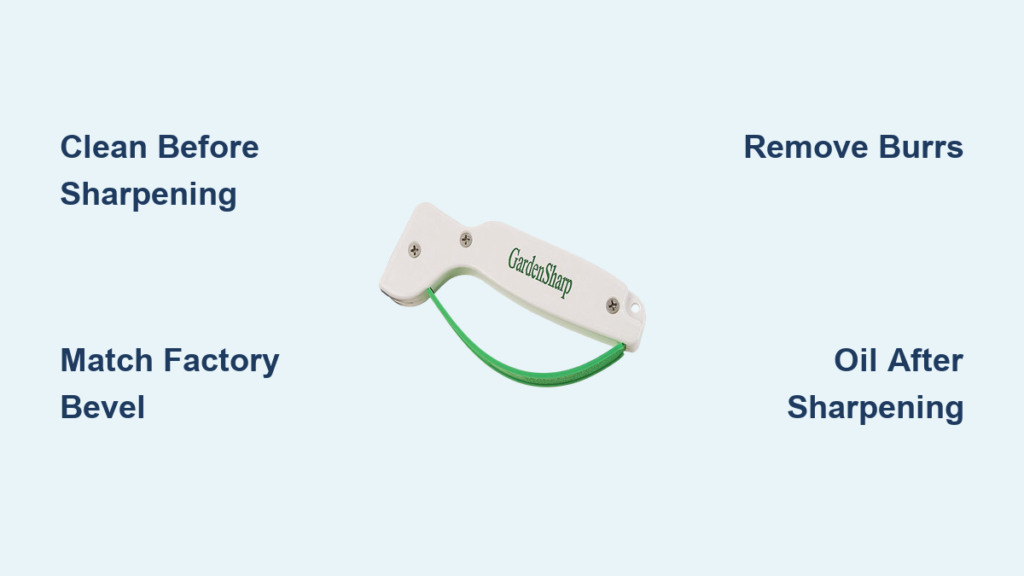
A dull garden tool doesn’t just slow you down—it harms your plants, strains your body, and shortens your equipment’s life. Knowing how to use a garden tool sharpener correctly restores clean, efficient cutting and ensures healthier gardens. Whether you’re sharpening pruners, shovels, hoes, or lawnmower blades, the right technique makes all the difference. This guide shows you how to clean tools properly, match factory bevels, choose the best sharpener, and finish with a burr-free edge. You’ll also learn how to oil, store, and maintain your tools for long-term performance.
From handheld files to commercial sharpeners like the Corona AC 8300 and AccuSharp 006C, this step-by-step walkthrough covers every detail. You’ll avoid common mistakes, troubleshoot poor results, and keep your tools in top shape with minimal effort. With these proven methods, every cut will be clean, every dig easier, and every gardening season more productive.
Clean Tools Before Sharpening
Remove Dirt and Sap First
Always start with a clean blade. Dirt, sap, and rust interfere with sharpening and can damage files or stones. Wipe off loose debris with a stiff brush. For stubborn grime, spray on Scrubbing Bubbles and let it sit for 3–5 minutes to break down buildup. Rinse thoroughly and dry immediately—moisture leads to flash rust.
Soak Blades for Deep Cleaning
For heavy residue or light rust, soak blades in household vinegar for 1–2 hours. Vinegar dissolves mineral deposits and sap. After soaking, scrub with a stainless steel wire brush or SOS pad to expose clean metal. Rinse and dry completely. If your loppers or pruners have rusted pivots, disassemble them first, clean the spring and joint with vinegar, then reassemble.
Dry Tools Completely
Never sharpen a wet blade. Moisture reduces friction and can ruin whetstones or clog files. Always dry tools with a clean cloth after cleaning. Work in a dry, well-ventilated area to prevent rust, especially in humid climates. Skipping this step leads to poor sharpening results and premature corrosion.
Match the Correct Sharpening Angle
Follow Factory Bevels on Pruners
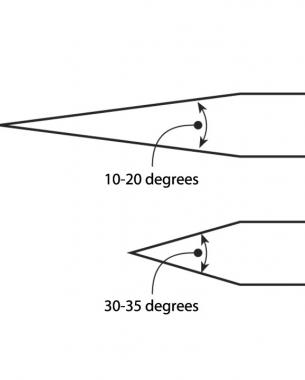
For tools that come sharp—like hand pruners, loppers, and pruning knives—always follow the factory bevel. Changing the angle ruins cutting performance. Inspect the blade closely to identify the original bevel. Use a texta pen to mark the edge; as you sharpen, the ink wears off where contact occurs, helping you maintain the correct angle.
Use 45° for Shovels and Spades
Most digging tools need a 45° bevel. This angle balances sharpness with durability. A sharper edge dulls too quickly in soil. Clamp the shovel in a vise and file at a consistent 45° along the entire edge. Use a mill file for flat blades, moving in one direction only.
Adjust Hoe Angles by Use Case
Hoes require different angles depending on their job:
• 45° for heavy chopping and cultivation
• 30°–35° for general-purpose weeding
• 20°–30° for fine, precision weeding
Sharpen with a file or bench grinder, keeping a steady hand. Watch for a clean steel line forming—this shows consistent metal removal.
File Curved Blades at 90°
For bypass pruners, the curved cutting blade must be filed flat across its inside curve. Position the blade in a vise and use a round or half-round file. File at a perfect 90° to the inside of the blade—this ensures it seats correctly against the anvil. Use one-direction strokes only. Jerky or angled filing creates an uneven edge that binds or crushes stems.
Choose the Right Sharpening Tool

Use Metal Files for Shovels and Hoes
A 6-inch mill file works best for flat-edged tools like shovels, hoes, and trowels. Clamp the tool securely and drag the file along the edge in smooth, even strokes. Apply pressure on the forward stroke only—lift on the return. Maintain a consistent angle. After several passes, check for a burr on the opposite side. This indicates the edge is forming.
Try Carbide Files for Small Blades
Carbide files are ideal for small, hard-to-reach edges like those on hand pruners, snips, and loppers. They cut faster than steel files and require less force. Cradle the tool in your hand, match the original bevel, and sweep the file in one direction. Check frequently for sharpness. Flip the blade to feel for a burr—when present, it’s time to deburr.
Use Whetstones for Precision Edges
A medium or fine whetstone (300–600 grit) delivers a refined edge. Keep the stone wet with water or oil. Move the blade across the stone at the correct angle using long, consistent strokes. Whetstones are excellent for pruning knives and fine blades. Mark the bevel with a pen to monitor contact. Finish with a few light strokes to remove the burr.
Use Commercial Sharpeners Correctly
Corona AC 8300: Fast Edge Restoration
The Corona AC 8300 is a portable, manual sharpener designed for quick field use. To use:
1. Align the sharpener with the blade’s original angle
2. Stroke 4–5 times in one direction
3. Flip the sharpener and run it flat across the back to remove burrs
It works on pruners, lawnmower blades, hedge trimmers, and scissors. No setup or power needed—ideal for gardeners who want sharp tools fast. One pass often restores cutting performance.
AccuSharp 006C: Diamond-Hone Precision
The AccuSharp 006C features a V-notch with tungsten carbide blades—among the hardest materials available. To sharpen:
1. Insert the blade into the V-notch
2. Hold the sharpener at a 90° angle to the edge
3. Draw it along the blade with light pressure in one direction
Avoid back-and-forth motion. Just a few strokes restore a razor-like edge. The full-length finger guard protects your hand. Use on pruners, loppers, shovels, and scythes. Ideal for single-beveled edges.
Hoselink All-in-One: Multi-Tool Convenience
The Hoselink sharpener combines multiple functions:
• Single-sided sharpener for bypass pruners
• Double-sided for anvil pruners
• Metal and ceramic honing bars
• Built-in oil well with applicator
For bypass pruners:
1. Place blade base into the single-sided slot
2. Swipe away from your body 3–4 times
3. Flip and use the metal honing bar to remove burrs (stroke toward the edge)
4. Finish with the ceramic bar for a polished cut
5. Apply lanolin oil from the built-in well
For anvil pruners, use the double-sided sharpener and repeat the process.
Remove Burrs for a Clean Edge

Why Burrs Matter
A burr is a thin ridge of metal that forms on the back side of the blade during sharpening. It prevents clean cuts and can tear plant tissue. Always remove burrs to ensure a smooth, sharp edge.
Deburr with Sandpaper or Honing Bar
After sharpening, flip the tool and check the back of the blade. Run 300-grit sandpaper across the edge to knock off the burr. Alternatively, use a metal honing bar—stroke toward the cutting edge. For fine tools, finish with a ceramic honing bar to polish the edge.
Test for Burr Presence
Drag your fingertip lightly across the back edge (carefully, from side to edge). If you feel a lip, the burr remains. Continue light filing or honing until the edge feels smooth. A clean, burr-free blade glides through stems without resistance.
Oil and Protect After Sharpening
Apply Lanolin to Blades
After sharpening, wipe a light coat of lanolin oil on all metal surfaces. It prevents rust and keeps moving parts smooth. Use a cloth to work oil into joints and crevices. The Hoselink sharpener includes a built-in oil well—ideal for quick application.
Lubricate Pivot Points
For pruners and loppers, apply a drop of three-in-one oil to the pivot bolt. Open and close the tool several times to distribute the oil. Wipe off excess to avoid attracting dirt. A well-lubricated joint ensures smooth operation and extends tool life.
Treat Wooden Handles
Rub linseed oil into wooden handles with a rag. It seals the wood, prevents cracking, and improves grip. Reapply every few months or when the handle looks dry. Avoid soaking—use a thin, even coat.
Store Tools Properly
Keep Tools Dry and Hanging
Store sharpened tools in a dry place. Hang them on a rack or wall to prevent moisture buildup and accidental damage. Never leave tools leaning in a corner or buried in a shed. Humidity causes rust, even on oiled blades.
Use Protective Covers
For long-term storage, slide blade guards onto pruners and shovels. This protects the edge and prevents accidents. Wrap tools in an oiled cloth for extra rust protection during winter storage.
Sharpen at the Right Frequency
Annual Maintenance Is Essential
Sharpen all garden tools at least once a year—late fall is ideal. This prepares them for spring planting. Even light users benefit from annual honing. For heavy use, sharpen after major jobs like pruning season or lawn mowing.
Signs Tools Need Sharpening
• Increased effort when cutting or digging
• Torn or crushed plant stems
• Visible dullness or nicks on the edge
• Soil sticking to a shovel blade
If your pruners crush instead of cut, it’s time to sharpen. Don’t wait—dull tools harm plants and make work harder.
Avoid Common Sharpening Mistakes
Never Use Back-and-Forth Strokes
Filing back and forth rounds the edge and creates an inconsistent bevel. Always use one-direction strokes—push the file forward, lift, return, repeat. This preserves the angle and creates a clean edge.
Don’t Remove Too Much Metal
Sharpening isn’t about reshaping the blade—it’s about restoring the edge. Remove only enough metal to eliminate nicks and dullness. Over-filing weakens the tool and shortens its life.
Don’t Skip Burr Removal
A sharp-looking edge can still have a burr. This hidden flaw ruins cutting performance. Always finish with deburring—whether with sandpaper, a honing bar, or the flat side of a sharpener.
Never Skip Cleaning
Sharpening a dirty blade spreads grime across the file or stone, reducing effectiveness. Always clean first. Sap and rust act as abrasives that damage sharpening surfaces over time.
Troubleshoot Poor Results
Dull Edge After Sharpening?
Check your angle. If it doesn’t match the factory bevel, the edge won’t perform. Ensure you’re using the right tool—carbide files for small blades, mill files for flat edges. Verify you’ve removed the burr. A burr can make a blade feel sharp but cut poorly.
Uneven or Chipped Edge?
Inconsistent pressure or angle changes during filing cause this. Use a vise to stabilize the tool. Make long, even strokes. For power tools like angle grinders, move slowly and steadily—rushing causes overheating and chipping.
Rust Keeps Returning?
You’re not drying tools fully or skipping oil. After every use, wipe blades dry. Apply a light coat of vegetable or lanolin oil, especially in damp conditions. Store in a dry, ventilated area.
Pruners Still Don’t Cut Cleanly?
Check the pivot tension. If too loose, the blades won’t meet properly. Tighten the bolt slightly. If too tight, the tool binds. Adjust until it opens and closes smoothly. Clean and oil the spring if it’s stiff.
Frequently Asked Questions About Garden Tool Sharpeners
Can I use a kitchen knife sharpener on garden tools?
No, most kitchen sharpeners are designed for thinner blades and specific angles. Garden tools require sturdier sharpeners like mill files, carbide files, or dedicated models such as the Corona AC 8300 or AccuSharp 006C.
How do I know when my tool is sharp enough?
Test the edge by slicing through a piece of paper or cardboard. A sharp blade cuts cleanly without tearing. For pruners, make a test cut on a small twig—if it slices through smoothly, it’s ready.
Should I sharpen both sides of a shovel blade?
Most shovels only need one side sharpened at a 45° angle. Sharpening both sides weakens the edge. Focus on the leading edge that contacts the soil.
Can I use a power grinder on pruners?
Yes, but use extreme caution. A bench grinder or angle grinder can overheat thin blades, causing warping or loss of temper. Use light pressure and dip the blade in water frequently to cool it.
Do I need to disassemble pruners before sharpening?
Yes, for thorough cleaning and sharpening. Remove the pivot bolt to separate the blades and clean rust from the spring and joint. Reassemble and lubricate after sharpening.
What’s the best way to store sharpened tools?
Hang them in a dry shed or garage. Use blade guards or sheaths to protect edges. Apply a light coat of oil before storage, especially in humid climates.
Key Takeaways for Using a Garden Tool Sharpener
Properly using a garden tool sharpener saves time, protects your plants, and extends tool life. Always clean tools before sharpening, match the factory bevel, and use one-direction strokes. Remove burrs with sandpaper or a honing bar, then apply lanolin or vegetable oil to prevent rust. Store tools dry and protected.
Whether you use a file, whetstone, or commercial sharpener like the Corona AC 8300 or AccuSharp 006C, consistency and technique matter most. Sharpen annually or after heavy use, and inspect tools regularly for signs of dullness. With these steps, every cut will be clean, every dig easier, and every gardening season more productive.



