
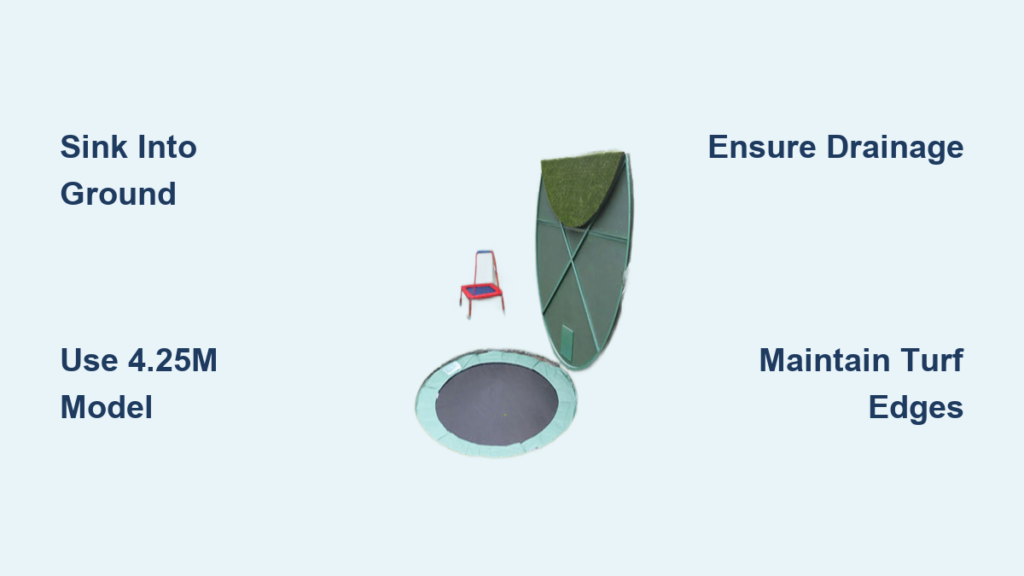
You love the fun and fitness your trampoline brings—but hate how it dominates your garden. It’s bulky, hard to miss, and can clash with even the most thoughtfully designed outdoor space. The best solution? Hide your trampoline by sinking it into the ground. This smart landscaping trick blends the trampoline seamlessly into your yard, boosts safety, and preserves your garden’s beauty—all without sacrificing bounce.
In this guide, you’ll learn how to install a sunken trampoline, choose the right model, manage drainage, and maintain it for decades. Whether you have a small urban backyard or a sprawling country garden, this method transforms an eyesore into an elegant, functional feature.
Why Sink a Trampoline?
Safer Bouncing, Lower Falls
A sunken trampoline reduces fall risks dramatically. Because the jumping surface sits below ground level, the bounce is naturally softer—air resistance increases, limiting height. This means fewer dangerous flips and tumbles.
The surrounding soil acts as a natural safety slope, cushioning landings if someone jumps off. And with the frame and legs buried, there’s no risk of tripping or falling onto exposed metal parts.
“When you sink a trampoline, it’s much safer than if it’s raised above ground.”
— Real-world safety insight from long-term users
Blends Into Garden Design
Once installed, a sunken trampoline can be nearly invisible from a distance. Neat turf edges and sloping soil make it look like a built-in garden feature—some visitors have even mistaken it for a small pool.
It’s ideal for small gardens where space is tight. Without towering legs and a bulky frame, it doesn’t dominate the view. You keep your green space usable and attractive.
Roy Lancaster, famed horticulturist, once thought a sunken trampoline was a swimming pool from just a few meters away.
Choose the Right Trampoline

Pick a 4.25m Circular Model
For best results, go with a 4.25-meter diameter circular trampoline—the largest standard size. It offers ample jumping space while fitting neatly into a dug-out hole.
Larger models may require deeper excavation and more soil removal, increasing cost and effort.
Use Half-Length Legs to Reduce Digging
Some brands, like Super Tramp, offer trampolines with half-length legs. These reduce the depth you need to dig—cutting labor and time—while still allowing full burial of the frame.
This is especially helpful if you’re digging by hand or working near tree roots or utility lines.
Dig the Installation Hole
Size and Depth Guidelines
- Diameter: Dig a hole slightly wider than the trampoline (add 10–15cm on all sides).
- Depth: Around 1 meter deep—enough to bring the jumping mat below ground level but above the water table.
This depth ensures the bounce stays controlled and the structure remains hidden.
Use a Mini Digger or Dig by Hand
A mini excavator makes the job fast—just half a day with a team of four. Rent one if you have access to your yard.
No machinery? You can dig by hand, but expect 2–3 full days of labor. Use sturdy shovels and wheelbarrows to move soil efficiently.
Pro tip: Save the topsoil separately. You’ll use it later for turfing and planting.
Lower the Trampoline Safely

Use Scaffold Boards for Control
Once the hole is ready, carefully lower the trampoline using scaffold boards as ramps. This protects the mat and springs during installation.
Have at least two people guide it down to avoid shifting or damage.
Leave a Small Edge Gap
Keep a 2–5cm gap between the trampoline frame and the hole’s edge. This allows room for adjustments and future maintenance—like replacing the safety pad or springs.
Don’t force it too tight; soil can shift slightly over time.
Backfill With Soil and Shape the Slope
Build a Natural Amphitheater
Use the excavated soil to backfill around the trampoline, creating a gentle slope. This forms a built-in viewing area and stabilizes the structure.
The soil will settle at its natural angle of repose:
– Clay soils hold steeper slopes
– Sandy soils spread wider and flatter
No need for retaining walls—the earth supports itself when properly compacted.
Avoid Overfilling the Frame
Ensure the soil covers the legs and frame completely, but doesn’t press against the jumping mat. You want full bounce clearance.
Let the soil settle for a few days, then top up if needed before laying turf.
Install Turf and Finish the Edges
Lay Turf for a Seamless Look
Roll out turf or sod around the outer edge to finish the installation. This stabilizes the soil, prevents erosion, and blends the trampoline into the lawn.
Cut the turf to fit snugly against the safety pad, leaving a 1cm gap to allow for expansion.
Keep Soil Slightly Above the Mat
Build the soil so it sits just an inch (2.5cm) above the jumping surface. This prevents rainwater from pooling on the mat, which can lead to mold, mildew, or premature wear.
Water will naturally drain off the slope into the surrounding garden.
Handle Drainage Like a Pro

Watch for the Water Table
If you hit groundwater while digging, stop and assess. You may need a sump and drainage system to prevent flooding.
Install a perforated pipe at the base, covered with gravel, leading to a drainage point or soakaway.
Most Sites Don’t Need Extra Drainage
In practice, many sunken trampolines never require artificial drainage. Natural soil permeability and the slight slope around the hole are often enough to manage rainwater.
Teams working on damp sites report no issues—thanks to good soil flow and elevation.
Maintain Your Sunken Trampoline
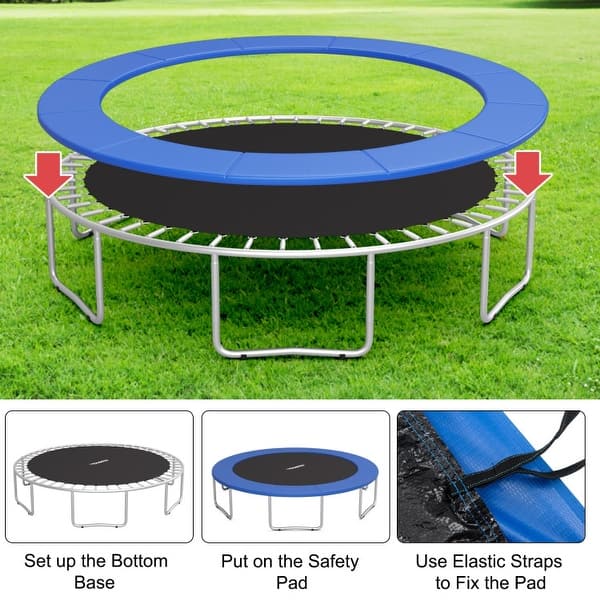
Replace Bed and Pads Every 10–15 Years
Even after 20+ years, the frame can remain solid. But the jumping bed and safety padding will wear out.
Replace them every 10 to 15 years, depending on usage and weather exposure.
- Signs of wear: frayed stitching, sagging mat, faded or cracked padding
- Replacement time: Just 2 people and a few hours for a full bed swap
Fix Springs and Attachments as Needed
Over time, springs may weaken or break, especially in high-use households. Replace only the damaged ones—no need to redo the entire set.
Use spring tools to make reattachment faster and safer.
“Over 20 years, several springs and attachments failing isn’t bad.”
— Real-world durability from long-term owners
Enforce Smart Safety Rules
Ban Flips and Somersaults
Even with a sunken design, no flips or somersaults. These moves increase the risk of neck, back, and head injuries—especially for kids.
Make this rule clear and non-negotiable.
Supervise All Jumps
Always supervise children, especially when friends are over. Excitement leads to risky behavior—like double bouncing or roughhousing.
One jumper at a time is safest, but if multiple jump, ensure they’re similar in size and age.
Limit Distractions During Use
Avoid loud music or screens nearby. When kids are distracted, safety rules get ignored.
“When they’re having fun and the radio’s blaring, all safety rules can go out the window.”
Keep the trampoline zone focused and calm.
Enjoy the Fitness and Fun Benefits
Build Core Strength Fast
Just two days of regular bouncing can improve core stability. The constant micro-adjustments while jumping engage abdominal and back muscles naturally.
It’s a fun way to stay fit—no gym required.
Low-Impact Exercise for All Ages
Unlike running, trampolining is gentle on joints. The mat absorbs shock, making it ideal for older adults or those with hip/knee issues.
Even 10 minutes a day boosts circulation and balance.
Boost Kids’ Coordination and Play
Jumping improves motor skills, balance, and spatial awareness in children. It also encourages social play—kids learn to take turns, communicate, and cooperate.
“We’ve had clients with indoor pools who stopped using them—kids only use the trampoline.”
Key Takeaways for Hiding a Trampoline in the Garden
Sinking your trampoline is a long-term upgrade that enhances safety, aesthetics, and usability. With proper installation, your sunken trampoline can last 25 years or more, blending into your garden while delivering years of healthy fun.
The frame stays protected from weather and impact, the bounce remains safe and controlled, and your landscape stays clean and uncluttered.
• Always supervise use and enforce strict safety rules
• Replace the jumping bed and pads every 10–15 years
• Monitor drainage and maintain turf edges regularly
Start planning your sunken trampoline today—and turn a backyard eyesore into a hidden gem.
Frequently Asked Questions About Hiding a Trampoline in the Garden
Can you really hide a trampoline by putting it in the ground?
Yes. By installing a trampoline below ground level and surrounding it with turf and sloped soil, it blends into the lawn and becomes nearly invisible from a distance. Many people mistake it for a garden feature or even a small pool.
How deep should the hole be for a sunken trampoline?
Dig about 1 meter deep—enough to place the jumping mat below ground level but above the water table. This depth ensures safety, proper bounce, and visual concealment.
Do sunken trampolines need drainage systems?
Most do not. If your soil drains well and you avoid hitting groundwater, natural slope and soil permeability handle rainwater. Only install a sump or perforated pipe if you encounter standing water during excavation.
What size trampoline works best for a sunken installation?
A 4.25-meter circular model is ideal. It’s the largest standard size, offers great bounce space, and fits neatly into a dug-out hole without excessive excavation.
How do you maintain a sunken trampoline over time?
Replace the jumping bed and safety padding every 10–15 years. Check springs for wear, re-tension or replace as needed, and maintain the turf edge to prevent erosion and keep the look clean.
Is a sunken trampoline safer than a regular one?
Yes. The below-ground position reduces bounce height, minimizes fall distance, and eliminates tripping hazards from exposed legs. The surrounding soil also cushions off-bed landings, making it significantly safer.



