
If your solar garden lights have grown dim or won’t stay on all night, dirty or oxidized solar panels are likely the culprit. Over time, exposure to sun, rain, dust, and temperature swings coats the panels with a hazy film that blocks sunlight and reduces charging efficiency. The good news? Cleaning solar garden lights is quick, inexpensive, and often takes less than 20 minutes. With simple tools and proven techniques, you can restore full brightness and extend the life of your lights for years.
You’ll learn two effective cleaning methods: a no-tools toothpaste method for light haze and a wet sanding technique for heavily yellowed panels. We’ll also cover protective coatings, seasonal maintenance, and critical safety tips to avoid damage. Whether your lights are flickering or barely charging, this guide gives you everything you need to revive them—no replacements required.
Restore Heavily Oxidized Panels with Wet Sanding
Wet sanding is the most effective way to fix solar garden lights with yellowed or deeply cloudy panels. This method removes the oxidized plastic layer and seals the surface, restoring clarity and charging performance.
Remove the Solar Panel Cover Safely
Unscrew or unclip the top housing from the base of each light. Most solar garden lights have a snap-on or screw-fixed cover. Work gently to avoid pulling wires or damaging internal components like the battery or LED board.
Pro Tip: Group and label lights by location before disassembly to make reinstallation easier.
Pre-Clean the Panel Surface
Wash the panel with mild dish soap and a soft sponge. This removes surface grime that could scratch the plastic during sanding. Use a small brush for tight crevices. Rinse thoroughly and let dry completely.
Warning: Never allow water to enter the housing—moisture can ruin the battery or circuitry.
Protect the Frame with Painter’s Tape
Apply painter’s tape around the edges of the solar panel. This shields the metal or plastic housing from scratches and sanding residue.
Visual Cue: Look for yellowing, cloudiness, or a rough texture—these confirm oxidation buildup.
Sand with 400-Grit Wet/Dry Paper
Soak the 400-grit sandpaper and panel in water. Sand in small circles with light pressure, keeping the surface wet at all times. Focus only on the clear plastic cover, never the black solar cell beneath.
- Sand for 2–3 minutes until the haze begins to lift
- The surface will appear dull but clearer
Critical: Excessive pressure can crack the panel or damage the photovoltaic layer.
Polish with 2000-Grit Paper for Clarity
Switch to 2000-grit wet/dry sandpaper. Continue sanding in circular motions while keeping the surface wet. This step removes fine scratches and restores transparency.
- Keep going until the surface feels glassy and looks clear
- Expect a dramatic improvement in light transmission
Pro Tip: Dip the sandpaper frequently in water to flush away debris and maintain smooth action.
Clean with Isopropyl Alcohol
Wipe the panel with 70% or higher isopropyl alcohol using a lint-free cloth. This removes oils, dust, and sanding residue, ensuring a clean surface for coating. Let it air dry—alcohol evaporates quickly.
Apply UV-Resistant Clear Coat in Thin Layers
Cut a cardboard shield slightly larger than the panel to prevent overspray. Hold the spray can 8–12 inches away and apply 2–3 thin coats of non-yellowing, UV-resistant automotive clear coat.
- Wait 5–10 minutes between coats
- Use short, sweeping bursts—no heavy sprays
- Avoid drips or pooling
Why This Matters: The clear coat seals the restored surface and prevents future UV damage.
Let the Coating Cure Before Reassembly
Allow the panel to dry undisturbed for 30–60 minutes. Do not reassemble or expose to moisture during this time. Once cured, the finish should be smooth, transparent, and fingerprint-resistant.
Final Check: Hold the panel up to light—the surface should be crystal clear with no streaks or haze.
Clean Mildly Cloudy Panels with Toothpaste (No Tools Needed)
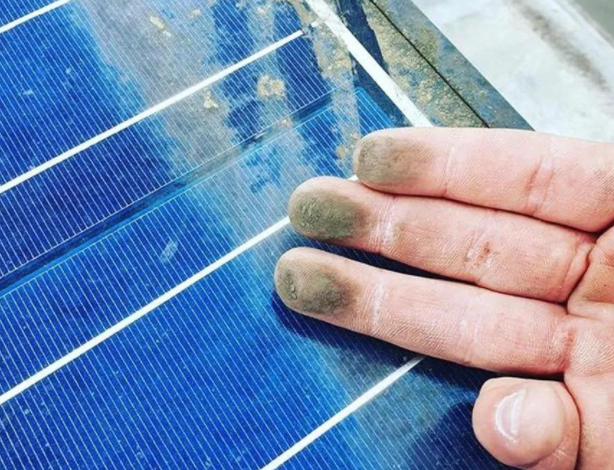
For lights with slight haze or if you want a zero-risk method, toothpaste works fast and safely. This technique uses household items and takes under 5 minutes.
Use Non-Gel Whitening Toothpaste
Apply a dime-sized amount of non-gel, whitening toothpaste (with mild abrasives like baking soda) directly onto the solar panel. Avoid gel formulas—they don’t have enough scrubbing power.
Why It Works: The gentle abrasives polish away oxidation without scratching the plastic.
Rub in Small Circles with a Damp Cloth
Using a soft, damp cloth, rub the toothpaste in small circular motions. Use light pressure—let the paste do the work. Continue for 1–2 minutes.
Visual Cue: You’ll see the cloudiness lift as the surface becomes reflective.
Rinse and Dry Completely
Wash off all toothpaste residue with clean water. Then let the panel air dry or pat it dry with a lint-free towel. Ensure no moisture remains before reattaching the cover.
Time Required: Under 5 minutes per light.
Apply Protective Coatings to Prevent Future Damage
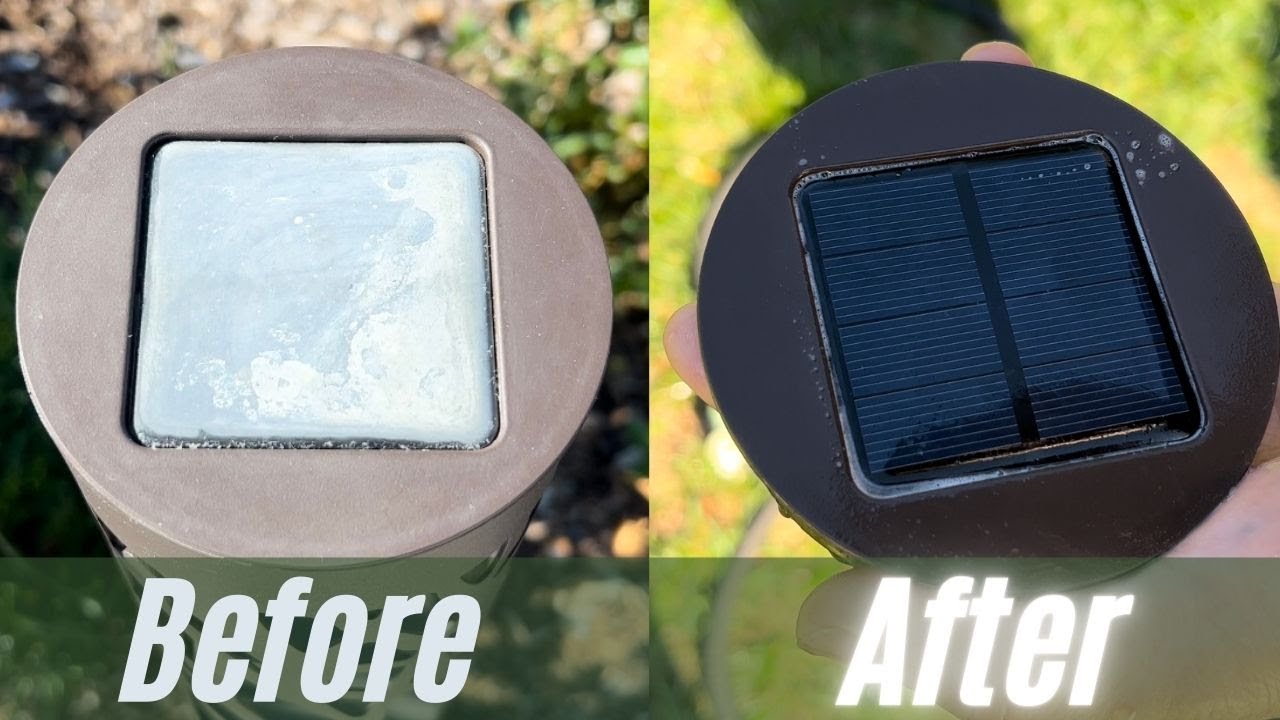
After cleaning, protect your panels to maintain clarity and reduce future maintenance.
Seal with Car Wax for Long-Lasting Protection
Apply a thin layer of car wax (paste or liquid) to the clean, dry panel. Buff lightly with a soft cloth. This creates a hydrophobic barrier that repels water, dust, and grime.
- Reapply every 2–3 months
- Especially effective in rainy or dusty climates
Pro Tip: Wax also enhances light transmission slightly by smoothing micro-scratches.
Prevent Rust on Metal Bases with WD-40
Spray a light coat of WD-40 on metal parts to prevent rust and corrosion. Wipe off excess to avoid attracting dirt. This is essential for lights with steel or iron housings.
Protect Plastic Housings with Armor All
Use a plastic protectant like Armor All on colored plastic bases. It restores color, prevents fading, and reduces cracking from UV exposure.
Avoid: Silicone-heavy products that attract dust.
Maintain Solar Garden Lights Year-Round
Regular upkeep keeps your lights performing like new and prevents deep oxidation.
Clean Panels Every 4–6 Weeks
Wipe down solar panels monthly during active use. Use a damp microfiber cloth and mild soap. Remove leaves, bird droppings, or snow promptly.
Best Time: Early morning or late evening—never clean under direct sunlight (heat can cause warping).
Schedule a Deep Clean in Early Fall
Plan a deep restoration in early fall before storing lights for winter. This ensures maximum efficiency when they return in spring.
Why Fall?: Reduces winter weather damage and prepares lights for low-light conditions.
Store Lights Properly in Cold Climates
If you live where temperatures drop below freezing, store lights indoors during winter. Extreme cold reduces charging and can crack brittle plastics.
- Clean and restore before storage
- Keep in a dry container
- Store batteries separately if removable
Choose the Right Cleaning Method for Your Lights

Not all solar garden lights need aggressive restoration. Pick the best method based on condition.
Use Toothpaste If:
- Panels are slightly cloudy
- You’re unsure about sanding
- You want a quick fix
- Lights are newer or lightly used
Use Wet Sanding If:
- Panels are yellowed or deeply hazy
- Lights barely charge anymore
- You’re comfortable with DIY repairs
- You want long-term results
Hybrid Approach: Try toothpaste first. If results are poor, proceed to wet sanding.
Avoid These Common Cleaning Mistakes
Even small errors can damage your lights or shorten their lifespan.
Never Sand the Solar Cell
Only sand the clear plastic cover, not the black photovoltaic layer underneath. Scratching the cell reduces energy absorption permanently.
Don’t Use Harsh Cleaners
Avoid bleach, ammonia, or abrasive pads (like steel wool). These can etch or cloud the panel irreversibly.
Skip Thick Clear Coat Layers
Applying too much clear coat causes fogging or peeling. Thin, multiple coats are always better than one heavy spray.
Prevent Water Ingress
Never soak the entire light or spray water directly into seams. Moisture inside leads to rust, battery failure, or short circuits.
Frequently Asked Questions About Cleaning Solar Garden Lights
Can I clean solar garden lights without removing the cover?
Yes, for light cleaning with a damp cloth and mild soap. But for deep restoration (especially wet sanding), you must remove the cover to access the panel safely.
Does toothpaste really work on cloudy solar panels?
Yes—non-gel, whitening toothpaste with mild abrasives effectively removes light oxidation. It’s a safe, no-cost method ideal for minor haze.
Can I use regular clear coat spray on solar panels?
Only use non-yellowing, UV-resistant automotive clear coat. Regular spray paint or lacquer will degrade quickly and block sunlight.
How often should I clean my solar garden lights?
Wipe panels every 4–6 weeks during use. Perform a deep clean or restoration once a year, ideally in early fall.
Why do my solar lights charge slowly after cleaning?
Moisture may have entered the housing during cleaning. Let the light dry fully in direct sun for 24–48 hours. If the issue persists, check the battery.
Can I restore plastic garden lights with the same method?
Yes—the wet sanding and clear coat method works on any UV-damaged outdoor plastic, including lawn furniture, signs, and fixtures.
Key Takeaways for Cleaning Solar Garden Lights
Cleaning solar garden lights is one of the easiest ways to improve outdoor lighting performance. Whether you spend 5 minutes with toothpaste or 20 with sandpaper, the results are immediate: brighter lights, longer runtime, and faster charging. By restoring oxidized panels and applying protective coatings, you can extend the life of your lights by 3–5 years.
Regular maintenance prevents deep degradation and saves money on replacements. Plus, it reduces electronic waste and keeps your garden looking beautiful. Start with the toothpaste method for quick wins, and use wet sanding for stubborn yellowing. With these proven techniques, your solar garden lights will shine brightly season after season.



