
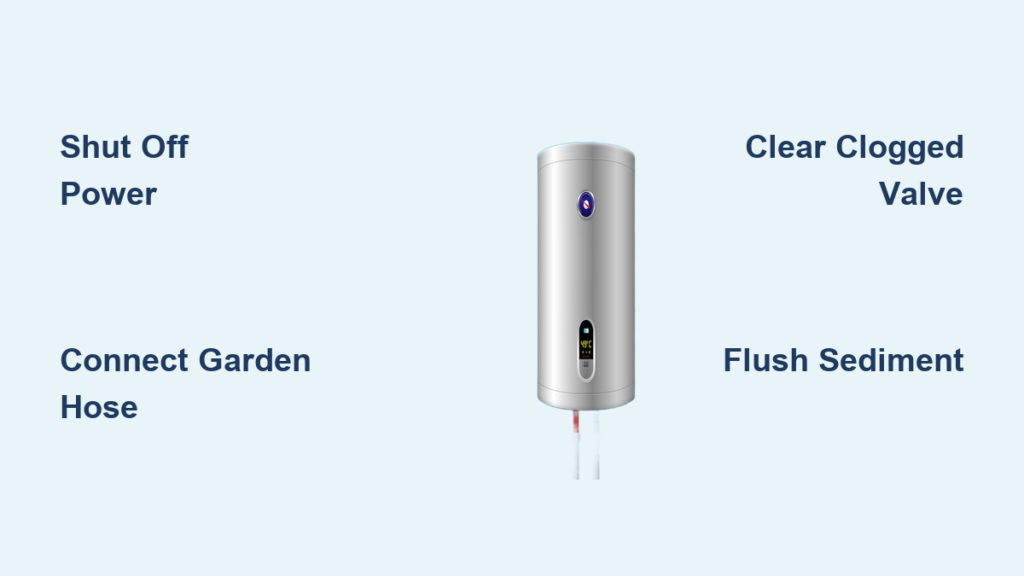
Sediment buildup in your water heater is an invisible problem—until it’s not. Over time, minerals from your water supply settle at the bottom of the tank, forming a thick layer that insulates the heating element or burner from the water. This forces your system to work harder, increasing energy bills, reducing hot water output, and shortening the unit’s lifespan. The good news? A simple annual flush using a garden hose can reverse these effects and keep your water heater running efficiently for years.
Flushing your water heater isn’t just for plumbers—it’s a DIY-friendly task that takes under an hour and costs almost nothing. With just a few tools and a standard garden hose, you can remove years of accumulated gunk, restore performance, and avoid costly repairs. This guide walks you through every step, from safety checks to final reactivation, ensuring a safe and effective flush. Whether you’re doing routine maintenance or tackling your first flush, this is everything you need to know.
Shut Off Power and Water Supply
Before draining your water heater, you must disable power and water to prevent damage or injury.
Cut Power to the Unit
For electric water heaters, go to your breaker panel and switch off the dedicated circuit breaker. Never restore power to an empty tank—this can instantly burn out the heating elements.
For gas water heaters, turn the gas control knob to “Pilot” or “Vacation.” This shuts off the main burner but keeps the pilot light on, avoiding the need to relight it. If you’re comfortable relighting, turn the valve fully to “Off.”
Close Cold Water Inlet Valve
Locate the cold water supply line at the top of the tank. Turn the shutoff valve 90 degrees to block incoming water. If your unit lacks a dedicated valve, install a full-port ball valve—it makes future maintenance much easier.
Relieve System Pressure
Open a hot water faucet somewhere in the house—preferably on an upper floor. This breaks the vacuum, allows air into the system, and ensures smooth drainage later.
Connect Garden Hose for Drainage

Now that the system is safe, set up the drain path using your garden hose.
Attach Hose to Drain Valve
Find the drain valve at the bottom of the tank. Connect a standard 3/4-inch male-threaded garden hose securely. Hand-tighten only—over-tightening can damage the valve.
Route Hose to Drain
Run the hose to a safe exit point:
• Floor drain
• Utility sink
• Outside (avoid landscaping—hot water can kill plants)
Place a bucket or towel under the valve to catch drips during setup.
Test for Vapor Lock
Even with everything off, water may not flow. That’s usually due to vapor lock.
Check for Air Traps
Crack the drain valve open slightly. If no water comes out, vapor lock is likely—air is trapped in the tank, blocking drainage.
Break the Lock
Go back to the open hot water faucet. Let it run briefly to allow air to escape. Return and reopen the drain valve. Water should now flow steadily.
If still blocked, proceed to unclogging steps.
Clear Clogged Drain Valve
Sediment often clogs the valve, especially in older units. Here’s how to fix it.
Use a Wire to Unclog
- Close the drain valve.
- Disconnect the hose.
- Place a rag beneath the valve.
- Open the valve slightly.
- Insert a straightened coat hanger or plumbing snake into the port.
- Gently probe to break up debris.
Hold the rag over the opening—water may burst out when the clog clears.
Upgrade to Full-Port Ball Valve
Standard drain valves are often only 3/8-inch, slowing drainage. Replace it with a 3/4-inch full-port ball valve for faster, more complete flushing.
Steps to replace:
1. Drain remaining water.
2. Use a wrench to remove the old valve.
3. Clean the valve opening.
4. Wrap new valve threads with Teflon tape and pipe dope.
5. Screw in the new valve tightly.
6. Reconnect the hose.
Note: If the tank is hot, run hot water at a tap to cool it before working.
Drain the Water Heater Completely
With the valve clear, it’s time to empty the tank.
Open Valve Fully
Turn the drain valve all the way open. Keep the hot water faucet open in the house—this allows air to enter and speeds up drainage.
Monitor Flow and Sediment
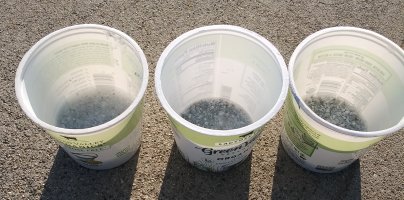
Let water flow into a bucket lined with a white t-shirt. This makes it easy to see:
• White/chalky deposits = calcium
• Gray particles = magnesium
• Reddish flakes = rust
Draining takes 10–20 minutes, depending on tank size and valve flow. Be patient—wait until water stops flowing.
Flush Out Remaining Sediment
Emptying the tank isn’t enough. You need to flush loose sediment from the bottom.
Rapid Valve Cycling Method
Once empty:
1. Close the drain valve.
2. Open it quickly—5 to 10 times.
3. Each burst stirs up sediment and forces it out.
This method uses built-up pressure to agitate and eject sludge without refilling.
Continuous Flush with Water Flow
For heavier buildup:
1. Reopen the cold water inlet valve slightly.
2. Let water flow through the tank and out the hose.
3. Run for 5–10 minutes, or until water runs clear.
Watch the hose output. If water stays cloudy, extend flush time. This step removes the insulating layer that reduces efficiency.
Close and Refill the System
With sediment gone, it’s time to restore the system.
Seal the Drain Valve
Close the valve tightly. Remove and disconnect the hose.
If the valve leaks when closed, cap it with a threaded plug—keep spares on hand for emergencies.
Refill the Tank
- Open the cold water inlet valve fully.
- Listen for air escaping from the open hot faucet.
- Once water flows steadily, close the faucet.
The tank is now repressurizing. Wait a few minutes before restoring power.
Restore Power and Heat Water
Now that the tank is full, it’s safe to turn the system back on.
For Electric Units
Flip the circuit breaker back on. Wait 1–2 hours before using hot water—elements need time to heat a full tank.
For Gas Units
Turn the gas control knob back to “On.” If the pilot went out, follow manufacturer instructions to relight it.
Replace the Anode Rod

This step is often skipped—but it shouldn’t be.
Why the Anode Rod Matters
The anode rod is a sacrificial component that corrodes instead of your tank. Once it’s worn, the tank starts to rust.
Check and Replace Every 3–5 Years
- Locate the rod on top of the heater (often under a cap).
- Use a socket wrench to unscrew it.
- Inspect: if it’s coated in calcium or more than 60% corroded, replace it.
Install a new rod with Teflon tape on the threads. This simple $30 part can add 5+ years to your water heater’s life.
Avoid Flushing Older Unmaintained Units
There’s one big exception to annual flushing: older tanks never flushed before.
Risk of Leaks
If your water heater is over 4–5 years old and has never been flushed, sediment may be sealing tiny cracks or weak spots. Removing it could trigger a leak.
How to Decide
- Check the serial number to determine age.
- If unsure, inspect sediment levels during a partial drain test.
- If the unit shows signs of rust or corrosion, consider replacement instead.
When in doubt, consult a plumber—flushing a failing tank could cause flooding.
Troubleshoot Common Flushing Issues
Even with care, problems can arise. Here’s how to fix them fast.
No Water from Drain Valve
• Cause: Vapor lock or clog.
• Fix: Open a hot faucet to release air. If still blocked, unclog with a wire.
Slow Drainage
• Cause: Small 3/8-inch valve or partial clog.
• Fix: Upgrade to a 3/4-inch full-port ball valve for faster flow.
Leaking Valve After Closing
• Cause: Damaged seat or debris.
• Fix: Cap with a threaded plug. Replace the valve when convenient.
Hot Water Takes Too Long to Return
• Cause: Air trapped in lines.
• Fix: Open hot faucets and let them run until flow stabilizes.
Maximize Efficiency with Annual Maintenance
Regular flushing isn’t a one-time fix—it’s part of a maintenance cycle.
Set a Yearly Schedule
Mark your calendar: flush every 12 months. Best time? Spring or fall—before peak heating seasons.
Adjust for Hard Water
If you have hard water, flush twice a year. High mineral content accelerates buildup.
Track Sediment Levels
Use the white t-shirt method each time. Less sediment over time means your system is staying clean.
Save Money: DIY vs. Plumber Cost
You don’t need a pro to flush your water heater—and skipping the service saves big.
• Professional flush: $250–$500
• DIY flush: $0–$50 (hose + anode rod)
With a one-time investment in a full-port valve and threaded plugs, you’ll save hundreds over the heater’s life.
Prevent Damage with Safety Checks
Avoid common mistakes that lead to damage or injury.
Never Power On an Empty Tank
Electric heating elements burn out instantly if not submerged. Always confirm the tank is full before restoring power.
Cool the Tank First
If the heater was recently used, run hot water for 10–15 minutes to cool it down. Working on a hot tank risks scalding and pressure issues.
Secure Hose Connections
A loose hose can spray water everywhere. Double-check the connection before opening the valve.
Frequently Asked Questions About Flushing Water Heaters
How often should I flush my water heater with a garden hose?
Flush your water heater at least once a year. If you have hard water, flush it twice a year to prevent rapid sediment buildup and maintain efficiency.
Can I flush a water heater without a garden hose?
No, a garden hose is essential for safely directing hot water and sediment to a drain. Without it, you risk scalding and water damage.
Why won’t water come out of my water heater drain valve?
This is usually due to vapor lock or a clogged valve. Open a hot water faucet to release air, or use a wire to clear sediment blocking the valve.
Should I replace the anode rod when flushing?
Yes. The anode rod protects your tank from rust. Inspect it every 3–5 years and replace it if it’s more than 60% corroded or coated in calcium.
Is it safe to flush an old water heater?
If your water heater is over 4–5 years old and has never been flushed, proceed with caution. Sediment may be sealing weak spots—removing it could cause leaks. Inspect carefully or consult a plumber.
What tools do I need to flush a water heater?
You’ll need a garden hose, bucket, towel, white t-shirt (for sediment inspection), wrench, and possibly a wire for unclogging. Optional upgrades include a full-port ball valve and threaded plugs.
Key Takeaways for Flushing Your Water Heater with a Garden Hose
Flushing your water heater with a garden hose is one of the most effective ways to extend its life, improve efficiency, and save on energy bills. By shutting off power and water, draining completely, flushing sediment, and replacing the anode rod, you ensure optimal performance. Always test for vapor lock, clear clogs, and upgrade to a full-port valve for faster drainage.
Set a yearly reminder—especially if you have hard water—and avoid flushing older, unmaintained units unless you’re certain they’re in good condition. With minimal cost and under an hour of effort, you’ll keep your water heater running like new. Grab your hose, follow these steps, and give your system the care it deserves.



