
You’ve chosen the perfect spot to create a new garden bed—maybe to hide a fire hydrant, refresh a dull corner, or boost your home’s curb appeal. The first and most crucial step? Removing grass for a garden bed. While it might seem like a big job, it’s a doable weekend project with a flat-edged shovel, proper timing, and a smart approach. Whether you’re working around obstacles or starting fresh, this guide gives you everything you need to remove sod efficiently, prepare healthy soil, and finish with a polished, weed-resistant bed.
In just a few hours, you can transform an ordinary patch of lawn into a beautiful, functional garden space. You’ll learn how to mark clean edges, cut and lift sod in manageable sections, avoid common mistakes, and prepare the soil for planting. With tips on tool selection, moisture timing, and disposal, you’ll complete the job safely and with minimal strain. Let’s get started.
Mark the Garden Bed Area
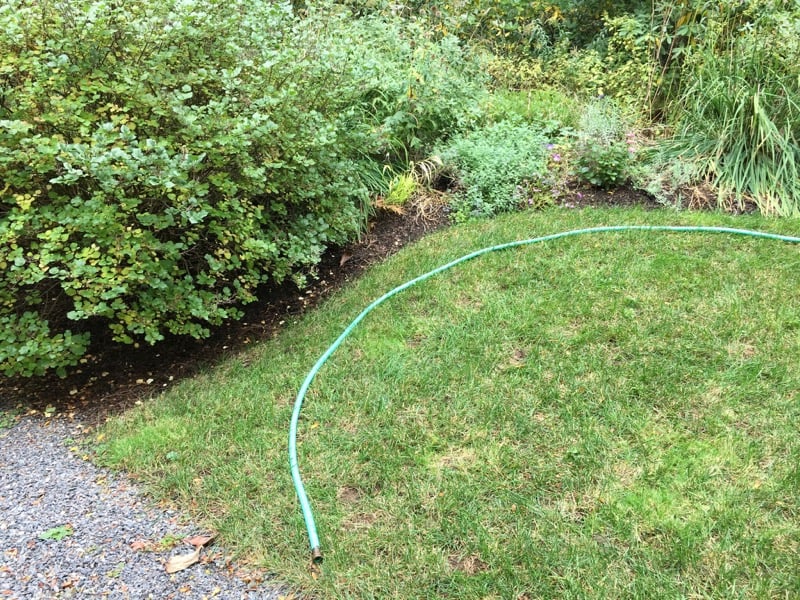
Use a Flexible Guide for Clean, Curved Edges
Start by outlining the exact shape of your new garden bed. Lay a flexible guide—like a garden hose, rope, or bright-colored extension cord—along the edge where you want to cut. This creates a smooth, visible line that helps you make even, professional-looking cuts. Follow the guide closely when slicing through the sod to ensure crisp boundaries. Avoid paint guns for small jobs; they’re messy and unnecessary. Stick to simple tools that give you control and precision.
Plan Around Obstacles and Access Points
Before cutting, check for fences, utility boxes, trailers, or fire hydrants that limit space. Tight areas make power tools impractical, so manual removal is best. Also, map out a clear path to carry sod to your compost pile or disposal area. Working around obstacles is easier when you plan your route early and keep your workspace uncluttered.
Choose the Right Tools for the Job

Use a Flat-Edged Shovel for Precision and Control
For small to medium beds, a flat-edged shovel (or straight-edged spade) is ideal. It slices cleanly through grass and roots, giving you control over the depth and angle of each cut. The flat edge helps lift sod in solid pieces, especially in tight spots where larger tools can’t go. While any shovel works, a flat-edged model reduces effort and improves results. Keep it sharp for smoother cutting.
Skip the Sod Lifter for Small Projects
Avoid renting a sod lifter unless you’re clearing a large lawn. For garden beds, it’s bulky, hard to maneuver, and often damages surrounding grass. Manual removal with a shovel is cheaper, more precise, and safer near obstacles. Save the heavy equipment for big-scale landscaping.
Gather Essential Supplies Before You Start
Prepare these items ahead of time:
• Compost pile or disposal area for sod
• Mulch for finishing the bed
• Native plants or groundcovers for planting
• Water container (if soil needs pre-moistening)
Having everything ready lets you work smoothly without interruptions.
Time It Right: Work With Ideal Soil Moisture
Remove Grass After a Light Rain
The best time to remove grass for a garden bed is after a light rain. Moist soil softens the root system, allowing the shovel to slide under sod easily. This helps you lift large, intact sections with less effort. Wet roots stay connected, reducing breakage and minimizing the need for spot repairs.
Avoid Dry or Soggy Soil Conditions
| Condition | Problem |
|---|---|
| Too dry | Roots snap—sod breaks apart, leaving patches behind |
| Too wet | Sod becomes heavy, muddy, and hard to carry |
If the ground is dry, water the area a few hours before starting. Let moisture soak in—don’t work in puddles. If it’s too wet, wait a day or two. Proper timing prevents frustration and physical strain.
Cut and Lift the Sod in Manageable Sections
Make the First Boundary Cut Along the Guide
Start by slicing straight down along your marked line using the flat-edged shovel. Push the shovel deep to cut through grass and roots. Follow your flexible guide precisely to create a clean edge. This cut defines the outer border of your garden bed and prevents grass from creeping back in.
Cut a Second Line 10–12 Inches Inward
Move 10–12 inches inside your first cut and make a parallel slice. This creates a sod strip of ideal width—wide enough to remove good sections but narrow enough to lift safely. A 12-inch width balances efficiency and manageability.
Section the Strip Every 2–3 Feet
Cut across the strip every 2 to 3 feet to break it into smaller chunks. This prevents long, heavy slabs that are hard to lift and carry. Smaller sections reduce back strain and make flipping sod for composting easier. Skipping this step leads to fatigue and injury.
Lift Sod Safely Using Proper Technique
Slide the shovel under each section and lift with your legs, not your back. Keep your spine straight and use your core to stabilize. Set sod aside grass-side down for composting or stack it neatly for disposal. Work steadily—rushing leads to mistakes and sore muscles.
Don’t Cut the Guide by Accident
Critical tip: Be careful not to slice through your guide, especially if it’s an extension cord. One wrong move can ruin the cord and halt progress. Keep it slightly outside the cutting zone or switch to a rope or hose if needed.
Remove and Dispose of the Sod
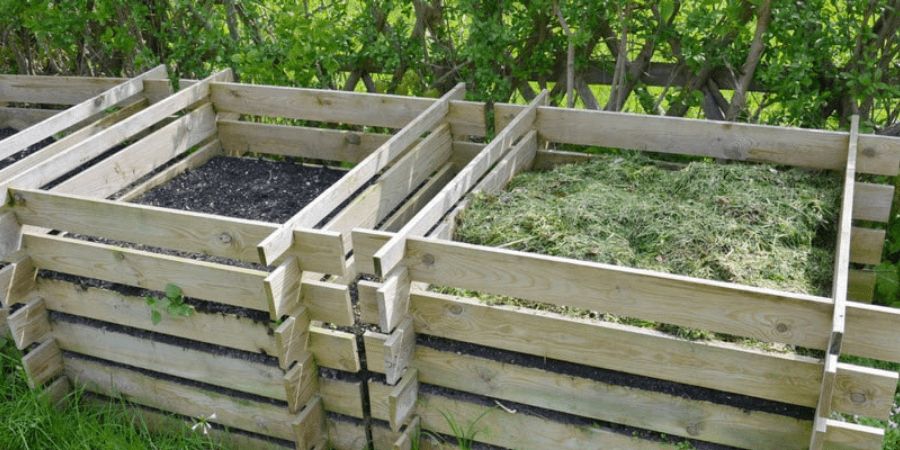
Carry Sod to Compost or Disposal Area
Transporting sod is often the toughest part. Carry sections to a compost pile, garden bin, or disposal site. If composting, place sod grass-side down to block sunlight and speed decomposition. Over several months, it breaks down into nutrient-rich soil you can reuse.
Work With a Partner to Reduce Effort
For faster results or larger beds, work with a second person. One cuts and lifts, the other carries. This halves the physical load, reduces fatigue, and makes the job more enjoyable. Even for small areas, an extra set of hands helps with heavy, wet sod.
Prepare the Garden Bed for Planting
Loosen and Clean the Soil
Once sod is gone, loosen the top 6–8 inches of soil with a garden fork or hand tiller. Remove leftover roots, rocks, and debris. This improves aeration and drainage, giving new plants a healthy start. Avoid stepping on the bed—work from the edges to prevent soil compaction.
Remove Any Remaining Grass Roots
Even after removal, some roots may linger. Pull them by hand or use a trowel to dig them out. This prevents regrowth and keeps your garden bed weed-free from day one.
Plant and Finish Your Garden Bed
Choose Native or Low-Maintenance Plants
Now it’s time to plant. Native plants thrive with less water and support pollinators. For ground-level coverage, try ornamental groundcovers like creeping thyme or sedum. Match your choices to sun and shade levels for best growth.
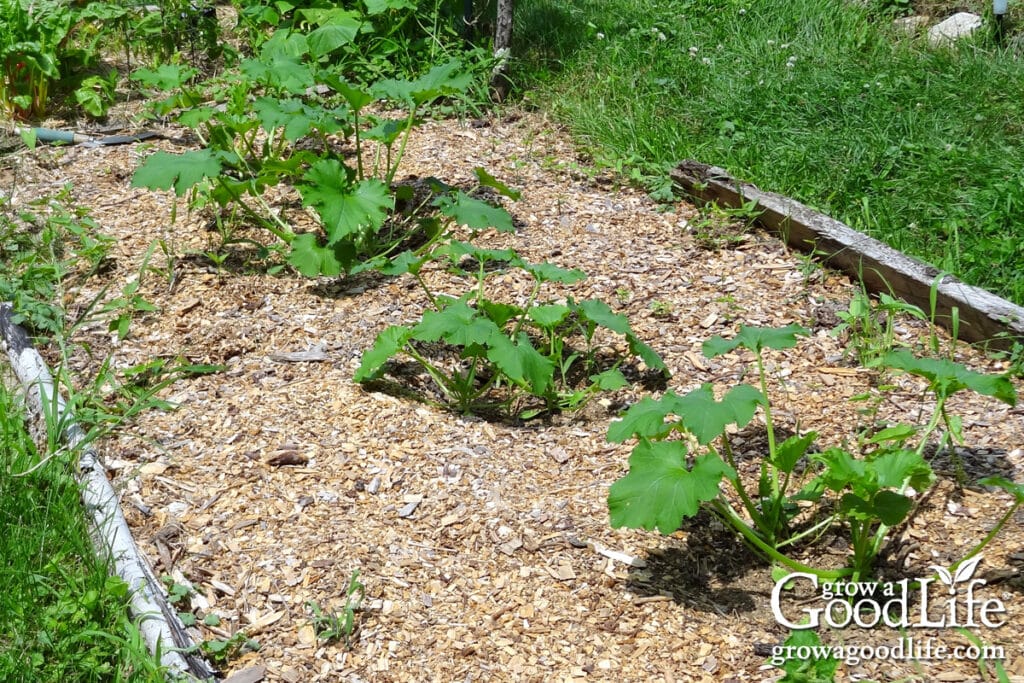
Apply 2–3 Inches of Mulch for Protection
Finish with a 2–3 inch layer of mulch. This:
• Retains soil moisture
• Suppresses weeds
• Shields roots from temperature swings
• Gives the bed a clean, finished look
Keep mulch a few inches away from plant stems to prevent rot and fungal issues.
Know What to Expect From the Project
Small Beds Take Just 2–4 Hours
A typical 4×8-foot garden bed can be completed in 2–4 hours by one person. The hardest part—removing grass—is over quickly. Once sod is gone, planting and mulching feel like rewarding final steps. Take breaks, stay hydrated, and work at a steady pace.
Enjoy an Instant Visual Upgrade
The transformation is dramatic. A plain grass patch becomes a functional, attractive garden space. Whether hiding a utility box or refreshing a dead corner, your yard’s curb appeal improves immediately.
Key Success Tips for a Smooth Job
Work in Small, Manageable Sections
Don’t tackle large areas at once. Section the sod into 2- to 3-foot pieces. This keeps the job under control, reduces fatigue, and prevents injury. Consistent progress beats rushing and burning out.
Use Proper Lifting Form
Bend your knees, keep your back straight, and lift with your legs. Rotate your hips instead of twisting your spine when placing sod. These habits protect your back and let you work longer.
Celebrate—The Hardest Part Is Done
Once the grass is gone, the rest is enjoyable. Planting, mulching, and admiring your work are the fun parts. Recognize grass removal as the major milestone it is.
Frequently Asked Questions About Removing Grass for a Garden Bed
Can I remove grass without a shovel?
While tools like sod cutters exist, a flat-edged shovel is the most practical for small beds. It’s affordable, precise, and works in tight spaces. For very small areas, a hand trowel may suffice, but a shovel is best for efficiency.
Should I compost the removed sod?
Yes—place sod grass-side down in your compost pile. The lack of sunlight kills the grass, and the roots break down over time into usable soil. Avoid composting sod treated with herbicides.
How deep should I cut when removing sod?
Cut 2–3 inches deep to capture most grass roots. Shallow cuts leave roots behind, leading to regrowth. A flat-edged shovel at the right depth ensures clean removal.
Can I plant right after removing grass?
Yes—once you’ve cleared the sod and loosened the soil, it’s ready for planting. Just remove any leftover roots and debris to give new plants the best start.
Will grass grow back after removal?
If all roots are removed and edges are clean, regrowth is unlikely. Monitor the border occasionally and pull any stray grass early. Mulch also helps suppress invaders.
Is it better to remove grass in spring or fall?
Both seasons work well. Spring offers moist soil and immediate planting. Fall allows time to prepare beds before winter. Avoid extreme heat or frozen ground.
Final Thoughts on Creating a Grass-Free Garden Bed
Removing grass for a garden bed is a rewarding DIY project that transforms your yard in just one weekend. With a flat-edged shovel, proper timing, and a methodical approach, you can clear sod efficiently and safely. Focus on working in small sections, lifting with your legs, and preparing the soil thoroughly. Once the grass is gone, planting and mulching bring your vision to life.
Your new garden bed will enhance curb appeal, hide eyesores, and support healthy plants. Top off mulch each spring and monitor for stray grass to keep it looking great. Now that the hard work is done, enjoy your beautiful, functional outdoor space.



