
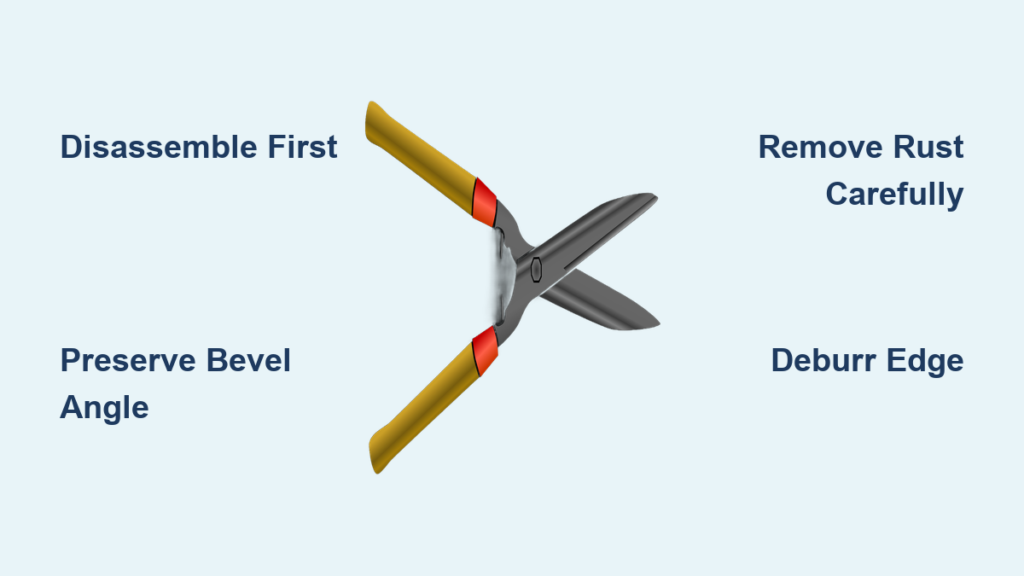
Dull garden shears crush stems instead of cutting them cleanly, damaging plants and making pruning frustrating. Learning how to sharpen garden shears properly restores their precision and extends their life—no need to replace them. With just a file, sandpaper, and 30 minutes, you can revive even rust-covered shears. This step-by-step guide follows proven techniques used by expert woodworker Paul Sellers, focusing on rust removal, bevel preservation, and smooth reassembly.
You’ll learn how to disassemble your shears safely, remove corrosion without damaging the cutting edge, file at the correct angle, and reassemble with proper tension. Plus, simple maintenance habits to keep your shears sharp season after season. Whether you’re reviving old tools or maintaining current ones, this method works for all bypass-style garden shears.
Disassemble the Shears
Taking apart your shears gives full access to both blades and the pivot point, ensuring a thorough cleaning and even sharpening. Skipping this step leads to uneven edges and poor performance.
Remove the Pivot Bolt
Use a wrench to loosen and remove the central nut and bolt. Keep the washer and spring washer nearby—they’re essential for proper tension during reassembly. Once the bolt is out, gently pull the two blades apart.
Why this matters: Sharpening while assembled risks filing at inconsistent angles and can damage the pivot mechanism over time.
Inspect for Damage
Check each blade for deep pitting, cracks, or bends. Light surface rust is normal and fixable. If the metal is deeply corroded or the blade is warped, replacement may be necessary.
Pro Tip: If the blades stick when opening or closing, it’s likely due to rust buildup in the pivot—cleaning will restore smooth motion.
Clean Surface Rust
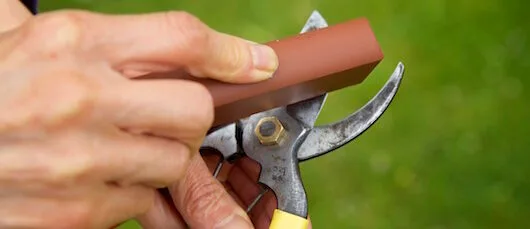
Rust increases friction and dulls blades quickly. Removing it prepares the metal for sharpening and ensures smooth blade movement.
Sand with 250-Grit Paper
Wrap 250-grit sandpaper around a small block or your finger. Gently sand the outer surfaces and pivot area, working from base to tip. Focus on rusted spots, but avoid the cutting edge, especially the white line marking the original bevel.
Use straight, even strokes to preserve blade geometry. This white line forms from years of blade contact and indicates the correct sharpening angle.
Use Steel Wool for Tight Spots
Switch to steel wool or a wire brush for the pivot hole and inner blade edges. These tools reach into crevices where sandpaper can’t.
Scrub until bare metal shines. Wipe clean with a dry cloth.
Final Step: Apply a light coat of mineral oil or 3-in-1 oil to prevent flash rusting before sharpening.
Sharpen the Cutting Edge
The key to sharp, effective shears is preserving the original bevel. Never create a new angle—this ruins the clean shearing action.
Choose the Right File
Use a three-cornered (triangular) saw file or a narrow flat file. The triangular shape fits the curved edge of most garden shears perfectly.
Upgrade Option: A diamond-coated file cuts faster, lasts longer, and handles hardened steel with ease.
File at the Correct Angle
Open one blade and place it on a non-slip surface. Hold the file at the same angle as the existing bevel—usually 20–30 degrees.
• Use long, even strokes from base to tip
• Keep the file flat against the bevel—never rock it up or down
• Apply consistent pressure
Do 10–15 strokes, then check for a burr—a slight ridge of metal on the flat side of the blade. That means you’ve fully cut through the edge.
Warning: Lifting the file creates a back bevel, which prevents clean cuts. Keep it flat!
Repeat on the Second Blade
Sharpen the second blade using the same number of strokes and pressure. Matching both blades ensures balanced cutting and prevents misalignment.
Expert Note: Uneven sharpening causes one blade to do all the work, leading to quick dulling and poor performance.
Remove the Burr
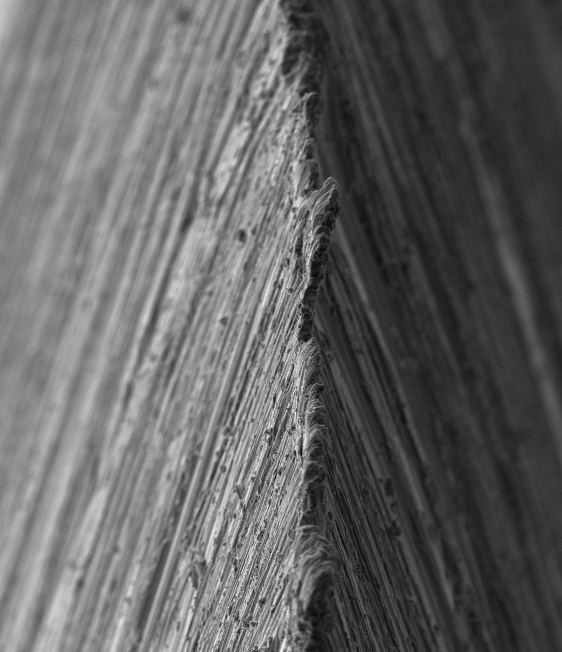
A burr is a thin lip of metal that forms on the opposite side of the edge during filing. It’s sharp but fragile—remove it for a durable, clean edge.
Deburr with Light Filing
Go over each blade with 2–3 light passes using the file. This knocks off the burr without removing more metal.
For the flat side (inside face), flip the blade and run the file lightly along the edge. Keep the file flat and use minimal pressure.
Alternative Method: Close the blades and work them open and closed 10–15 times. The rubbing action naturally breaks off the burr.
Finish with Steel Wool (Optional)
For a polished feel, lightly rub the flat side of each blade with fine steel wool. This removes micro-burrs and smooths the surface for cleaner cuts.
Reassemble the Shears

Proper reassembly ensures smooth action and correct blade alignment.
Align Blades and Washers
Place the blades back together with the spring washer between them. This maintains tension and prevents loosening during use.
Ensure the cutting edges overlap correctly—typically, the upper blade should sit slightly forward of the lower one.
Tighten the Pivot Nut
Reinsert the bolt and secure it with the lock nut. Use a crescent wrench to tighten it firmly—but not too tight.
Test Tension: The blades should move smoothly without wobble. If stiff, loosen slightly. If loose, tighten a quarter-turn.
Lubricate and Protect
Final oiling prevents rust and ensures smooth operation.
Apply Oil to the Pivot
Put a single drop of oil between the blades at the pivot point. Open and close the shears 10–15 times to distribute it.
Wipe off excess with a clean cloth. Too much oil attracts dirt and grime.
Best Oils: 3-in-1 oil, mineral oil, or specialized tool oil. Avoid WD-40 as a long-term lubricant—it dries out.
Store Properly
Keep shears in a dry place. For long-term storage, wrap the blades in an oiled cloth or hang them in a tool rack.
Pro Tip: After each use, wipe blades with an oily rag to prevent moisture buildup.
Test the Sharpness
Verify your work with a real cutting test.
Try a Branch Test
Snip a small green twig (¼ inch thick). Sharp shears should slice cleanly with minimal pressure. If it crushes or tears, recheck the edge or burr.
Visual Check: Hold the blade edge-up to light. A sharp edge reflects little or no light.
Adjust Tension if Needed
If the blades bind or feel loose, tweak the pivot nut. Ideal tension allows smooth motion without side-to-side play.
Prevent Future Dullness
Keep your shears sharp longer with simple habits.
Clean After Every Use
Wipe blades with a damp cloth, then dry immediately. Remove sap and plant residue before it hardens.
For Sticky Residue: Use rubbing alcohol or a vinegar-soaked cloth.
Avoid Cutting Hard Materials
Never use garden shears on wire, thick branches, or dry wood. These quickly dull or chip the edge.
Use the Right Tool: Bypass pruners for green stems, loppers for thick branches, and ratchet loppers for tough cuts.
Sharpen Regularly
Don’t wait until shears struggle. Sharpen every few months with heavy use—or whenever cutting feels rough.
Quick Maintenance: A few strokes with a pocket file keeps the edge keen between deep sharpenings.
Frequently Asked Questions About Sharpening Garden Shears
Can I sharpen garden shears without taking them apart?
You can, but it’s not recommended. Disassembling ensures even sharpening and allows full access to the pivot and inner blade surfaces. Filing while assembled risks uneven edges and missed rust spots.
What file should I use to sharpen garden shears?
Use a three-cornered (triangular) saw file or a narrow flat file. The triangular shape fits the curved cutting edge perfectly. For faster results on hardened steel, use a diamond-coated file.
How do I know the correct sharpening angle?
Follow the existing bevel—look for the white line along the edge where the blades have worn together. This shows the factory angle, typically 20–30 degrees. Never create a new angle.
Why is a burr important when sharpening?
A burr indicates you’ve cut through the full edge. It forms on the opposite side of the bevel and must be removed to create a clean, durable cutting surface. You can deburr with light filing or by working the blades together.
Can I use sandpaper to sharpen garden shears?
Sandpaper alone isn’t ideal for sharpening the edge, but it’s excellent for removing surface rust and polishing. Use 250-grit for cleaning and fine steel wool for finishing—never sand the bevel itself.
How often should I sharpen my garden shears?
Sharpen every few months with regular use, or whenever cutting feels rough or requires extra force. Clean and oil after each use to extend time between sharpenings.
Key Takeaways for Keeping Garden Shears Sharp
Mastering how to sharpen garden shears saves money, improves plant health, and makes gardening easier. The core principles are simple: disassemble first, preserve the original bevel, remove rust early, and oil regularly. With a file, sandpaper, and a few minutes, any dull or rusty pair can be restored to precision cutting tools.
Always follow the factory bevel, remove the burr after filing, and reassemble with proper tension. Clean and oil your shears after each use to prevent rust and maintain smooth action. By sharpening regularly and avoiding hard materials, your shears will stay sharp and reliable for years.



