Dull garden clippers make pruning harder and can harm your plants. When blades are sharp, they slice cleanly through stems, reducing plant stress and lowering the risk of disease. But when they’re worn or dirty, they crush rather than cut—inviting infection and slowing healing. Learning how to sharpen garden clippers properly takes just minutes and pays off in healthier plants and easier gardening. This guide walks you through the full process: cleaning, sharpening, and protecting your tools using simple, affordable supplies. In about 5 minutes, you can restore your pruners to like-new condition.
You don’t need expensive gear—just a carbide sharpening tool, household cleaner, oil, and a few basic items. The key is consistency: clean after every use, sharpen regularly, and always oil moving parts. Follow these steps to keep your garden clippers sharp, rust-free, and ready for every pruning task.
Clean Garden Clippers Before Sharpening
A dirty blade won’t sharpen well. Sap, soil, and rust interfere with the sharpening surface and can ruin the edge. Cleaning first ensures a smooth, effective sharpening process and prevents contamination during sharpening.
Remove Sap and Debris From Blades
Spray the blades with household cleaner or soapy water. Focus on joints, crevices, and the cutting edge where gunk builds up. Use a scrubber pad to wipe both blades, always moving from the dull side toward the sharp edge—this protects your fingers and preserves the blade. For tight spots around the pivot screw, use an old toothbrush to dislodge stuck-on grime.
Treat Rust on Metal Surfaces
If you see rust, gently rub it with fine steel wool until the metal is smooth and shiny. Avoid sandpaper—it can scratch too deeply and weaken the blade. Work slowly to preserve blade integrity. After removing rust, rinse the pruners under water to wash away residue.
Dry Blades Immediately After Cleaning
Wipe the blades and all metal parts completely dry with a clean rag. Never air dry—moisture left on steel causes rust fast. Drying right after cleaning prevents corrosion and keeps your tools in top shape.
Pro Tip: Do a quick wipe-down after each gardening session. It takes 30 seconds and prevents buildup.
Sharpen the Beveled Cutting Edge Properly
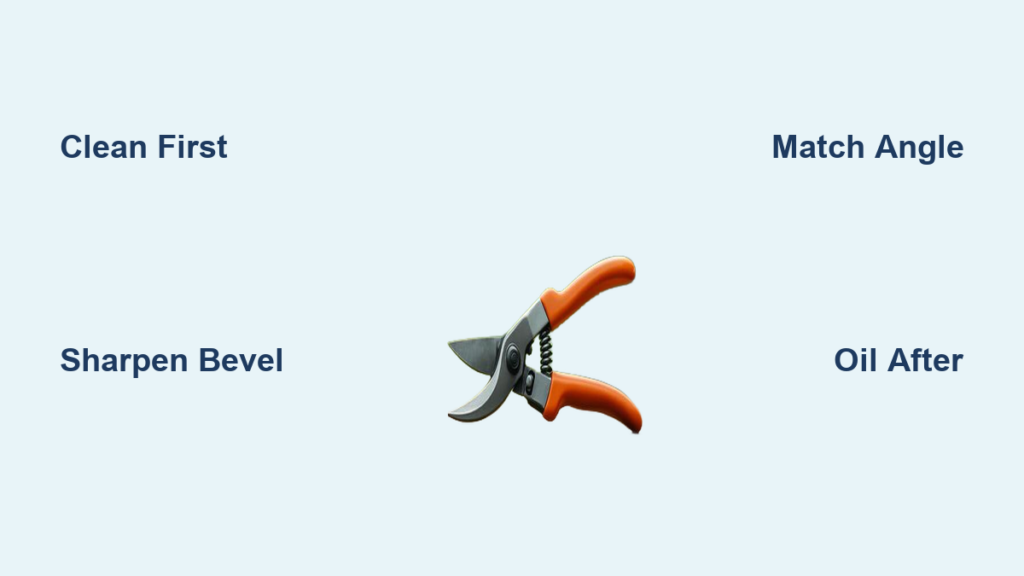
Only one blade on bypass pruners has a bevel—the angled cutting edge. That’s the only side you should sharpen. The flat side is smoothed only to remove burrs, not to create a new edge.
Match the Factory Bevel Angle
Hold the carbide sharpening tool at the same angle as the blade’s original bevel. Most pruners have a 20–30° angle. Going too steep or too shallow ruins the edge. Keep your hand steady and align the tool precisely to maintain the correct sharpening angle.
Stroke from Blade Base to Tip
Draw the carbide tool from the base of the blade to the tip, applying light, even pressure. Repeat 4–5 times. Use the same number of strokes each time for consistency. This motion polishes the edge and restores sharpness.
Warning: Always move away from your body and keep fingers clear. The blade will get sharper with each pass.
Deburr the Flat Side of the Blade
Flip the blade so the flat side rests against the sharpening tool. Repeat the same motion—base to tip, 4–5 strokes. This removes microscopic burrs formed during sharpening. You’re not sharpening this side, just deburring it.
Test Blade Sharpness After Sharpening
Run your finger lightly along the edge (carefully, from the side). It should feel uniformly smooth and sharp. If it snags or feels uneven, repeat the process. A properly sharpened blade cuts paper cleanly—try slicing a piece to confirm.
Oil Moving Parts to Prevent Rust

Sharpening exposes fresh metal, which oxidizes quickly. Oiling protects the blade and keeps the mechanism working smoothly.
Apply Light Household Oil
Put a few drops of mineral oil, vegetable oil, or any light household oil on a clean rag. Wipe it over both blades, the pivot point, and any springs or moving parts. Don’t drench—just a thin film is enough.
Work the Pruners to Distribute Oil
Open and close the pruners 10–15 times to distribute the oil. This prevents sticking and ensures smooth operation. Wipe off excess oil to avoid attracting dust.
Expert Note: Oil after every cleaning, not just sharpening. It extends tool life and prevents corrosion.
Avoid These Common Garden Clipper Sharpening Mistakes
Even small errors can ruin blades or shorten tool life. Watch for these frequent missteps to protect your investment and ensure clean cuts.
Never Skip Cleaning Before Sharpening
Sharpening a dirty blade spreads grime and creates an uneven edge. Always clean first—no exceptions. Dirt and sap act like abrasives and can damage the blade surface.
Only Sharpen the Beveled Side
Only the beveled side gets sharpened. The flat side is only deburred. Sharpening both sides weakens the blade and reduces cutting efficiency.
Stick to the Original Blade Angle
Deviating from the factory bevel angle damages the edge. Use the carbide tool to match the original angle exactly. Inconsistent angles lead to poor performance and faster dulling.
Never Let Clippers Air Dry
Moisture equals rust. Always dry with a rag immediately after rinsing. Leaving tools wet even overnight invites corrosion.
Use Consistent, Light Pressure
Heavy or inconsistent pressure creates dips in the blade. Use light, steady strokes for a uniform edge that lasts longer.
Choose the Best Tool for Sharpening Garden Clippers
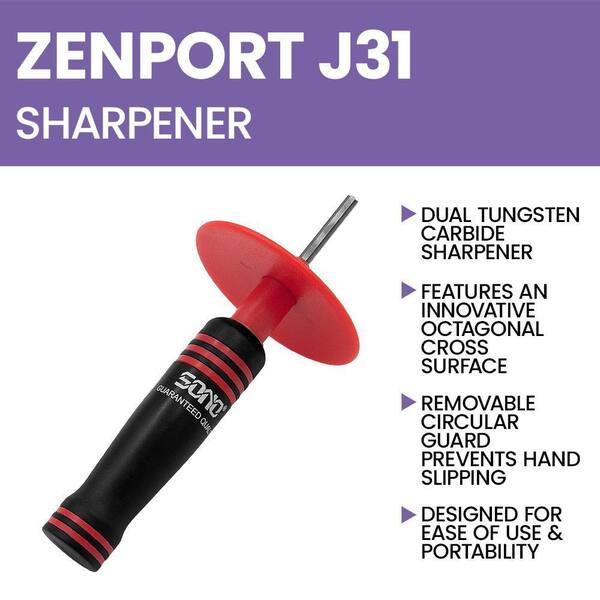
Not all sharpeners work well on small, curved pruner blades. The right tool makes the job fast and precise.
Why a Carbide Sharpening Tool Works Best
Carbide sharpeners are made from tungsten carbide—a hard, durable composite resistant to wear. They’re ideal for small garden tools because they:
• Fit easily on curved blades
• Require no setup or adjustment
• Last for years with minimal maintenance
• Cost around $10 and are widely available
Avoid Files and Whetstones for Quick Touch-Ups
Files are too coarse and can remove too much metal. Whetstones require skill to maintain angles and are overkill for quick pruner touch-ups. Save them for larger tools like shovels or shears.
Pro Tip: Keep your carbide tool in your gardening caddy. It’s small, durable, and always ready.
Maintain Sharp Garden Clippers With Regular Care
Sharp pruners don’t stay that way forever. Regular maintenance keeps them performing well and prevents rust.
Clean After Every Gardening Session
Wipe blades with a damp cloth and dry immediately. For heavy sap or soil, do a full clean weekly during peak season. A quick wipe takes less than a minute but prevents long-term damage.
Sharpen Every 4–6 Weeks During Active Use
If you garden weekly, sharpen every 4–6 weeks. High-use periods may require more frequent touch-ups. Signs you need sharpening:
• Stems look crushed, not cut
• You need extra force to close the blades
• Cuts feel ragged or uneven
Store in a Dry, Protected Place
Keep pruners in a dry place. Hang them or store in a toolbox with silica gel packs to reduce moisture. Avoid damp sheds or garages where humidity builds up.
Benefits of Keeping Garden Clippers Sharp
Well-maintained tools do more than cut better—they protect your garden and make work easier.
Promote Faster Plant Healing
Sharp blades make clean cuts that heal fast. Dull blades crush tissue, creating entry points for fungi and bacteria. Healthy cuts mean healthier plants.
Extend Tool Lifespan
Regular cleaning and oiling prevent rust and corrosion. A well-cared-for pruner can last decades with proper maintenance.
Reduce Hand Fatigue and Effort
Sharp clippers require less hand strength. This reduces fatigue, especially for gardeners with arthritis or weak grip.
Quick Fact: A sharp pruner uses up to 30% less force than a dull one.
Frequently Asked Questions About Sharpening Garden Clippers
Can I use a knife sharpener on garden clippers?
Yes, but only if it’s designed for small tools and matches the blade angle. Most standard knife sharpeners are too large or rigid for curved pruner blades. A carbide tool is safer and more effective.
How often should I sharpen my garden clippers?
Sharpen every 4–6 weeks during active use. If you notice crushing stems or need extra force, it’s time to sharpen. Light users can go longer, but clean after every use.
Do I sharpen both blades on bypass pruners?
No. Only sharpen the beveled (angled) cutting blade. The flat blade is only smoothed to remove burrs. Sharpening both weakens the tool and reduces cutting precision.
What’s the best oil for garden clippers?
Use mineral oil, vegetable oil, or any light household oil. These create a protective film without gumming up moving parts. Avoid heavy motor oils.
Can I sharpen anvil pruners the same way?
Anvil pruners have a different design—a flat anvil and a single cutting blade. Only sharpen the cutting blade, matching its bevel. Clean the anvil surface but don’t sharpen it.
Why do my clippers still feel dull after sharpening?
You may have sharpened the wrong side or used the wrong angle. Check that you only sharpened the beveled edge and matched the factory angle. Also ensure you cleaned the blade first.
Key Takeaways for Sharpening Garden Clippers
• Always clean blades before sharpening—sap and rust ruin the edge
• Only sharpen the beveled side; deburr the flat side
• Use a carbide tool to match the original 20–30° angle
• Oil after every cleaning to prevent rust and ensure smooth action
• Store in a dry place and sharpen every 4–6 weeks
Make sharpening part of your routine. With just 5 minutes and a $10 tool, you’ll keep your garden clippers in peak condition. The result? Cleaner cuts, healthier plants, and tools that last for years. Start today—your garden will thank you.