
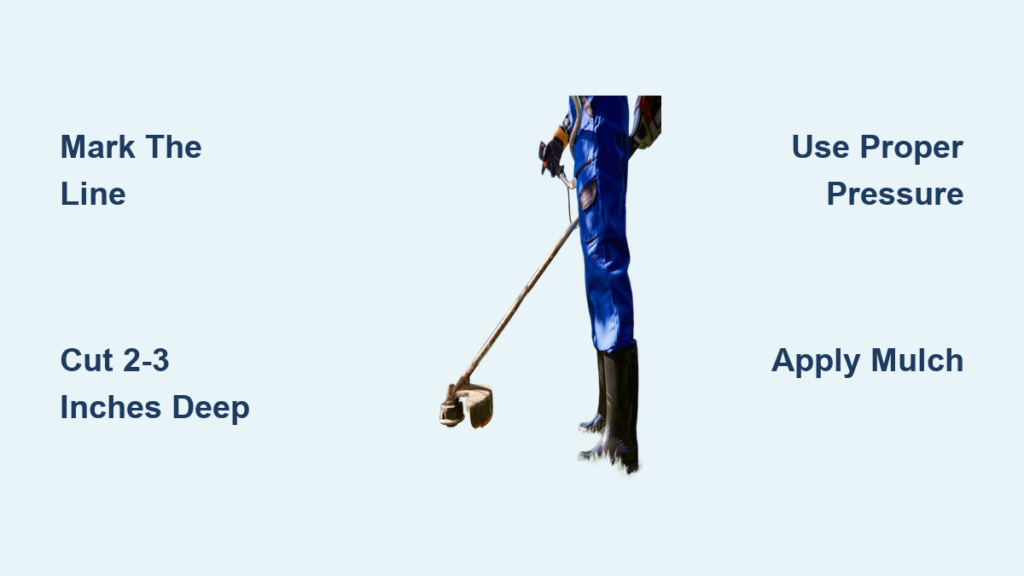
A clean, sharp edge between your lawn and garden beds, sidewalks, or driveways instantly elevates your landscape’s appearance. If grass keeps creeping into your flower beds or your borders look ragged after mowing, learning how to use a garden edger is the solution. Whether you’re using a simple manual step edger or a powerful EGO Power Head attachment, each tool delivers clean separation when used correctly—saving you time on maintenance and boosting your home’s curb appeal.
Mastering the technique behind edging goes beyond just cutting a line. It involves choosing the right tool, preparing your lawn, using proper form, and finishing with mulch for long-lasting results. This guide walks you through every step—from marking your edge to storing your tool—so you can achieve polished, weed-resistant borders with confidence. You’ll also learn pro tips, avoid common mistakes, and keep your equipment in top shape for years.
Choose the Right Edger for Your Lawn

Manual vs. Power Edgers: Which Is Best?
Manual edgers are ideal for small yards or light touch-ups. They require physical effort but offer unmatched control over depth and angle. With no cords, batteries, or fuel, they’re quiet, eco-friendly, and affordable. A sharp blade and footplate let you cut precise lines by stepping down and wiggling through grass and roots.
Power edgers like the EGO Power Head with edging attachment slice through turf quickly and effortlessly. Their high-speed rotating blade is perfect for large lawns or frequent edging. Features like a rear wheel ensure consistent depth, while an accessory handle improves balance. Though more expensive, they reduce fatigue and deliver faster, straighter results.
When to Use a Step Edger
A step edger works best on dry soil and smaller landscape borders. You operate it by stepping on the top handle with both feet, using body weight to drive the blade into the ground. A rocking motion helps it cut cleanly through compacted soil and shallow roots.
It excels at creating uniform 2–3 inch deep cuts along walkways or flower beds. Its compact size makes it ideal for tight spaces around trees or garden features. Avoid using it on wet ground—it increases resistance and can damage the blade.
Match Your Tool to Lawn Size and Needs
For small to medium yards under 5,000 sq ft, a manual or step edger is cost-effective and easy to store. These tools give you full control and are perfect for occasional use. For larger properties or weekly maintenance during peak growing seasons, a power edger saves time and physical strain.
Consider your budget, physical ability, and desired precision. Power models offer speed and consistency; manual options provide quiet, tactile feedback and zero emissions.
Prepare Your Lawn and Tools
Mark the Edging Line for Accuracy
Before cutting, clearly define where the edge should go. Use a garden hose, string, or spray paint to trace the boundary between lawn and bed, sidewalk, or driveway. For new installations—like around a light pole—spray paint offers the best visibility.
Extend the line about 2 inches beyond the current edge. This gap allows room for mulch or bark dust later, preventing grass from invading fresh landscaping. A well-marked path ensures consistency and prevents accidental overcutting.
Check Soil Moisture Before Edging
Dry soil is ideal—especially for manual and step edgers. Wet ground clings to blades, increases resistance, and makes clean cuts difficult. If it rained recently, wait 1–2 days for the soil to dry.
Power edgers handle damp conditions better but still perform best on firm, not soggy, ground. Avoid edging during or right after heavy irrigation. Working in optimal conditions reduces effort and improves cut quality.
Inspect and Maintain Your Edger
A dull blade tears grass instead of slicing it, leading to ragged edges and faster regrowth. Before use, check your edger’s blade for sharpness and damage.
For manual and step edgers:
• Clean off built-up soil with a brush or sand bucket
• Sharpen the blade if nicked or dull
• Ensure the footplate and handle are secure
For power edgers:
• Confirm the blade is tightly attached
• Position the accessory handle for comfort
• Verify the rear wheel spins freely
• Wear safety glasses—especially with exposed spinning blades
Master Manual Edging Technique
Position the Blade for a Clean Cut
Stand behind the edger and place the blade at a slight angle into the soil along your marked line. The cutting edge should face the lawn side to remove grass spreading into the bed. Align the tool to follow curves or straight edges accurately.
Hold the handle with both hands and position one foot on the footplate. Keep your stance balanced to apply even pressure without overreaching.
Cut with Controlled, Steady Pressure
Step down firmly on the footplate while gripping the handle. Push down and gently wiggle the edger left and right to slice through grass and shallow roots. This motion creates a clean, vertical cut 2–3 inches deep—enough to block grass spread without harming nearby plant roots.
Avoid cutting deeper than 3 inches. Excessive depth invites weeds, destabilizes soil, and may damage irrigation lines or tree roots.
Work in Small, Manageable Sections
After each cut, lift the edger and move it forward 6–12 inches. Reinsert the blade and repeat. Work in 10-foot segments to maintain focus and precision. Overlong stretches lead to drifting off-line or inconsistent depth.
If grass starts to thin in one area, consider relocating healthy plugs (see “Reuse Grass Plugs” below). This fills bare spots without buying new sod.
Operate a Step Edger Efficiently

Use Proper Foot Placement and Pressure
Place the sharp blade along the marked line, angled slightly into the soil with the cutting edge facing the lawn. Stand over the tool and step firmly on the top handle with both feet. Apply steady pressure to drive the blade into the ground.
Do not jump or stomp—controlled force prevents blade bending or breakage.
Apply a Smooth Rocking Motion
Once the blade is embedded, use a gentle left-to-right rocking motion to help it cut through compacted soil and root systems. This technique reduces strain and improves penetration without requiring excessive force.
Keep the movement smooth and rhythmic. Rushing leads to uneven cuts or skipped sections.
Advance Every 6 Inches for Uniform Depth
After completing a cut, lift the edger and move it forward approximately 6 inches (15 cm). Realign with the marked line and repeat. This incremental approach ensures uniform depth and a continuous edge.
Stop immediately if you feel resistance—this could indicate underground utilities, rocks, or dense roots. Investigate before proceeding.
Use a Power Edger Like a Pro
Set Up the EGO Power Head Correctly
Attach the edging blade securely to the power head. Make sure all connections are tight and the blade spins freely. Install the accessory handle and adjust it for comfortable two-handed control.
Position the edger so the blade hovers just above the ground. Use the rear wheel to set your desired cutting depth—typically 2–3 inches.
Activate and Guide the Blade Smoothly
Engage the trigger to spin the blade. Wait for it to reach full speed before moving forward. Begin edging slowly along the marked line, letting the wheel guide the tool.
Keep both hands on the handles and maintain a steady pace. Moving too fast results in shallow cuts; going too slow can overwork the motor or dig too deep.
Handle Sparks Safely During Operation
Sparks during operation are normal. They occur when the metal blade contacts soil, small stones, or buried debris. As long as the blade is intact and cutting smoothly, continue working.
However, if sparks are excessive or accompanied by vibration or noise, stop and inspect the blade for damage or obstruction.
Avoid Common Edging Mistakes
Don’t Force Through Resistance
If the edger meets sudden resistance, stop immediately. Forcing it can:
• Damage underground irrigation lines
• Sever electrical cables
• Harm tree roots
• Bend or break the blade
Back off and investigate. Use a hand trowel to probe the area. Adjust your path if necessary to avoid obstacles.
Avoid Cutting Too Deep
Cutting deeper than 3 inches offers no added benefit and introduces risks. Deep trenches:
• Expose roots to drying and disease
• Create spaces where weeds take hold
• Require more mulch to fill
• May interfere with sprinkler systems
Stick to 2–3 inches for effective grass control and clean aesthetics.
Never Skip Blade Maintenance
A dull blade is the #1 cause of poor edging results. It tears grass, leaving frayed edges that invite pests and disease. Check sharpness before each use.
Sharpen manual blades with a file or bench grinder. Replace damaged or excessively worn blades. For power edgers, follow manufacturer guidelines for blade care and replacement intervals.
Finish with Professional Results

Reuse Grass Plugs to Repair Bare Spots
If you have thin or bare patches, use your edger to lift healthy grass plugs from trimmed areas. Gently pry up small sections of turf (2–3 inches wide) and transplant them into problem spots.
Water thoroughly after planting. This method recycles existing grass, maintains lawn uniformity, and avoids the cost of new sod.
Create Clean Garden Beds Around Features
To install a new garden space—such as around a light pole or tree:
1. Mark the boundary with spray paint
2. Edge along the line
3. Remove the turf strip
4. Add fresh topsoil
5. Plant flowers, shrubs, or ground cover
This creates a defined, weed-resistant bed with a polished appearance.
Apply Mulch or Bark Dust for Long-Lasting Edges
After edging, pull back the grass slightly to open a clean gap. Spread a 1–2 inch layer of mulch or bark dust along the edge. Use a rake to smooth and level it, ensuring it sits flush with the lawn.
Benefits include:
• Blocks grass encroachment
• Suppresses weeds
• Enhances visual contrast
• Retains soil moisture
Reapply mulch annually for lasting results.
Clean and Store Your Edger Properly
Remove Soil and Debris After Use
After each use, clean the blade and footplate. Use a stiff brush or dip the tool in a bucket of sand to scrub off stubborn dirt. Sand acts as a mild abrasive that removes buildup without damaging metal.
Pay special attention to hinge points and crevices where moisture can collect and cause rust.
Dry Completely Before Storage
Wipe the entire tool with a dry cloth. Let it air-dry completely before putting it away. Storing a wet edger promotes rust and shortens its lifespan.
For power edgers, remove the battery and store it separately in a cool, dry place.
Store in a Dry, Protected Location
Keep your edger in a garage, shed, or garden storage box. Hang it or place it upright to protect the blade from damage. Avoid leaving tools on damp concrete floors.
Regular cleaning and dry storage extend tool life and ensure peak performance next use.
Frequently Asked Questions About Garden Edgers
How deep should I cut when using a garden edger?
Cut 2–3 inches deep. This depth blocks grass from spreading into beds without harming plant roots or irrigation lines. Deeper cuts increase weed growth and soil instability.
Can I use a power edger on wet soil?
It’s best to avoid edging on wet soil. While power edgers handle damp conditions better than manual tools, soggy ground increases resistance, reduces cut quality, and can damage the blade or motor.
Why does my edger leave ragged edges?
Ragged edges are usually caused by a dull blade. A sharp blade slices cleanly; a dull one tears the grass. Sharpen or replace the blade regularly for clean, professional results.
Should I edge before or after mowing?
Edge after mowing. A freshly cut lawn gives you a clearer view of the grass line, making it easier to create straight, consistent edges. It also prevents clippings from interfering with the blade.
How often should I edge my lawn?
Edge every 4–6 weeks during the growing season. High-growth lawns may need edging every 2–3 weeks. Regular maintenance keeps borders crisp and reduces overgrowth into garden beds.
Can I reuse the grass I remove when edging?
Yes. Healthy grass plugs removed during edging can be transplanted to bare or thin spots in your lawn. Water them well after planting to help them establish.
Key Takeaways for Mastering How to Use a Garden Edger
Using a garden edger correctly transforms your landscape with clean, defined borders that last. Choose the right tool—manual for small yards, power for large or frequent jobs. Prepare by marking your line, checking soil dryness, and sharpening your blade. Cut at 2–3 inches deep, work in small sections, and never force the tool through resistance.
Finish by applying mulch to lock in your results and suppress weeds. Reuse grass plugs to repair thin spots and maintain a full lawn. Clean and store your edger properly to extend its life.
Now that you know how to use a garden edger like a pro, grab your tool and give your yard the polished look it deserves. With consistent care, your edges will stay sharp all season long.



