
You’ve seen the brown, sunken spots on your tomatoes. Your peppers are dropping fruit. Something’s wrong—but you’re watering regularly, feeding your plants, and giving them plenty of sun. The culprit? It might not be a pest or disease. More often than not, it’s calcium deficiency, and the fix starts with garden lime.
Garden lime is a powerful yet simple soil amendment that raises pH and supplies essential calcium. Used correctly, it prevents blossom end rot, boosts nutrient availability, and creates healthier soil for vegetables, fruits, and ornamentals. But apply too much, at the wrong time, or on unsuitable soil—and you can do more harm than good.
This guide cuts through the confusion. You’ll learn exactly how to use garden lime—from testing your soil and choosing the right type, to applying it safely and effectively for tomatoes, container plants, and garden beds. We’ll cover dosages by soil type, liquid vs. granular methods, and critical mistakes to avoid. Whether you’re battling rotting fruit or preparing a new veggie patch, this is your complete, step-by-step resource.
Choose the Right Garden Lime for Your Soil

Not all lime works the same. Using the wrong type can cause nutrient imbalances or even harm your plants. Match your lime to your soil’s specific needs.
Use Standard Garden Lime (Calcium Carbonate)
Choose this if:
– Your soil pH is below 6.0
– You need to raise pH and add calcium
– You grow tomatoes, peppers, brassicas, or most common vegetables
Standard garden lime, also called ground limestone, contains calcium carbonate. It works slowly over weeks to months, making it ideal for seasonal soil prep. It’s widely available, safe to handle, and perfect for most home gardens.
Apply Dolomite Lime Only When Magnesium Is Low
Use dolomite lime only if:
– A soil test confirms low magnesium levels
– Plants show yellowing between leaf veins (a sign of magnesium deficiency)
Dolomite lime contains both calcium and magnesium carbonate. But if your soil already has enough magnesium, adding more can block calcium uptake and worsen blossom end rot.
Avoid Hydrated (Builders’) Lime
Despite its fast action, hydrated lime (calcium hydroxide) is too strong for most gardeners. It’s:
– Highly caustic—can burn skin, eyes, and roots
– Too reactive—can spike pH rapidly
– Requires only 30–40% of the amount used for garden lime
Stick to finely ground garden lime unless you’re experienced and certain of your soil’s needs.
Skip Lumpy or Coarse Lime Products
Lime must be finely ground to dissolve and react with soil. Lumps take years to break down and do little in the short term. Always check the bag—no visible stones or chunks.
Test Your Soil pH Before Applying Lime
Never add lime without testing. Applying lime to alkaline soil harms plants and wastes effort.
Ideal pH Range for Vegetables
- 6.0 to 7.0 is optimal for most vegetables
- 6.5 is the ideal target for general garden use
If your pH is 7.0 or higher, do not apply lime. Instead, grow acid-loving plants like blueberries or rhododendrons in containers with ericaceous compost.
Best Times to Test Soil
- Before planting a new bed
- Annually for vegetable gardens
- When plants show poor growth or blossom end rot
Wait at least 3 months after adding lime, compost, or fertiliser—otherwise, results will be inaccurate.
How to Accurately Test Soil pH
Use a:
– Digital pH meter (calibrate regularly)
– Soil test kit from a garden centre
– Lab-based soil analysis (most accurate)
Insert the probe or mix the sample to 15–20cm deep—the root zone where lime needs to work.
Fix Blossom End Rot in Tomatoes with Garden Lime
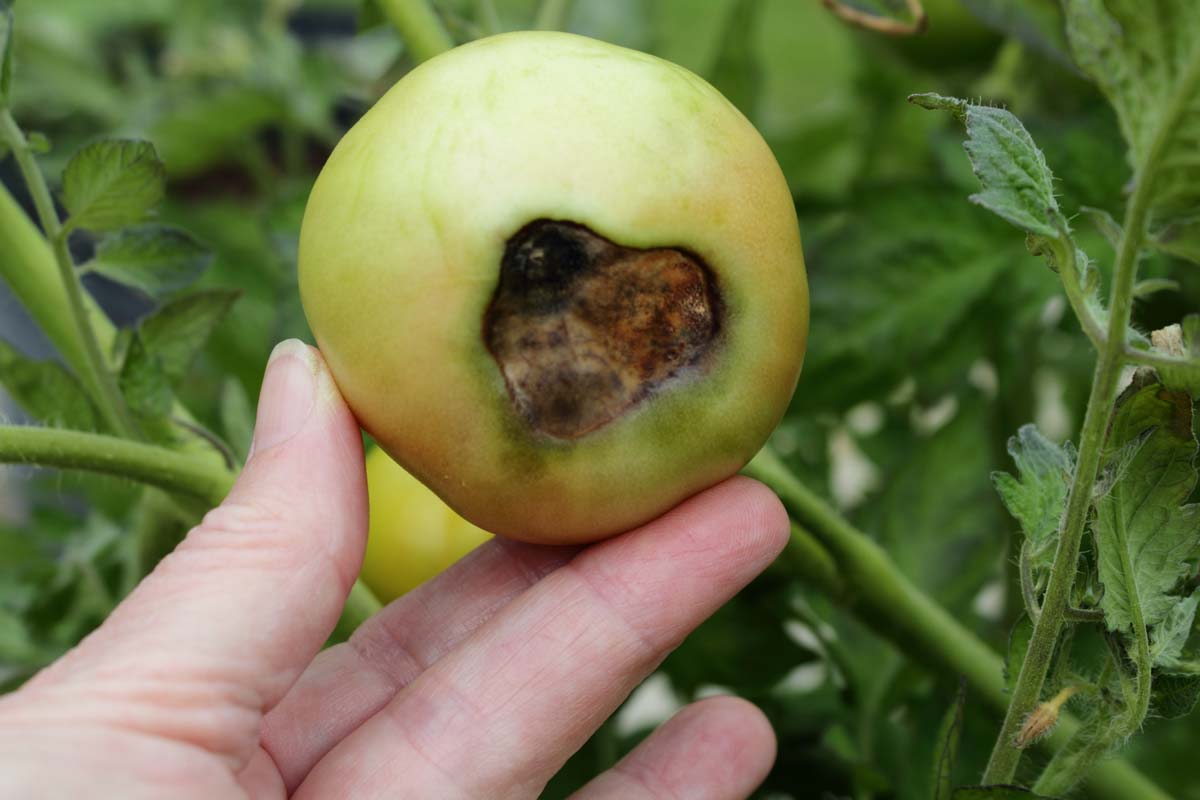
Blossom end rot—the dark, leathery patch on the bottom of tomatoes—is the top sign of calcium deficiency. Garden lime can stop it—but only when applied correctly.
Add Lime at Planting Time
For best results:
– Mix a handful of garden lime into each planting hole
– Or apply 100g per sq m over the bed before transplanting
– Water in immediately
This ensures calcium is available during early fruit development.
Use Liquid Lime for Fast Correction
If rot has already started:
1. Mix ½ cup (2–3 small handfuls) of garden lime into 1 gallon of water
2. Stir until cloudy (like muddy water)
3. Pour 1–2 cups around the base of each plant
For a 5-gallon container with two tomato plants, use 1 cup of solution and wait 3–5 days to assess improvement.
Why liquid works: It delivers calcium quickly to roots, bypassing slow soil breakdown.
Prevent Calcium Uptake Blockers
Even with lime, calcium won’t reach fruit if:
– Watering is inconsistent (dry spells block uptake)
– Too much nitrogen is present (competes with calcium)
– Roots are damaged (limiting absorption)
Keep soil evenly moist, especially during fruit set. Avoid high-nitrogen fertilisers once flowering begins.
Apply Garden Lime Based on Soil Type and pH
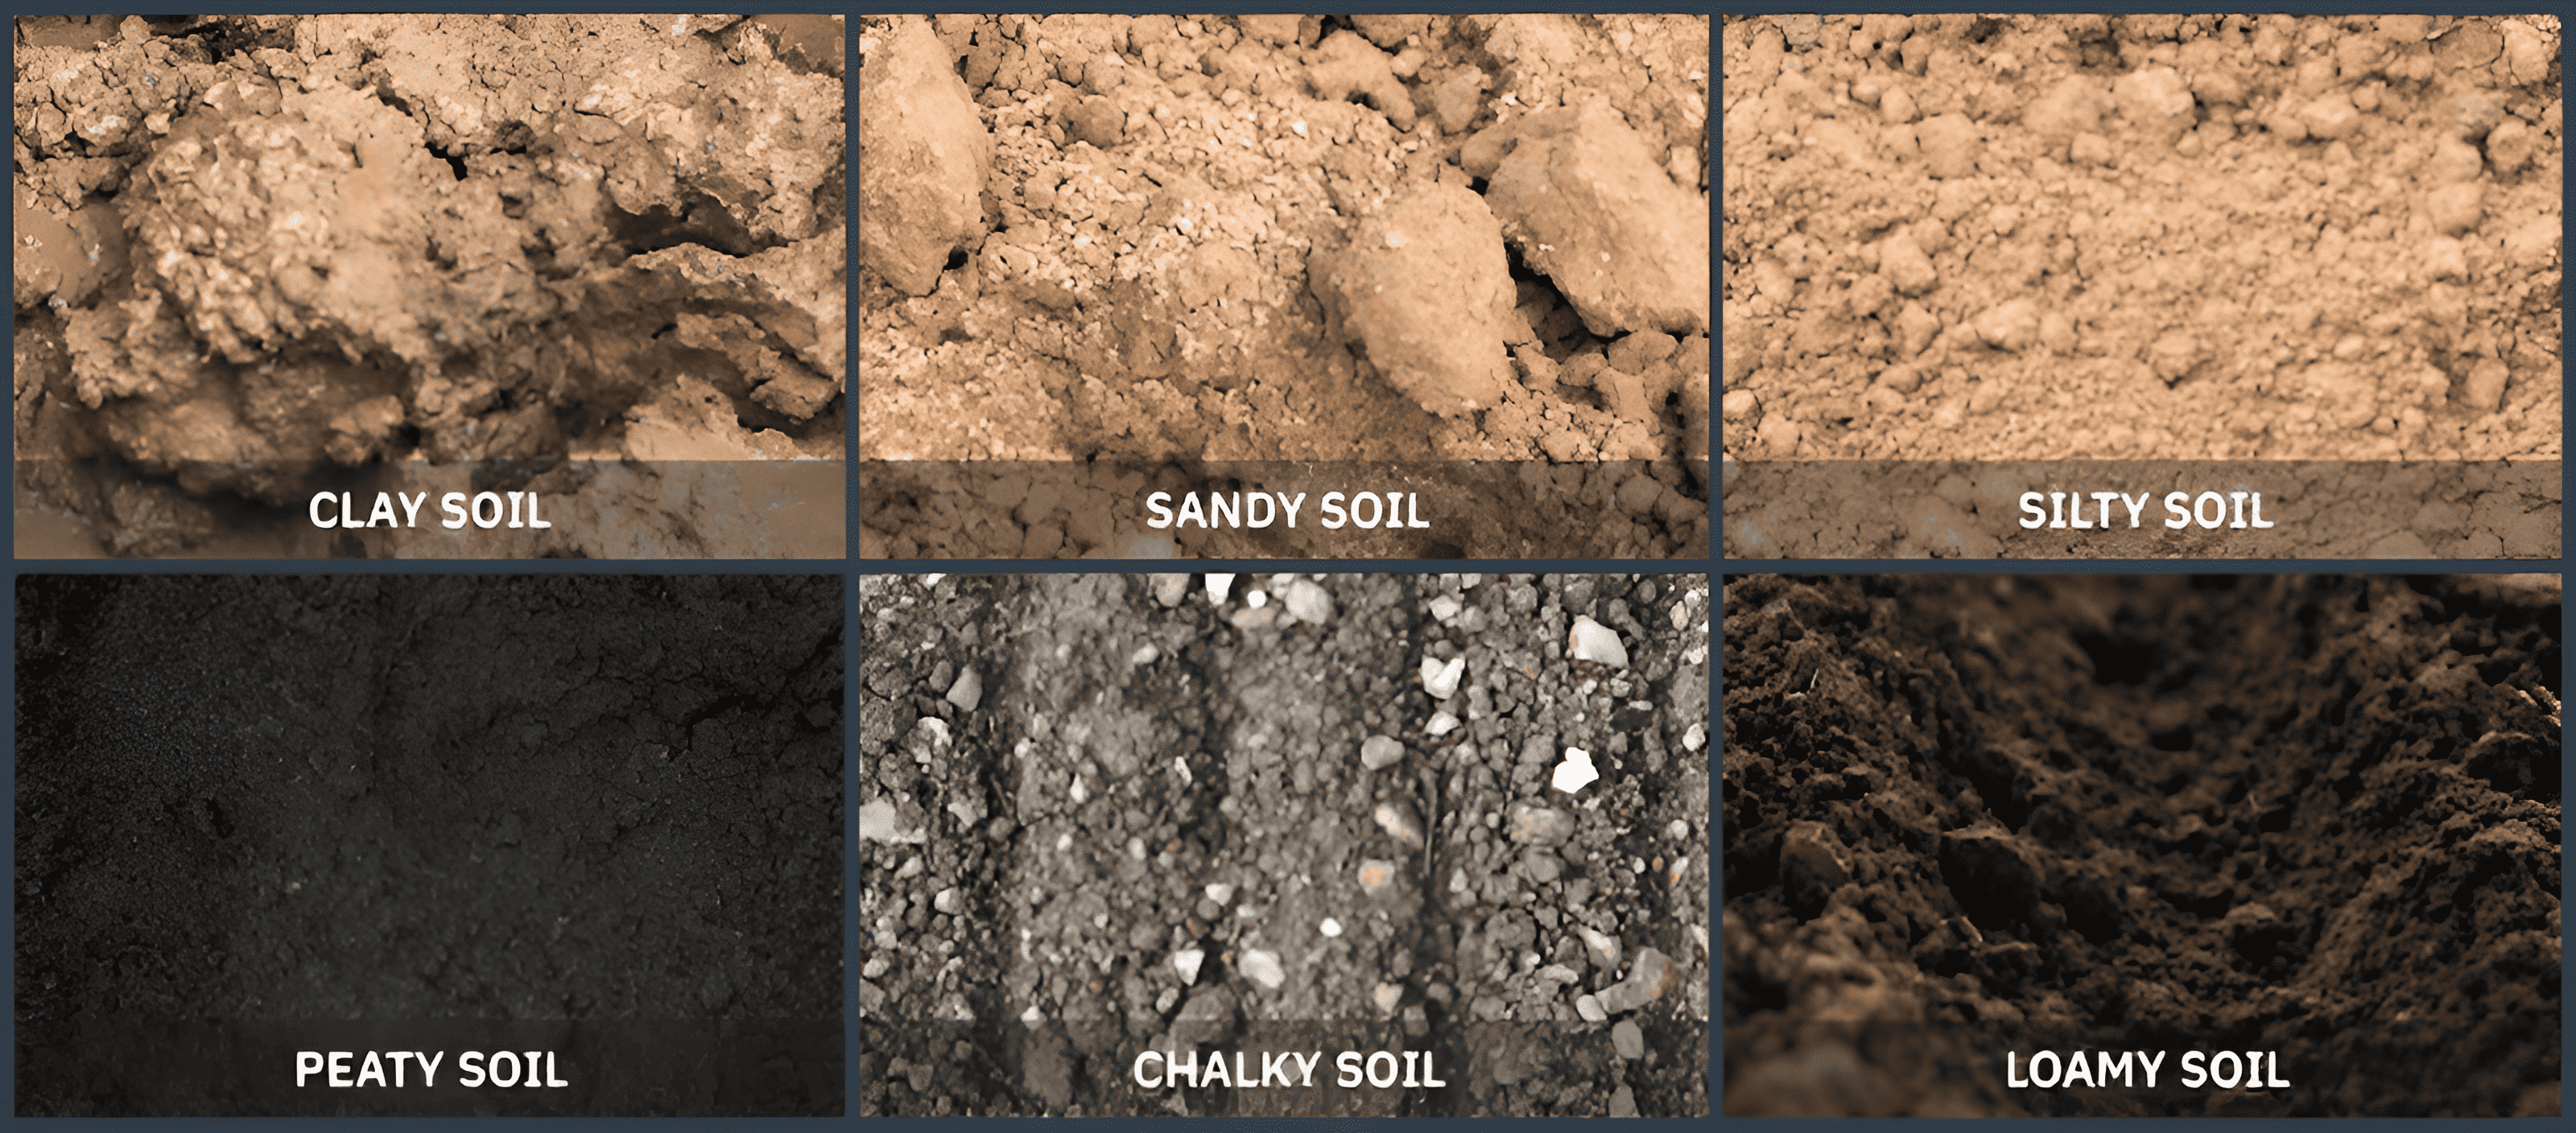
Clay resists pH change. Sand doesn’t. That’s why lime rates vary by texture.
Clay Soil Needs More Lime
| Original pH | Lime Needed (kg/m²) |
|---|---|
| 5.0 | 1.5 |
| 5.5 | 1.0 |
| 6.0 | 0.5 |
Clay has high buffering capacity, meaning it resists pH change. You need more lime to neutralise acidity.
Loam Soil: Moderate Application Rates
| Original pH | Lime Needed (kg/m²) |
|---|---|
| 5.0 | 1.0 |
| 5.5 | 0.5 |
| 6.0 | 0.25 |
Loam balances drainage and nutrient retention—ideal for most gardens.
Sandy Soil: Less Lime Required
| Original pH | Lime Needed (kg/m²) |
|---|---|
| 5.0 | 0.5 |
| 5.5 | 0.25 |
| 6.0 | 0.1 |
Sandy soil changes pH quickly but also leaches calcium. Reapply lime annually if growing heavy feeders like tomatoes.
Conversion Tip
- 1 kg/m² ≈ 48 oz/yd²
- Use a soil spreader or gloves for even coverage
Apply Garden Lime at the Right Time
When you apply lime matters as much as how much.
Best Time: Late Autumn or Winter
Apply lime:
– Before digging or tilling
– During dormancy, not active growth
Lime takes 4–8 weeks to react with soil. Winter application lets it work before spring planting.
For New Gardens: Lime Before Planting
Always adjust pH before sowing seeds or planting. Once plants are established, surface-applied lime takes years to reach deep roots.
For Established Beds: Surface Apply with Caution
You can sprinkle lime on top of soil around perennials or lawns, but:
– It moves slowly downward (only 1–2 inches per year)
– Effects may take 2–3 years
– Best for maintenance, not correction
Use Correct Application Methods for Maximum Effect
How you apply lime determines how well it works.
For Garden Beds: Dig or Water In
- Below 0.5 kg/m²: Sprinkle and dig in, or water in if tilling isn’t possible
- Above 0.5 kg/m²: Dig in half, sprinkle the rest on top and water well
Mix lime into the top 20cm (8 inches) to ensure contact with root zones.
For Drip-Irrigated Gardens
Place granular lime:
– Next to drip lines
– Within the wetting zone
Then water immediately. This dissolves the lime and pulls it into the soil before the next irrigation cycle.
Critical: Dry lime on the surface does nothing. It must be wetted in to activate.
For Container Plants: Use Liquid Application Only
Granular lime breaks down too slowly in pots. Use the water-mix method:
1. ½ cup lime per gallon of water
2. Stir well
3. Apply 1–2 cups per pot
4. Repeat every 3–4 weeks during fruiting
Avoid over-liming—containers have limited soil volume.
Avoid These 5 Common Garden Lime Mistakes
Even experienced gardeners get lime wrong. Steer clear of these errors.
Mistake 1: Applying Without Testing
Lime won’t help if:
– Soil is already alkaline
– The problem is drought, not calcium
Test first. Apply only when needed.
Mistake 2: Using Lumpy or Coarse Lime
Large particles take years to dissolve. Always use finely ground lime with no visible chunks.
Mistake 3: Skipping the Water
Dry lime sits on the surface. Water immediately after application to move it into the root zone.
Mistake 4: Overusing Hydrated Lime
It’s 30–40% stronger than garden lime. Using the same amount will spike pH and harm plants.
Mistake 5: Ignoring Magnesium Levels
Using dolomite lime when magnesium is already high can cause calcium deficiency—even if you’ve added lime.
Try These Alternative Calcium Sources

If you prefer not to raise pH, use these instead.
Calcium Nitrate Fertiliser
- Fast-acting, water-soluble
- Does not affect pH
- Apply as foliar spray or soil drench per label
Ideal for mid-season calcium boosts in tomatoes and peppers.
Gypsum (Calcium Sulfate)
- Supplies calcium without raising pH
- Improves soil structure in clay soils
- Use at 1–2 kg/m²
Best for neutral or alkaline soils where calcium is low but pH is fine.
Milk Solution
- Mix 1 part milk with 1 part water
- Spray on leaves or pour at base
- Contains bioavailable calcium
Used by many gardeners as a natural, low-cost option.
Compost and Organic Matter
Well-rotted compost supplies small amounts of calcium. But during heavy fruiting, it’s rarely enough on its own.
Maintain Healthy Soil Year-Round
Lime is a tool—not a cure-all. Long-term success depends on balanced soil management.
Water Consistently
Calcium moves with water. Letting soil dry out during fruit development blocks uptake, even if lime is present.
- Water deeply 2–3 times per week
- Use mulch to retain moisture
- Avoid overhead watering to reduce disease
Avoid High-Nitrogen Fertilisers
Excess nitrogen promotes leafy growth but interferes with calcium absorption. Use balanced or low-nitrogen feeds once flowering begins.
Remove Affected Fruit
If blossom end rot appears:
– Pick off damaged fruit
– Don’t let the plant waste energy on it
– Treat soil immediately
New fruit should develop normally if calcium is now available.
Re-Test Soil Annually
Soil pH changes over time. Test every year to stay within the 6.0–7.0 range.
Don’t Lime These Plants or Soils
Lime isn’t for every garden.
Don’t Lime If:
- Soil pH is 7.0 or higher
- You’re growing acid-loving plants like:
- Blueberries
- Rhododendrons
- Camellias
- Heathers
These thrive in acidic soil (pH 4.5–6.0). Adding lime will cause chlorosis (yellow leaves) and poor growth.
For Acid-Loving Plants: Use Sulphur
To lower pH, apply:
– Elemental sulphur (follow package rates)
– Iron sulfate (faster acting)
– Ericaceous compost in containers
Avoid peat—it’s environmentally damaging and no longer recommended.
Handle Garden Lime Safely
Even natural products require caution.
Always Wear Gloves
Dry lime can irritate skin. Always wear:
– Rubber or nitrile gloves
– Safety goggles if using hydrated lime
– Dust mask if handling large quantities in dry, windy conditions
Keep Away from Children and Pets
Store lime in a sealed container, out of reach. Avoid applying on windy days to prevent dust drift.
Wash Hands After Use
Even with gloves, wash hands thoroughly after handling.
Frequently Asked Questions About Garden Lime
What is the best time of year to apply garden lime?
Apply garden lime in late autumn or winter, before spring planting. This gives it 4–8 weeks to react with the soil and adjust pH before crops go in.
Can I use garden lime on tomato plants?
Yes. Mix a handful of lime into each planting hole or use a liquid solution (½ cup lime per gallon of water). This prevents blossom end rot by supplying calcium directly to roots.
How much garden lime should I use per square meter?
It depends on your soil type and pH. For clay soil at pH 5.0, use 1.5 kg/m². For sandy soil at the same pH, use only 0.5 kg/m². Always test first.
Does garden lime raise soil pH?
Yes. Garden lime (calcium carbonate) raises soil pH in acidic soils. It works best when dug into the top 20cm of soil and watered in. Do not use it on alkaline soils (pH 7.0 or higher).
Can I use milk instead of garden lime?
Yes, as a supplement. Mix 1 part milk with 1 part water and apply to the soil or spray on leaves. Milk provides calcium but does not raise pH like lime.
What happens if I use too much garden lime?
Over-liming raises soil pH too high, causing nutrient lockout—especially iron and manganese. This leads to yellowing leaves and poor growth. Always test soil before and after application.
Key Takeaways for Using Garden Lime Successfully
Using garden lime correctly prevents blossom end rot, balances soil pH, and supports strong plant growth. The key steps are: test your soil first, choose the right lime type, and apply at the right rate and time.
For most vegetable gardens, apply finely ground garden lime in winter, based on soil type and pH. Use liquid lime for fast correction in tomatoes and containers. And never lime without testing—especially if you’re growing acid-loving plants.
Now that you know how to use garden lime safely and effectively, you can grow healthier tomatoes, peppers, and vegetables—free from rot and nutrient issues. Test, treat, and watch your garden thrive.



