
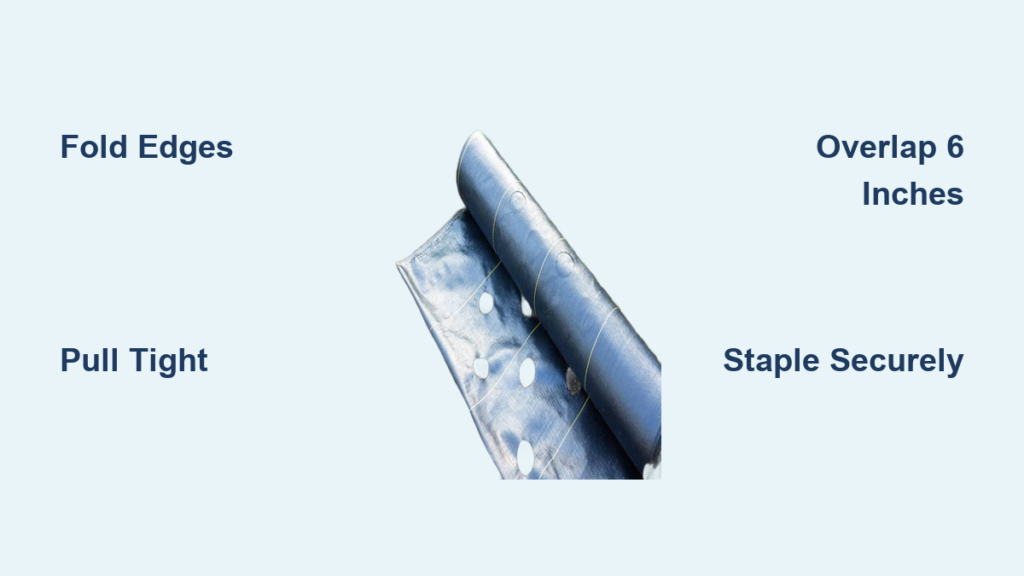
Weeds don’t just clutter your garden—they compete for water, nutrients, and sunlight, threatening the health of your plants. If you’re tired of constant weeding, garden fabric (also known as landscape fabric or weed barrier) is one of the most effective solutions available. When installed correctly, high-quality woven garden fabric blocks over 95% of weeds while still allowing water, air, and nutrients to reach plant roots. But using the wrong type or skipping key steps can leave you with a tangled, ineffective mess that fails within months.
This guide shows you exactly how to use garden fabric for long-term success. You’ll learn how to choose durable materials, prepare your soil properly, secure the fabric without gaps or wrinkles, and avoid the most common installation errors. Whether you’re setting up flower beds, vegetable gardens, or gravel walkways, this step-by-step process ensures your garden stays clean, healthy, and weed-free for years.
Choose the Right Garden Fabric for Long-Term Results
Skip Thin or Plastic Landscape Sheets
Not all garden fabric works the same. Many inexpensive rolls sold at big-box stores are thin, tear easily, and degrade within a year. Worse, some gardeners use plastic sheeting, which blocks weeds but stops water and air flow, leading to poor drainage, root rot, and dead soil microbes. Plastic also breaks down under UV light and creates more problems than it solves.
Instead, use heavy-duty woven landscape fabric. It’s designed to last 5–10 years, resists tearing, and allows full permeability. This type withstands foot traffic, mulch weight, and weather exposure—making it ideal for permanent installations.
Compare Fabric Types Before You Buy
| Type | Weed Control | Water Flow | Lifespan | Recommendation |
|---|---|---|---|---|
| Woven (Heavy-Duty) | Excellent | High | 5–10 years | ✅ Best Choice |
| Non-Woven (Thin) | Poor | Low | 1–2 years | ❌ Avoid |
| Plastic Sheeting | Blocks weeds | None | 1–3 years | ❌ Avoid |
Always choose UV-resistant woven fabric. The higher upfront cost pays off in durability and reduced maintenance.
Gather the Right Tools and Materials
Essential Tools for Smooth Installation
- Sharp utility knife or heavy-duty scissors: For precise, clean cuts
- Mallet or hammer: To drive staples into the ground without bending them
- Rake or hoe: To clear debris and level the soil surface
Required Materials for a Secure Fit
- Woven landscape fabric: Enough to cover your area with 6–12 inches extra on all sides
- 6-inch galvanized landscape staples: Rust-resistant and strong enough to hold in soft or loose soil
- Optional: Galvanized spikes with washers for rocky or compacted ground
Covering Options to Boost Performance
After laying the fabric, top it with:
– Mulch (wood chips, bark)
– Gravel, brick chips, or decorative stones
These materials add weight, improve appearance, and provide an extra layer of weed suppression.
Clear and Prepare the Soil Thoroughly
Eliminate All Existing Weeds First
Never lay fabric over live plants. Any surviving roots will grow through the barrier, making your effort useless.
Option 1: Use Herbicide (Fast Method)
– Apply a non-selective herbicide like glyphosate
– Wait 7–14 days until all vegetation is dead
– Do not till—this brings new weed seeds to the surface
Option 2: Remove Weeds Manually (Organic Method)
– Dig out all grass and weeds with a shovel or hoe
– Remove roots completely
– Be meticulous—missed roots mean future weeds
Level the Ground for Full Contact
- Rake the soil flat
- Remove rocks, sticks, and debris that could lift or puncture the fabric
- Create a smooth, even base so the fabric lies flush with the ground
Unroll and Cut the Fabric Correctly
Start at One Edge and Work Across
- Begin unrolling at one end of your bed
- Leave 6–12 inches of extra fabric beyond the edge for folding and securing
- Anchor the roll with a stake or have someone hold it to prevent uncontrolled rolling
Cut Only When Necessary
- Use a sharp utility knife for clean, straight cuts
- Cut sparingly—premature cutting leads to misalignment
- Slight fraying at cut edges is normal and manageable
Overlap Rows by at Least 6 Inches
- When covering wide areas, overlap seams by 6 inches minimum
- Never leave gaps—even tiny openings let weeds through
- Staple through both layers at overlaps to lock them in place
Secure the Fabric to Prevent Shifting

Fold Edges to Stop Fraying
Woven fabric can unravel over time. Prevent this by:
– Folding the first 2–3 inches of the starting edge under itself
– Doing the same at the far end before stapling
– This doubles thickness and strengthens the staple point
Staple Every 3–4 Feet for Stability
- Drive staples every 3–4 feet along edges and seams
- In soft soil, space them 12–18 inches apart for better hold
- Push staples flush with the ground to avoid snags
Use 6-Inch Staples or Spikes in Tough Conditions
- 4-inch staples often pull loose in soft soil
- 6-inch galvanized staples provide deep anchoring
- In hard or rocky ground, use galvanized spikes with washers for maximum grip
Keep the Fabric Taut During Installation
- Stretch the fabric tightly as you go
- Avoid wrinkles—these trap debris and allow weeds to root on top
- If the fabric sags, remove a staple and re-tighten
Handle Overlaps and Seams Like a Pro
Overlap Is Mandatory—No Exceptions
Even a small gap becomes a weed highway. A 6-inch overlap:
– Ensures complete soil coverage
– Prevents weeds from sneaking between layers
– Eliminates weak spots in your barrier
Staple Through Both Layers at Seams
- At every overlap, staple through both pieces
- This prevents shifting from wind or foot traffic
- Skipping this step risks separation and weed invasion
Install Plants Through the Fabric Safely
Mark Plant Spots Before Cutting
- Arrange your plants first
- Use stakes or chalk to mark each location
Cut X-Shaped Openings for Each Plant
- Use a utility knife to cut a small X at each marked spot
- Peel back the flaps to expose the soil
- Plant directly into the opening
- Fold the fabric back around the base to block weeds
Leave Fabric Intact in Mulch-Only Areas
For pathways or non-planted zones, keep the fabric whole. Cover with gravel or mulch to hold it down and improve appearance.
Apply Mulch or Gravel for Protection
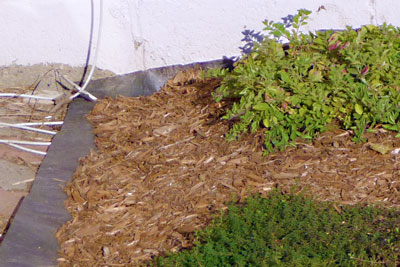
Cover Entire Surface for Best Results
- Spread 2–3 inches of mulch, gravel, or stone over the fabric
- This hides the fabric, improves looks, and adds weight
- Weight prevents wind lift and keeps fabric flat
Refresh Cover Material Annually
- Organic mulch decomposes over time
- Top it off each year to maintain thickness
- Avoid piling mulch against plant stems—it can cause rot
Final Inspection: Don’t Skip This Step
Before finishing, check:
– ✅ All edges are folded under and secured
– ✅ No gaps or exposed soil anywhere
– ✅ All overlaps are 6+ inches and stapled
– ✅ Fabric is taut with no wrinkles
– ✅ Staples are flush and tight
– ✅ Plant holes are cut and tucked properly
Walk the entire area. Fix loose sections now—small issues become big problems later.
Avoid These Common Garden Fabric Mistakes
Installing Over Live Weeds
Laying fabric on living plants is a waste. They’ll grow through within weeks.
Using Flimsy Staples
Cheap staples bend or pull out. Invest in rust-resistant, heavy-duty staples that last.
Ignoring Edge Folding
Unfolded edges fray and weaken. Always fold under 2–3 inches before stapling.
Leaving Wrinkles or Slack
Loose fabric collects dirt and allows weeds to grow on top. Pull it tight and smooth.
Choosing Thin or Plastic Fabric
Big-box store rolls fail fast. Use professional-grade woven fabric for real results.
Maintain Your Garden Fabric for Years
Inspect Annually
- Check edges for exposure or lifting
- Look for tears, holes, or worn spots
- Re-staple loose sections immediately
Repair Damage Quickly
- Patch small tears with fabric tape or overlapping pieces
- Replace large damaged sections to stop weed spread
Replenish Cover Material
- Add mulch or gravel as needed
- This protects fabric from UV damage and foot traffic
Best Uses for Garden Fabric
Flower and Ornamental Beds
- Keeps beds clean and weed-free
- Reduces watering needs by minimizing evaporation
- Prevents soil erosion during rain
Vegetable Gardens
- Cuts weeding time dramatically
- Helps warm soil (especially dark fabric)
- Use only with planting holes—never cover growing plants
Pathways and Walkways
- Stops weeds from growing through gravel
- Maintains a stable, level surface
- Reduces re-graveling and maintenance
Around Trees and Shrubs
- Install in rings (keep 2–3 inches from bark)
- Prevents mower damage and weed competition
- Cover with mulch for a polished look
Troubleshoot Common Problems Fast
Weeds Growing Through the Fabric
Causes:
– Weeds not killed before installation
– Gaps or insufficient overlap
– Tears or holes in fabric
Fix:
– Remove weeds and repair fabric
– Ensure all overlaps are 6+ inches
Fabric Bunching or Lifting
Causes:
– Inadequate stapling
– Wrong staple size
– Wind or foot traffic
Fix:
– Re-tighten and add more staples
– Use 6-inch staples or spikes in problem areas
Edges Unraveling
Cause:
– Unfolded cut edges
Fix:
– Fold under and re-staple
– Trim frayed ends and tuck under if possible
How to Make Garden Fabric Last 5–10 Years
Quality garden fabric lasts 5–10 years when:
– Made of heavy-duty woven material
– Installed with proper tension and 6-inch overlaps
– Secured with rust-resistant staples
– Covered with mulch or gravel
– Protected from heavy foot traffic
UV exposure is the main threat. Covering the fabric significantly extends its life.
Key Takeaways for Using Garden Fabric the Right Way
Fold edges. Pull tight. Staple securely. Overlap 6 inches.
These four steps are the foundation of a successful installation. Garden fabric isn’t a quick fix—it’s a smart prep step that saves you hours of weeding and keeps your garden looking great. Use heavy-duty woven fabric, kill weeds first, overlap generously, and anchor every inch. Done right, your garden will stay weed-free for years with minimal upkeep.
Skip the shortcuts. Invest in quality materials and proper technique. Your future self—enjoying a pristine garden instead of pulling weeds—will thank you.
Frequently Asked Questions About Garden Fabric
Can I reuse old garden fabric?
No. Old or damaged fabric loses strength and develops holes. Replacing it ensures full weed protection and prevents future problems.
Should I put landscape fabric under gravel?
Yes. Garden fabric under gravel stops weeds, prevents stones from sinking into soil, and maintains a stable surface. Use heavy-duty woven fabric and secure it well.
Does landscape fabric harm plants or soil?
Only if you use plastic. Quality woven fabric allows water and air to pass, so roots stay healthy. It also protects soil from erosion and compaction.
How do I remove landscape fabric?
Cut it into strips with a utility knife and roll it up. Remove staples or spikes first. If mulch has mixed in, sift or rake debris from the fabric.
Can I plant directly in landscape fabric?
No. You must cut X-shaped openings to plant through the fabric. Never cover plant stems with fabric—it restricts growth and can cause rot.
Is landscape fabric safe for vegetable gardens?
Yes, if used correctly. Install with planting holes only and avoid covering edible crops. Use organic mulch on top and never use plastic.



