
Nothing ruins a satisfying gardening session faster than a clogged trowel or a rusty pruner. Over time, soil, sap, and moisture build up on garden tools, dulling blades, weakening metal, and spreading disease. Learning how to clean garden tools properly isn’t just about appearance—it’s essential for plant health, tool longevity, and your own efficiency. A few minutes of maintenance can save hours of struggle later and prevent the silent spread of fungal or bacterial infections through your garden.
This guide walks you through a complete, step-by-step process to clean, disinfect, sharpen, and protect every type of garden tool—from hand pruners to shovels. Whether you’re doing routine upkeep or reviving neglected equipment, these proven techniques will keep your tools sharp, rust-free, and ready for action. Follow these methods annually (especially in late fall) or after each use for best results, and transform your garden tools from grimy to gleaming.
Remove Soil and Debris Before Deep Cleaning
Dirt buildup dulls blades and hides rust, so the first step in how to clean garden tools is removing all visible grime. Skipping this stage reduces the effectiveness of every step that follows.
Blast Off Loose Dirt With a Hose
Use a garden hose with a full-spray nozzle to rinse off loose soil. Focus on crevices, joints, and under blades where dirt accumulates. For stubborn clumps, scrub with a stiff brush or use a putty knife to gently scrape away packed-in mud.
Soak Tools to Loosen Dried-On Grime
Fill a bucket with hot water and add ½ teaspoon of dish soap per gallon. Soak tools for 15–20 minutes to loosen dried soil. This is especially helpful for trowels, hoes, and step edgers. After soaking, rinse with cool water and dry immediately—wet metal invites rust.
Pro Tip: Never leave tools soaking overnight. Prolonged moisture exposure accelerates corrosion.
Remove Sap, Resin, and Sticky Buildup
Sap from trees, resin from evergreens, or insect secretions can gum up blades and handles, making tools sluggish and hard to clean.
Wipe With Turpentine or Lighter Fluid
Dampen a cloth with turpentine or lighter fluid and wipe down affected areas. These solvents break down sticky residues quickly. For lighter buildup, commercial residue removers (available at hardware stores) work well.
What to Watch For: Residue often hides along blade edges and pivot points. Check thoroughly after pruning pine, citrus, or other sap-heavy plants.
Alternative: For eco-conscious gardeners, citrus-based degreasers offer a safer, biodegradable option.
Eliminate Rust From Metal Surfaces
Rust weakens tools and reduces cutting efficiency. Catch it early to avoid permanent damage.
Use Oil and Steel Wool to Remove Rust
Coat rusted areas with vegetable oil and let it sit for 10–15 minutes. The oil penetrates the rust, making it easier to remove. Then, scrub with steel wool or a wire brush until the metal is smooth and clean. Wipe off residue and dry completely.
Handle Severe Rust With Disassembly
For heavily rusted loppers or pruners, disassemble the tool if possible. Clean inside joints and pivot points where rust hides. Repeat the oil-scrub process as needed. Finish by polishing the metal with an SOS pad for a smooth surface.
Warning: Avoid sandblasting or aggressive grinding unless restoring antique tools—these can damage factory edges.
Sharpen Cutting Edges for Cleaner Cuts
Sharp tools make cleaner cuts, reduce plant stress, and require less effort. Use the right file for your tool type.
Sharpen Flat Blades With a Mill File
Trowels, hoes, and edgers have flat blades best sharpened with a 6-inch mill file. Hold the file at a 45° angle to the beveled edge and make quick, even strokes away from the blade. Repeat until the edge feels sharp.
Visual Cue: Look for a consistent, polished edge. Avoid rounding the blade tip.
Sharpen Small Blades With a Carbide File
Hand pruners, snips, and loppers need precision. Use a carbide file, which cuts efficiently with less pressure. Match the file angle to the original bevel. Stroke in one direction only—don’t saw back and forth.
After sharpening, flip the blade and check for a burr (a thin raised edge). If present, lightly file the opposite side to remove it.
Pro Tip: Test sharpness by slicing paper. A clean cut means you’re done.
Disinfect Tools to Prevent Disease Spread

This step is non-negotiable when pruning diseased plants. Pathogens like fire blight, verticillium wilt, and fungal spores cling to metal and spread with every cut.
Soak Tools in a Bleach Solution
Mix 1 part chlorine bleach with 9 parts water (or 2 cups bleach per gallon). Soak tools for 10 minutes, then rinse and dry thoroughly. Bleach kills most pathogens but is corrosive—always rinse after use.
Sanitize Between Cuts on Diseased Plants
When working on infected plants, spray tools with Lysol or wipe with disinfectant wipes between cuts. Keep a spray bottle and rag in your gardening kit for fast sanitizing.
Best Practice: Use separate tools for diseased plants and let them dry before cleaning and storing.
Oil and Protect Every Tool Component
Cleaning exposes bare metal and wood—prime targets for moisture and decay. Sealing and lubricating is the final, crucial step.
Coat Metal Blades With Vegetable Oil
Apply a light layer of vegetable oil to blades using a rag. This creates a moisture barrier and prevents rust. Reapply after each cleaning, especially if tools are used in wet soil.
Seal Wooden Handles With Linseed Oil
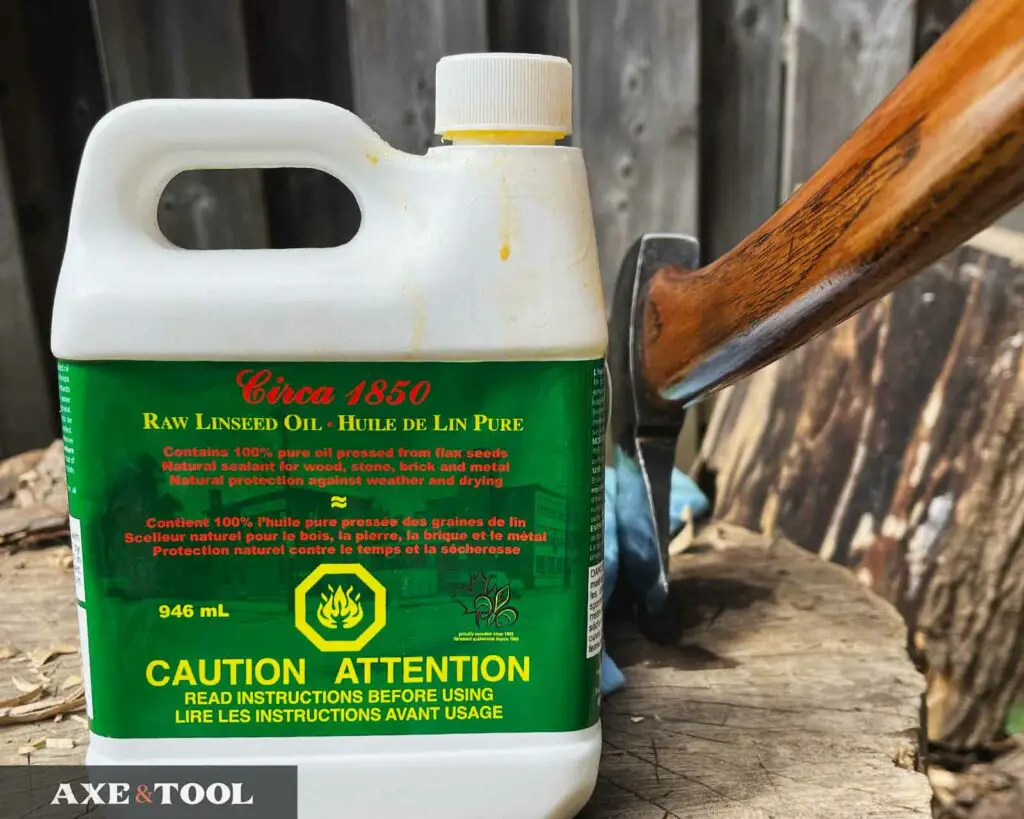
Wipe wooden handles with linseed oil. It soaks in, hardens over time, and prevents cracking or splintering. Apply every few months or during annual maintenance.
Note: Linseed oil dries slowly—let it sit overnight before use.
Lubricate Moving Parts With Three-in-One Oil
Drip a small amount of three-in-one oil into the pivot of pruners and loppers. Open and close the tool 10–15 times to work in the oil. Wipe off excess to avoid attracting dust.
Avoid WD-40 as a lubricant: It displaces water but doesn’t provide lasting protection—use it only for freeing stuck parts.
Store Garden Tools to Prevent Damage

Improper storage causes warping, rust, and dulling. Smart storage keeps tools in top shape year-round.
Use an Oil-Sand Mix for Hand Tools
Fill a bucket with sand and mix in 1 cup of vegetable oil. Insert trowels, pruners, and other small tools into the mix. The oil coats the metal, preventing rust while keeping tools accessible.
Hang Shovels, Hoes, and Rakes Off the Ground
Mount larger tools on wall hooks or a pegboard. This keeps handles straight, prevents moisture pooling, and saves floor space.
Storage Rule: Always keep tools in a dry, ventilated shed or garage. Avoid damp basements or outdoor piles.
Follow a Seasonal Maintenance Schedule
Regular care beats emergency fixes. A simple schedule keeps tools ready and extends their life.
After Every Use
• Knock off loose soil
• Wipe blades with a dry cloth
• Disinfect if used on diseased plants
Weekly (During Growing Season)
• Inspect for rust
• Test blade sharpness
• Check pivot joints for smooth operation
Annually (Late Fall)
• Deep clean all tools
• Remove rust
• Sharpen every cutting edge
• Oil wooden handles
• Lubricate joints
• Prepare for storage
Why Fall? End-of-season maintenance ensures tools are ready for spring and avoids winter corrosion.
Avoid These Common Garden Tool Cleaning Mistakes
Even well-meaning gardeners make errors that shorten tool life.
Leaving Tools Wet After Cleaning
Moisture is the top cause of rust. Always dry tools completely after washing—use a towel, not air drying.
Skipping Disinfection After Pruning Diseased Plants
Failing to sanitize after pruning diseased plants spreads infection. Always disinfect—no exceptions.
Using the Wrong Sharpening Angle
Too steep or too shallow an angle ruins the cutting edge. Match the file to the tool’s original bevel.
Storing Tools in Damp Areas
Basements, unheated sheds, or leaning tools against walls trap moisture. Use elevated, dry storage.
Restore Severely Neglected Garden Tools
Reviving rusted or gummed-up tools takes time, but most can be saved.
Disassemble and Deep Clean
Take apart pruners and loppers. Soak metal parts in oil, scrub joints, and replace worn screws or springs if needed.
Repeat Cleaning Cycles for Heavy Buildup
Heavy sap or rust may require repeating the oil-scrub process 2–3 times. Be patient—results improve with each round.
When to Replace: If blades are cracked, bent, or too thin from over-sharpening, consider replacement.
Tool-Specific Care Guide for Common Garden Tools
Different tools need tailored approaches. Use this quick reference:
| Tool | Key Maintenance Steps |
|---|---|
| Hand Trowel | Soak in soapy water, scrub, sharpen with mill file, oil blade |
| Step Edger | Remove soil with putty knife, sharpen flat edge, oil wooden handle |
| Hand Pruners | Disinfect after use, sharpen with carbide file, lubricate pivot |
| Loppers | Disassemble for deep clean, sharpen blades, oil joints |
| Shovel | Rinse after use, dry thoroughly, hang for storage |
| Hoe | Scrape off mud, sharpen edge, store off the ground |
Frequently Asked Questions About Cleaning Garden Tools
How often should I clean my garden tools?
Clean tools after every use by wiping off soil. Perform a full cleaning, sharpening, and oiling at least once a year—preferably in late fall. During heavy use, inspect weekly for rust and sharpness.
Can I use household cleaners to clean garden tools?
Yes. Scrubbing Bubbles, dish soap, and Lysol wipes are effective for removing grime and disinfecting. For sap, turpentine or citrus-based degreasers work best. Avoid abrasive cleaners that scratch metal.
What’s the best way to prevent rust on garden tools?
Dry tools immediately after cleaning, apply a light coat of vegetable oil to metal parts, and store in a dry place. Use an oil-sand mix for hand tools or hang larger tools off the ground.
Should I disinfect tools after every use?
Only if you’ve pruned diseased plants. In that case, disinfect between cuts and after use. For healthy plants, wiping blades clean is sufficient.
Can I sharpen garden tools with a grinder?
You can, but it’s risky. Grinders remove metal quickly and can overheat blades or ruin the bevel. For most home gardeners, a mill file or carbide file is safer and more precise.
Do wooden handles need special care?
Yes. Wipe them with linseed oil every few months to prevent drying, cracking, and splintering. Sand lightly if rough spots appear, then reapply oil.
Key Takeaways for Cleaning Garden Tools
• Always remove soil and debris first—this prepares tools for effective cleaning
• Disinfect after pruning diseased plants to protect your garden’s health
• Sharpen cutting tools annually for cleaner cuts and less effort
• Oil metal blades and wooden handles to prevent rust and cracking
• Store tools in a dry, elevated space to avoid moisture damage
Start a simple routine today: wipe, sharpen, oil, and hang. These small steps ensure your garden tools stay sharp, safe, and ready for seasons of productive gardening.



