
As frost begins to coat your garden each morning and the last harvest is tucked away, it’s time to take action. Knowing how to winterize garden beds properly protects your soil from erosion, prevents weed invasion, and builds fertility while you wait out the cold months. Without this crucial care, nutrients can wash away, pests can settle in, and spring prep becomes twice as hard. But with a few smart steps—removing diseased plants, enriching the soil, and applying the right mulch—you can turn winter into a season of quiet improvement. In this guide, you’ll learn exactly how to winterize garden beds to ensure healthier soil, fewer weeds, and faster planting when spring returns.
You’ll discover which materials to use (and avoid), how to protect soil structure, and why this fall chore is one of the best investments you can make for next year’s garden. Whether you grow vegetables, herbs, or flowers in raised beds, these proven strategies will keep your garden strong—even during dormancy.
Remove Diseased Plants to Stop Pests and Disease
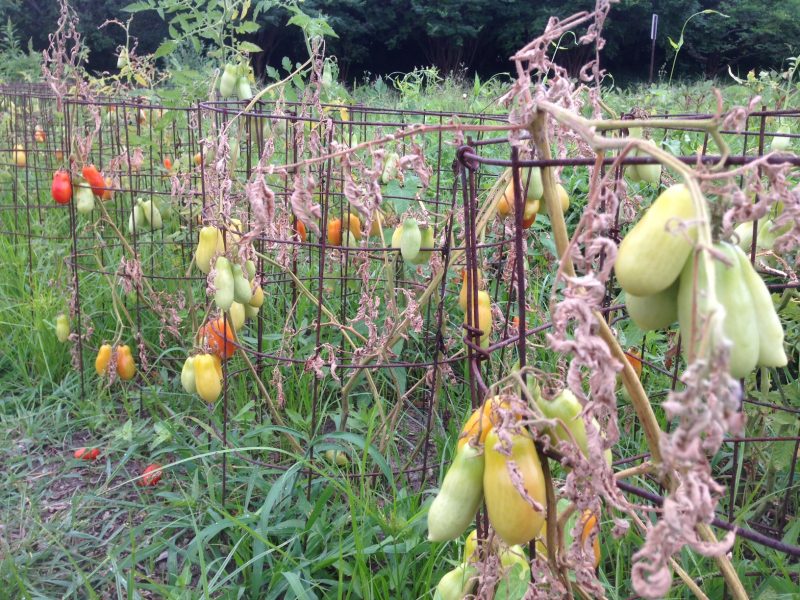
Start your winterization process by clearing all dead and dying plant material from your beds. This step is essential to prevent fungi, bacteria, and insects from surviving the winter in old stems and leaves. If you spot signs of disease—such as powdery mildew, leaf spots, or chewed foliage—dispose of those plants in the trash. Do not compost them, as most backyard compost piles don’t get hot enough to kill harmful pathogens.
Compost Only Healthy Plant Debris
Plants that were healthy at the end of the season—like clean tomato vines or spent bean stalks—can go into your compost pile. Shake off excess soil from the roots before adding them. This keeps your garden beds tidy and safely recycles organic matter back into your system.
Avoid Walking on Wet Soil
When pulling out plants, resist the urge to step directly on the bed, especially if the soil is damp. Compacted soil loses its structure, making it harder for roots and water to move through in spring. Use a tarp to drag out heavy debris instead of trampling the soil.
Take Off Old Wood Chip Mulch Before Amending
Before adding nutrients, remove any existing wood chip mulch from your beds. Leaving it in place creates a barrier that blocks compost from making direct contact with the soil. Set the wood chips aside—they’re perfect for pathways, around trees, or in perennial beds where you won’t be planting next season.
Why You Shouldn’t Bury Wood Chips
Wood chips break down slowly and can temporarily lock up nitrogen in the soil if mixed in. By removing them first, you allow fresh compost to integrate fully and feed your soil microbes over winter.
Add a 2–3 Inch Layer of Compost
Once the bed is clean and mulch-free, top-dress with 2–3 inches of finished compost. This is the single most effective way to replenish nutrients used up during the growing season. As rain and snowmelt move through the compost, they carry organic matter deep into the soil, feeding earthworms and beneficial microbes.
Use Only Fully Aged Compost
Choose compost that’s dark, crumbly, and smells like fresh earth. Avoid material with visible food scraps or a sour odor—it’s not fully broken down and could attract rodents or delay decomposition.
Skip Tilling to Protect Soil Life
Top-dressing means you don’t have to till, which disrupts fungal networks and soil structure. Let nature do the work: earthworms and microbes will gradually pull the compost down, improving soil health without disturbance.
Cover with a Protective Mulch Layer

After composting, apply a thick layer of mulch to shield the soil from winter’s extremes. This blanket does more than just cover bare ground—it stabilizes temperature, reduces erosion, and blocks weeds before they start.
Prevent Freeze-Thaw Cycles
Repeated freezing and thawing can push plants out of the soil (a process called frost heaving), damage roots, and break down soil aggregates. A mulch layer keeps soil temperature more consistent, protecting both plants and structure.
Stop Weeds Before They Take Hold
Mulch acts as a physical barrier, preventing wind-blown weed seeds from landing in your beds. It also suppresses overwintering weeds like chickweed and henbit that can take over in early spring.
Choose the Right Mulch for Your Garden

Not all mulches work the same for winterizing garden beds. Pick one based on your spring planting plans, availability, and ease of removal.
Shredded Leaves: Best for Most Vegetable Gardens
Shredded or whole leaves are free, effective, and improve soil as they break down. In spring, simply rake them aside to warm the soil and plant directly. They’re lightweight and won’t compact over winter.
Pro Tip: Shred Leaves with a Lawn Mower
Run a mower over fallen leaves to chop them into small pieces. Shredded leaves stay in place better and decompose faster than whole ones, giving you richer soil by spring.
Wood Chips: Ideal for Perennial or No-Till Beds
If you’re not replanting the bed next year—or it’s a permanent no-dig garden—wood chips are a great choice. They last longer and build soil structure over time, but they’re harder to remove for spring planting.
Cardboard or Old Rugs: Emergency Weed Barriers
If you’re short on mulch, lay down flattened cardboard or an old outdoor rug over the compost layer. These block light and stop weeds effectively. Remove them in spring before planting to avoid smothering seedlings.
Make Spring Planting Easier with Smart Mulching
Think ahead: the faster you can access your soil in spring, the sooner you can plant. That’s why lightweight, easy-to-remove mulches like shredded leaves often outperform heavier options.
Leaves vs. Straw: Which Is Better?
Straw is sometimes used, but it often contains weed seeds. Leaves—especially from your own yard—are usually cleaner. If you use straw, look for bales labeled “weed-free” to avoid introducing new weeds.
Mark Your Spring Planting Zones Now
Use stakes, labels, or garden markers to outline where you’ll plant next season. This helps you avoid disturbing those areas when applying mulch and speeds up spring prep.
Inspect and Maintain Bed Structure

Before winter hits, check your raised beds for damage. Repair cracked sides or loose corners to prevent collapse under snow or ice. This ensures your beds last for years and hold soil securely.
Prevent Soil Compaction and Settling
If your soil level has dropped, gently fluff the surface after adding compost. Don’t pack it down—loose soil allows better water infiltration and root growth when planting begins.
Ensure Proper Drainage
Standing water leads to soggy soil, which can cause root rot and compaction. If your bed holds water, consider adding a slight slope or mixing in coarse material like perlite or compost to improve drainage.
Plan Your Spring Garden Now
Winterizing isn’t just about protection—it’s also about preparation. Use this quiet time to get ahead on next year’s growing season.
Rotate Crops to Prevent Disease
Avoid planting the same crop family in the same spot year after year. Move tomatoes, peppers, and potatoes to different beds to reduce pest buildup and balance nutrient use.
Stock Up on Supplies Early
Order seeds, compost, and tools now. Off-season sales make bulk compost or manure more affordable. Having everything ready means you can start planting the moment the soil warms.
Start or Update a Garden Journal
Record what worked this year—what crops thrived, what pests appeared, and when you planted. This helps you improve your winterizing routine and plan smarter each season.
Frequently Asked Questions About Winterizing Garden Beds
Should I leave plant debris in the garden over winter?
No. Leaving dead or diseased plants in the bed invites pests and diseases to overwinter. Remove all spent plants, especially those with signs of infection, and dispose of them in the trash.
Can I compost healthy plant material from my garden?
Yes. Healthy plant debris—like clean tomato vines or bean stalks—can go into your compost pile. Just shake off excess soil first to keep your compost balanced and free of clumps.
Is it okay to till compost into the soil in fall?
It’s better to avoid tilling. Tilling disrupts soil structure and harms beneficial fungi. Instead, top-dress with compost and let earthworms and rain incorporate it naturally over winter.
What’s the best mulch for winterizing vegetable beds?
Shredded leaves are ideal. They’re free, easy to remove in spring, and improve soil as they decompose. Wood chips work for permanent beds, but they’re harder to clear for planting.
Do I need to water the mulch after applying it?
Only if the weather is unusually dry. A light watering helps settle the mulch and keeps it in place, especially if wind is a concern. In most cases, winter rains will do the job.
Can I plant cover crops instead of using mulch?
Yes. In larger gardens, cover crops like winter rye or clover can protect and enrich soil. But for small raised beds, mulch is simpler and just as effective.
Key Takeaways for How to Winterize Garden Beds
Winterizing your garden beds is a simple but powerful way to protect and improve your soil. By removing diseased plants, adding compost, and applying the right mulch, you set the stage for a healthier, more productive garden next year. Focus on using shredded leaves for easy spring access, avoid compacting the soil, and take time to plan your crop rotation and supplies.
The best gardens aren’t the ones that get the most sun—they’re the ones that get the most care, even in the off-season. When you learn how to winterize garden beds effectively, you’re not just cleaning up. You’re building resilience, saving time, and giving your plants a head start. So grab your compost and mulch, and let winter work for you.



